Performing End-of-day Tasks
This document provides instructions for the tasks that should be done at the end of each day.
1. Reports
Viewing the day sheet
Day sheet
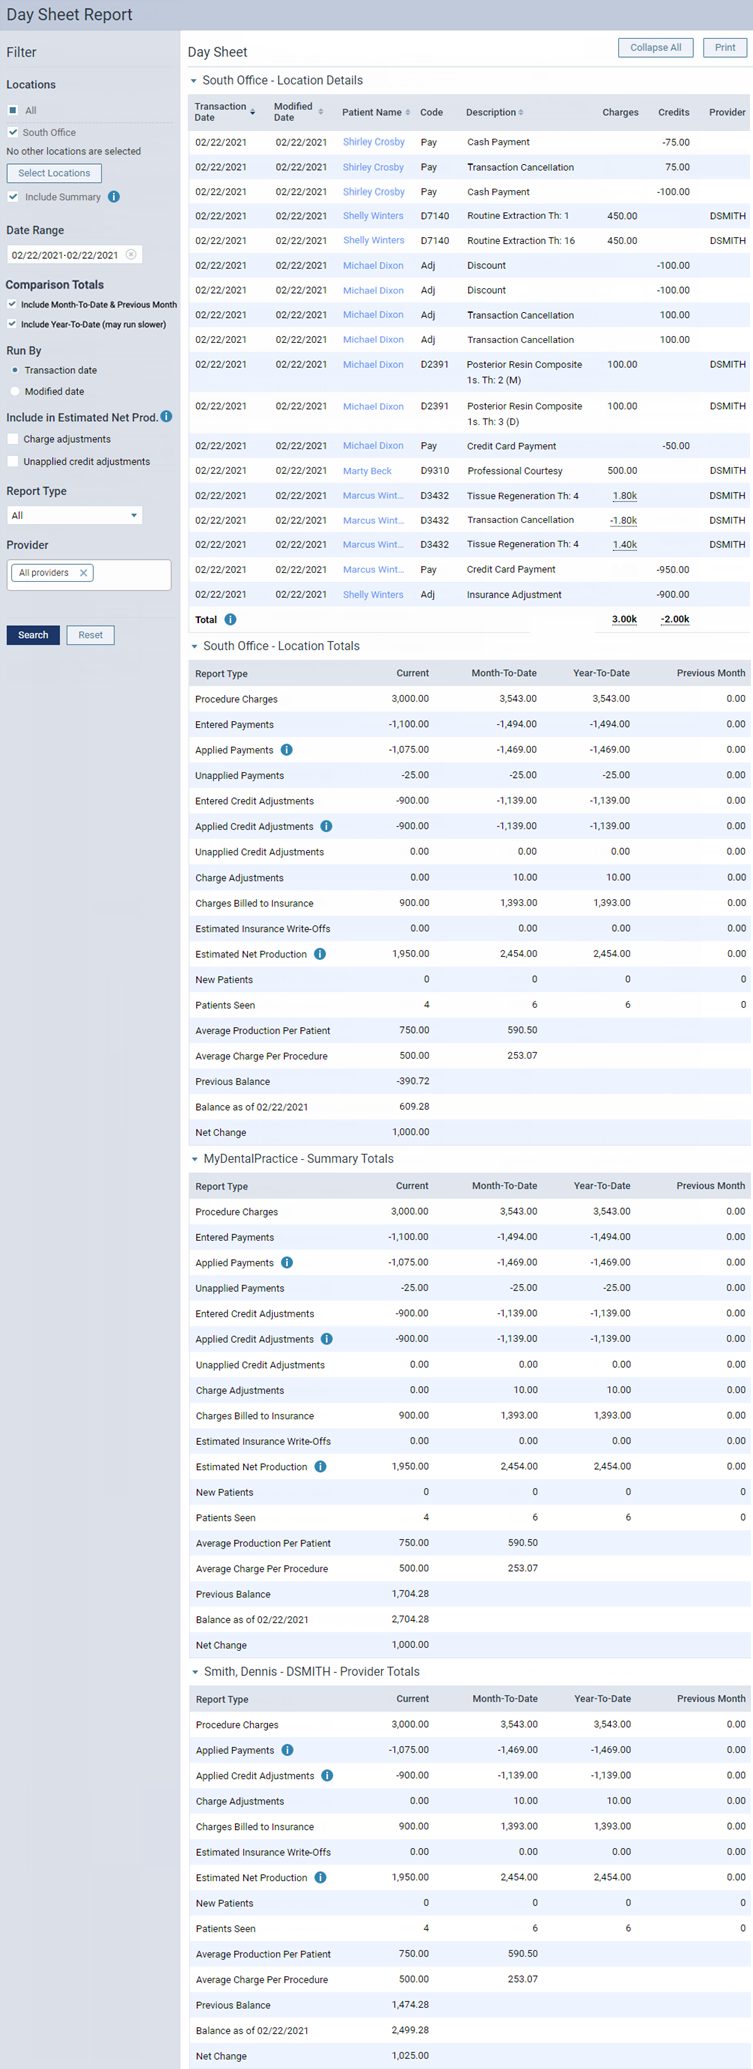
The day sheet displays charges, payments, adjustments, and unearned revenue for your organization, locations, and individual providers for a specified date range.
Important: Only one user per location can generate the day sheet at any given time.
To view the day sheet
-
On the Home menu, under Reports, select Day Sheet.
The Day Sheet Report page opens.

-
Set up the following options:
-
Locations - The transactions and totals for the selected locations. Do one of the following:
-
To include all locations, select the All checkbox.
-
To include only the location that you are currently logged in to, select the checkbox of the current location.
-
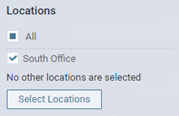
To include specific locations, click (or tap) Select Locations to open the Locations dialog box, select the checkbox of each desired location, and then click (or tap) Save.
Notes:
-
Only the locations that you have access to are available.
-
If multiple (or all) locations are selected, the day sheet includes transaction type totals for each location (the Location Totals sections on the report) but does not include a list of transactions (the Location Details section on the report).
-
If only one location is selected, the day sheet includes a list of transactions for that location (the Location Details section on the report) and transaction type totals for that location (the Location Totals sections on the report).
-
At least one location must be selected unless the Include Summary checkbox is selected. If no locations are selected, but the Include Summary checkbox is selected, the day sheet includes transaction type totals for the organization (the Summary Totals section on the report) but does not include a list of transactions (the Location Details section on the report), location totals (the Location Totals sections on the report), or provider totals (the Provider Totals sections on the report).
-
-
Include Summary - To view the transaction type totals for the organization (the sum of the totals for all locations in the organization; the Summary Totals section on the report), select the checkbox.

-
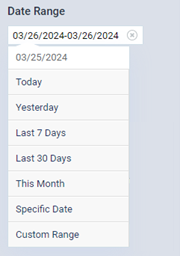
Date Range - The date or date range of transactions to include on the report. Leave the current date selected, or select the desired date (today, yesterday, or a specific date) or date range (last 7 days, last 30 days, this month, or a custom range).
Notes:
-
If one location is selected, the date range cannot exceed one calendar year (366 days). If multiple locations are selected, the date range cannot exceed one calendar month (31 days).
-
A transaction is included on the report if its transaction or modified date (depending on the selected Run by option) is within the specified Date Range for the report. If the transaction was backdated, if the details of the transaction were changed after the transaction date, or if the transaction was deleted, on the report, the transaction's Modified Date (created/modified date) differs from the Transaction Date. Also, if a transaction on the report has revision history, an asterisk (*) appears next that transaction's Modified Date to indicate that there is at least one revision or cancellation.

-
A deleted transaction is included on the report if its transaction date is within the specified Date Range for the report. On the report, a deleted transaction appears as strikethrough text (crossed out).

-
-
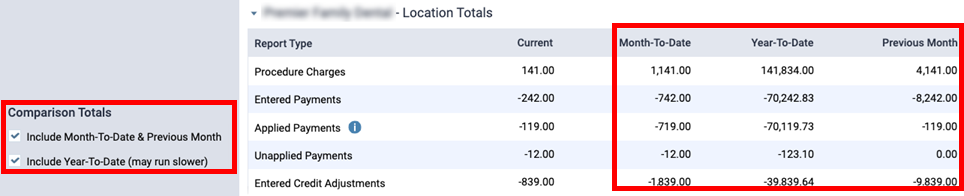
Comparison Totals - Select or clear any of the following checkboxes:
-
Include Month-To-Date & Previous Month - With this checkbox selected, the MTD and previous month's totals are calculated (which may increase the report loading time), and the Month-To-Date and Previous Month columns are displayed. With this checkbox clear, the MTD and previous month’s totals are not calculated, and the Month-To-Date and Previous Month columns are not displayed (in the Location Totals, Summary Totals, and Provider Totals sections on the report).
-
Include Year-To-Date (may run slower) - With this checkbox selected, the YTD totals are calculated (which may increase the report loading time), and the Year-To-Date column is displayed. With this checkbox clear, the YTD totals are not calculated, and the Year-To-Date column is not displayed (in the Location Totals, Summary Totals, and Provider Totals sections on the report).
The report with the options not selected.
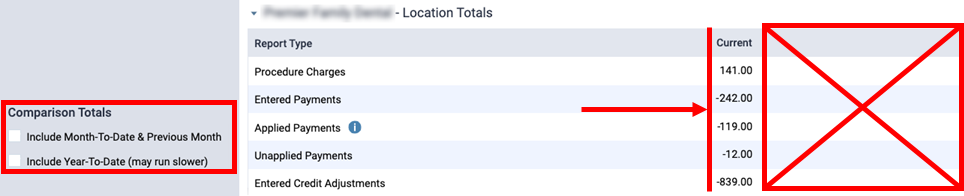
The report with the options selected.
-
-
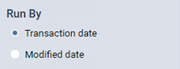
Run By - Select whether you want to generate the day sheet by transaction date or modified date:
-
Transaction date - To include transactions with a transaction date that is within the date range for the report.
-
Modified date - To include transactions with a modified date that is within the date range for the report. Because running the day sheet by modified date considers the revision history of a transaction, an entry on the report might be a revision or cancellation of a transaction instead of the current version. Run the day sheet by modified date to verify that the backdating of or corrections made to transactions have been recorded.
-
-
Include in Estimated Net Prod. - You can include charge adjustments and unapplied credit adjustments in the calculation of the Estimated Net Production amount on the report. Select any of the following checkboxes:
-
Charge adjustments - To include charge adjustments that affect production.
-
Unapplied credit adjustments - To include credits that have not been applied.
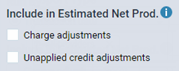
Note: These options are available only if Transaction date is selected under Run By.
-
-
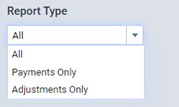
Report Type - The types of transactions to include on the report. Select whether you want to view the full report, only the payments received, or only the adjustments made.
-
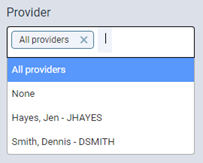
Provider - The transactions and totals for the selected providers. Do one of the following:
-
To include all providers, if All providers is not already selected, do one of the following:
-
If one or more providers are selected, click (or tap) a white space in the box to display a list, and then select All providers.
-
If None is selected, click (or tap) its X to display a list, and then select All providers.
-
-
To include only one provider, do one of the following:
-
If All providers is selected, click (or tap) its X, and then select the desired provider.
-
If multiple providers are selected, click (or tap) each provider's X until the desired provider is the only one selected.
-
If one or more providers are selected, but none of those is the desired provider, click (or tap) a white space in the box to display a list, select None, click (or tap) a white space in the box again to display a list, and then select the desired provider.
-
If None is selected, click (or tap) its X to display a list, and then select the desired provider.
-
-
To include specific providers, do one of the following:
-
If All providers is selected, click (or tap) its X to display a list, and then select a provider; for each additional provider you want to add, click (or tap) a white space in the box to display a list, and then select a provider.
-
If one or more providers are already selected, for each additional provider you want to add, click (or tap) a white space in the box to display a list, and then select a provider.
-
If None is selected, click (or tap) its X to display a list, and then select a provider; for each additional provider you want to add, click (or tap) a white space in the box to display a list, and then select a provider.
-
-
To include no providers, if None is not already selected, do one of the following:
-
If All providers is selected, click (or tap) its X to display a list, and then select None.
-
If one or more providers are selected, click (or tap) a white space in the box to display a list, and then select None.
-
Notes:
-
To remove a selected provider, click (or tap) the corresponding X.
-
If all providers are selected, the day sheet includes transaction type totals for each provider (the Provider Totals sections on the report), a list of transactions that are associated with any of those providers and with the selected location (the Location Details section on the report, which appears if only one location is selected for the report), and transaction type totals for each selected location (the Location Totals sections on the report)
-
If one or more, but not all, providers are selected, the day sheet includes transaction type totals for each provider (the Provider Totals sections on the report) and a list of transactions that are associated with any of those providers and with the selected location (the Location Details section on the report, which appears if only one location is selected for the report) but does not include transaction type totals for each selected location (the Location Totals sections on the report).
-
If no providers are selected, the day sheet does not include transaction type totals for each provider (the Provider Totals sections on the report), the list of transactions is not included or is empty (the Location Details section on the report), and the transaction type totals for the organization are all zeros if those totals are included on the report (the Summary Totals section on the report).
-
-
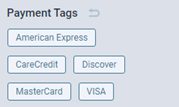
Payment Tags - If the selected Report Type is Payments Only, and you are running the report for only one location, you can filter the report by payment tags. Only the tags that have been attached to patient payments and insurance payments are available.
Do any of the following for any tag that you want to use to filter the report (as you click (or tap) a tag button, the status changes):
-
To include those payments that have a specific tag attached, click (or tap) the corresponding tag button as needed to make a green stripe appear on the left side of the button.

-
To include those payments that do not have a specific tag attached, click (or tap) the corresponding tag button as needed to make a red stripe appear on the left side of the button.

-
To include payments whether or not they have a specific tag attached, click (or tap) the corresponding tag button as needed to make the button not have a colored stripe, or do not click (or tap) the button if it already does not have a stripe.

-
-
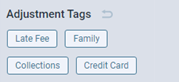
Adjustment Tags - If the selected Report Type is Adjustments Only, and you are running the report for only one location, you can filter the report by adjustment tags. Only the tags that have been attached to adjustments are available.
Do any of the following for any tag that you want to use to filter the report (as you click (or tap) a tag button, the status changes):
-
To include those adjustments that have a specific tag attached, click (or tap) the corresponding tag button as needed to make a green stripe appear on the left side of the button.

-
To include those adjustments that do not have a specific tag attached, click (or tap) the corresponding tag button as needed to make a red stripe appear on the left side of the button.

-
To include adjustments whether or not they have a specific tag attached, click (or tap) the corresponding tag button as needed to make the button not have a colored stripe, or do not click (or tap) the button if it already does not have a stripe.

-
-
-
Click (or tap) Search.
-
On the message that appears, click (or tap) Continue.
Wait for the report to load. This can take from one to five minutes, depending on the date range.
-
To print the report, click (or tap) Print.
Viewing and printing a deposit slip
Deposit slip
You can view and print a deposit slip for a specified date or date range. The deposit slip includes patient payments (cash, checks, credit cards, patient financing, and electronic transfers), bulk insurance payments (checks and electronic transfers), and individual insurance payments (checks and electronic transfers). The deposit slip also displays totals for each type of payment.
To print a deposit slip
-
On the Home menu, under Reports, select Deposit Slip.
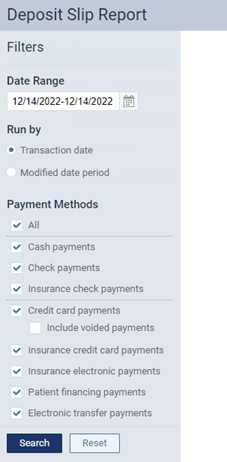
The Deposit Slip Report page opens.
-
Set up the following options:
-
Locations - The transactions and totals for the selected locations. Do one of the following:
-
To include all locations, select the All checkbox.
-
To include only the location that you are currently logged in to, select the checkbox of the current location.
-
To include specific locations, click (or tap) Select Locations to open the Locations dialog box, select the checkbox of each desired location, and then click (or tap) Save.
Notes:
-
Only the locations that you have access to are available.
-
If multiple (or all) locations are selected, the payments and totals are grouped by location.
-
If multiple (or all) locations are selected, the Date Range must be one month or less.
-
-
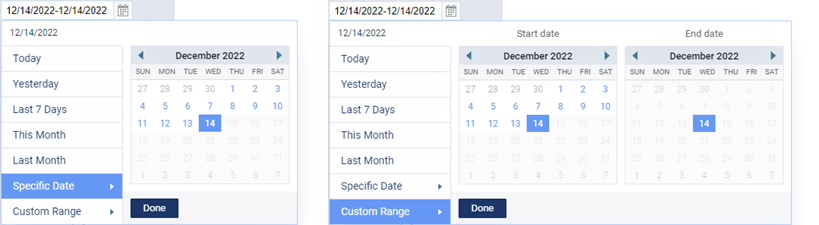
Date Range - The date of the deposit slip is today by default, but you can change the date. To change the date, click (or tap) in the box, and then select a date or date range.
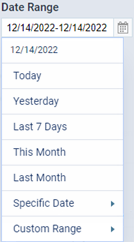
Note: You can create a deposit slip for one of the pre-defined dates or date ranges, for a Specific Date, or for a Custom Range.
-
Run by - Select whether you want to run the deposit slip by Transaction date or the Modified date period.
Note: The transaction date is different from the created/modified date in the following instances:
-
When posting a payment, you backdate it.
-
When editing a payment, you change the Transaction date, Amount, Check #, Reference #, Bank/branch #, Applied amounts, Tags, or Deductibles.
-
-
Payment Methods - The All checkbox is selected by default, so the deposit slip will include all forms of payments except voided payments. If you do not want to include all forms of payment, clear the checkbox of each form of payment that you want to exclude. If Credit card payments is selected, to include voided payments, select the Include voided payments checkbox.
-
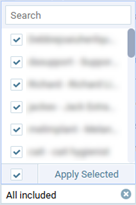
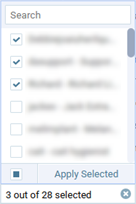
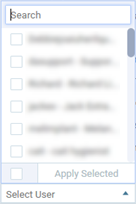
Last Updated By - To filter by users who have entered or modified payments, do one of the following:
-
To include all users, select the checkbox at the bottom of the list, and then click Apply Selected.
-
To include specific users (up to 2000), select the checkbox of each desired user on the list, and the click Apply Selected.
-
To remove the user filter if users are selected, clear the checkbox at the bottom of the list, and then close the list.
Notes:
-
To quickly locate a user in the list, when you expand the list, you can begin typing part of a username or a user’s first or last name in the search box at the top of the list.
-
If you are running the deposit slip by Transaction date:
-
If there are revisions for a given payment, the payment is included if one of the selected users made the most recent revision to that payment on a date that is within the specified Date Range.
-
If there are no revisions for a given payment, the payment is included if one of the selected users entered that payment on a date that is within the specified Date Range.
-
-
If you are running the deposit slip by Modified date period:
-
If there are revisions for a given payment, the payment is included if one of the selected users made a revision to that payment on a date that is within the specified Date Range.
-
If there are no revisions for a given payment, the payment is included if one of the selected users entered that payment on a date that is within the specified Date Range.
-
-
-
-
Click (or tap) Search.
Note: Depending on the date range of the report and the number of records that must be checked, it may take 1-5 minutes for the report to load. Please be patient. If you leave the page before the report loads, you will have to regenerate the report.
The report details appear. The report has two views: Report View and Grid View.
-
Report View - This is the standard view.
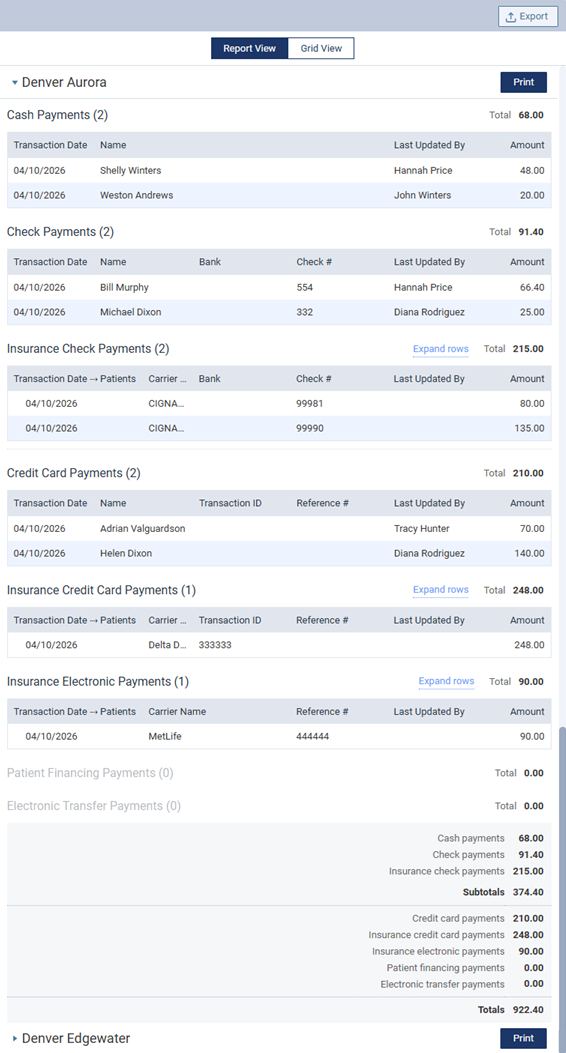
Each location on the deposit slip is a section that you can collapse and expand as needed.
If the Include voided payments checkbox was selected, voided payments appear in the Credit Card Payments section. For each voided payment, "Voided" appears in red text in the Status column (which is an additional column that appears only if the deposit slip includes voided payments).

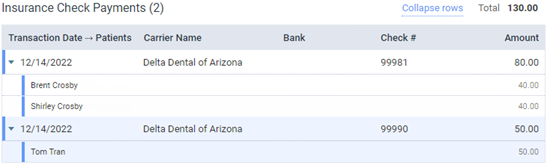
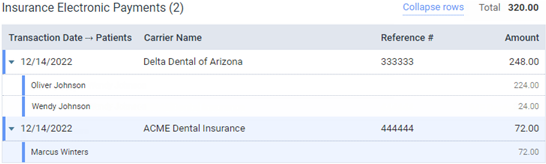
Under Insurance Check Payments, Insurance Credit Card Payments and Insurance Electronic Payments, to view the patient name that is associated with an individual insurance payment or the patient names and the corresponding portions that are associated with a bulk insurance payment, expand that payment's row. To expand or collapse all payment rows in a section, click (or tap) the Expand rows link or the Collapse rows link, respectively.

There is a Print button for each location so you can print the deposit slip for each location separately. To print the deposit slip for a location, click (or tap) the location's Print button. The .pdf file appears on a new browser tab so you can print or download a copy of the deposit slip.
-
Grid View - This view lists each payment by transaction date. You can sort the list by any of the available details (such as location or payment type). A total of all payments in the list appears at the bottom.
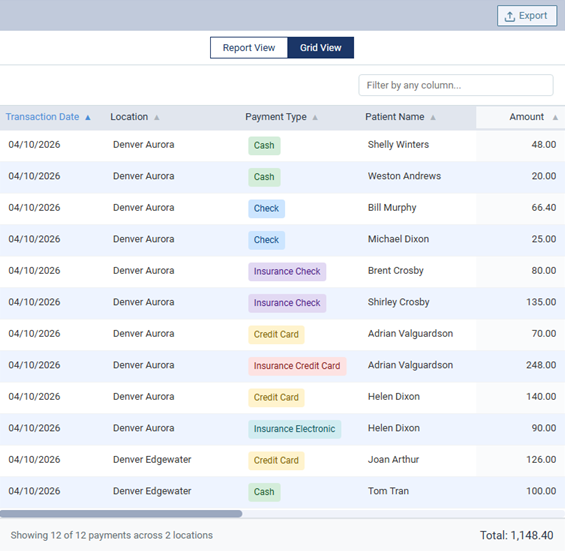
To filter the list to display only the payments that match specific text, in the Filter by any column box, begin typing part of a transaction/modified date, location, payment type, patient name, carrier name, bank, check number, transaction ID, reference number, or user's name. Continue typing as needed to narrow down the list further. To return to viewing the full list, delete the text from the Filter by any column box.
-
-
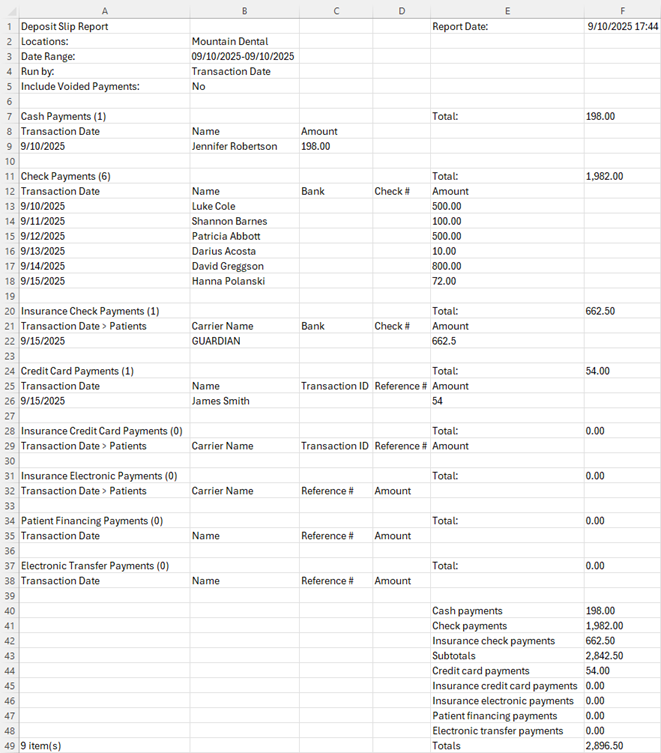
While using either the Report View or the Grid View, to export the report, click (or tap) Export. The report is downloaded as a .csv file. You can open the .csv file in a spreadsheet program.
2. Clinical
Processing unsigned clinical notes
Processing unsigned clinical notes
From the practice dashboard, you can view and sign the clinical notes that have not been signed by you that should have been. A clinical note is considered to be unsigned by you if you are the primary provider and have not signed it. A clinical is also considered to be unsigned by you if the primary provider (someone other than you) has signed it, but you are the additional provider and have not signed it.
To sign clinical notes
-
On the Home menu, under Location, select Overview.
The location's Overview page (dashboard) opens.
-
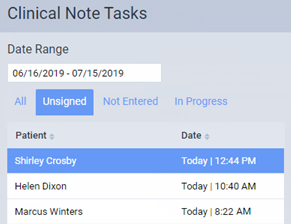
Click (or tap) the Unsigned column of the Clinical Note Tasks box. A clinical note is considered to be unsigned by you if you are the primary provider and have not signed it.
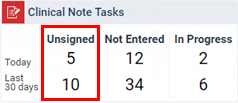
The Clinical Note Tasks page opens with the Unsigned tab selected.
-
By default, the Date Range is set to display patients with unsigned notes for the last 30 days, but you can change the date range to filter the list as needed. Select Today, Yesterday, Last 7 Days, Last 30 Days, Last 180 Days, This Month (since the first day of the current month), or Custom Range (specify the Start Date and End Date, and then click, or tap, Done).
-
Select a patient.
On the right, the corresponding clinical note appears for you to review. For your reference, the procedures and conditions that were posted for the selected patient on the corresponding date appear. Also, the options to sign the clinical note appear.
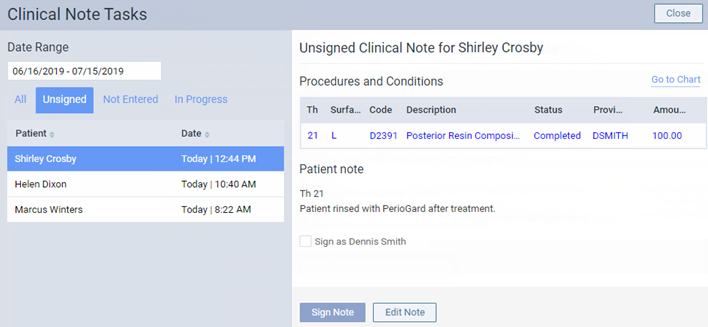
Note: To open the Chart page of the patient's clinical record in a new browser tab, click (or tap) the Go to Chart link in the upper-right corner. On the Chart page, you can review the patient's clinical information and enter or sign clinical notes. Then, you can close the new tab or select the original tab to return to the Clinical Note Tasks page.
-
To edit the note before signing it, click (or tap) Edit Note. In the Clinical Note dialog box, do any of the following as needed: modify the assigned tooth numbers (Th), change the Provider; change the Date; select, or change the Additional Provider; and edit the Note text, and/or insert notes from Templates. You can sign the note before saving the changes (in which case, ignore step 6) or sign it later. Then, click (or tap) Save.

-
To sign the clinical note on the Clinical Note Tasks page, do the following:
-
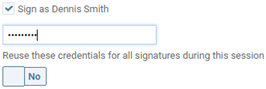
Select the Sign as [provider name] checkbox.
Note: The Sign as [provider name] checkbox is available only if a digital signature for the selected provider has been set up.
-
Enter your password in the Password box that appears.
-
To allow yourself to sign any other clinical notes on the Unsigned tab during this clinical note tasks session without having to enter your password each time, set the Reuse these credentials for all signatures during this session switch to Yes.

Notes:
-
With the switch set to Yes, the automatic signature mode remains active until there is no activity on the Clinical Note Tasks page for five minutes, until you navigate away from the Clinical Note Tasks page to another area of Dentrix Ascend, or until you manually turn it off while viewing an unsigned note on the Clinical Note Tasks page.
-
With the switch set to No, you must enter your password for each clinical note that you sign.
-
-
Click (or tap) Sign Note.
-
-
Repeat steps 3-6 as needed to edit and sign other clinical notes.
Entering clinical notes not entered
Entering clinical notes not entered
From the practice dashboard, you can create clinical notes that were not entered that should have been. A clinical note is considered to have not been entered if a clinical note with you as a provider has not been entered on the service date of a completed procedure with you as the provider and if that procedure has been set up to require a clinical note.
Common reasons why a clinical note is counted as Not Entered:
-
The provider who is assigned to the procedure has not signed the clinical note as the main provider (the first signature).
-
The date of the clinical note does not match the date of the procedure.
-
Procedures are posted after the clinical note is signed. Another clinical note must be created and signed.
To enter clinical notes
-
On the Home menu, under Location, select Overview.
The location's Overview page (dashboard) opens.
-
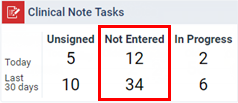
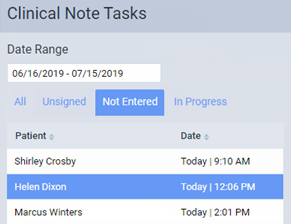
Click (or tap) the Not Entered column of the Clinical Note Tasks box. This column displays how many clinical notes were not entered today and during the previous 30 days that should have been. A clinical note is considered to have not been entered if a clinical note with you as a provider has not been entered on the service date of a completed procedure with you as the provider and if that procedure has been set up to require a clinical note.
The Clinical Note Tasks page opens with the Not Entered tab selected.
-
By default, the Date Range is set to display patients without notes for the last 30 days, but you can change the date range to filter the list as needed. Select Today, Yesterday, Last 7 Days, Last 30 Days, Last 180 Days, This Month (since the first day of the current month), or Custom Range (specify the Start Date and End Date, and then click, or tap, Done).
-
Select a patient.
On the right, the options for entering a corresponding clinical note appear. Under Note Not Entered for [Patient Name], the procedures posted for the selected patient on the corresponding date appear for your reference.
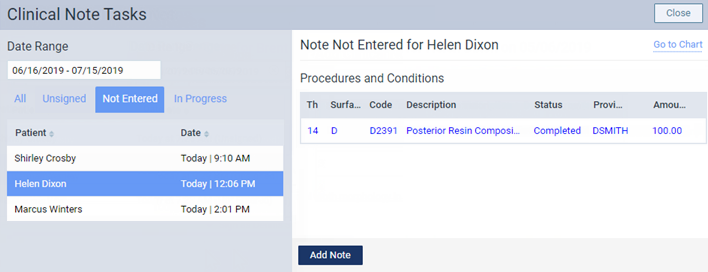
Note: To open the Chart page of the patient's clinical record in a new browser tab, click (or tap) the Go to Chart link in the upper-right corner. On the Chart page, you can review the patient's clinical information and enter or sign clinical notes. Then, you can close the new tab or select the original tab to return to the Clinical Note Tasks page.
-
Click (or tap) Add Note.
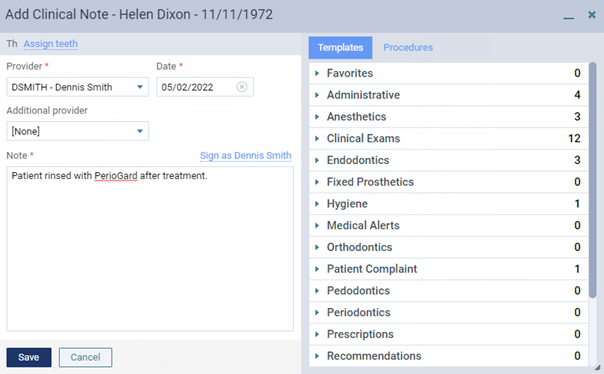
The Add Clinical Note dialog box appears.
-
Set up the following options:
-
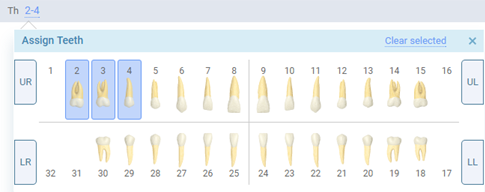
Th - To assign tooth numbers to the note, click (or tap) the Assign teeth link, select the applicable teeth, and then click (or tap) X.
-
Provider - The provider to associate with this note. Only providers who have access to the current location and who are flagged as charting providers are available.
Notes:
-
If the patient has a preferred provider (primary provider), that provider is selected by default for this clinical note. If the patient does not have a preferred provider but does have an appointment scheduled for today, the provider for that appointment is selected by default for this clinical note. If the patient does not have a preferred provider and does not have an appointment scheduled for today, the first provider alphabetically by ID in the list is selected by default for this clinical note.
-
If the patient has a preferred provider, and you select a different provider, the preferred provider is selected automatically in the Additional Provider list.
Recommendation: As the patient's provider of record, the primary provider should enter a clinical note for the work performed even if he or she has already signed a clinical note as the Additional Provider on that day.
-
-
Date - The date of the note. Leave the current date selected, or click (or tap) the box to select a different date.
-
Additional Provider - A secondary provider (such as a hygienist) to associate with this note. To associate an additional provider with the note, select that provider; otherwise, leave [None] selected. Only providers who have access to the current location and who are flagged as charting providers are available.
-
Note - The text of the note. Enter the note text, and/or insert notes from templates.
-
-
If the note is complete, and if you are the selected provider or have permission from the provider, you can sign the note. To sign the note, click (or tap) the Sign as [provider name] link, and then enter the selected provider's or, if you are the provider, your password in the Password box that appears. However, if the note needs to be finished later, or if the provider has to review the note, the note can be signed later.
Note: The Sign as [provider name] link is available only if a digital signature for the selected provider has been set up.
-
Click (or tap) Save.
-
Repeat steps 3-8 as needed to enter and sign other clinical notes.
Resuming clinical notes in progress
Resuming clinical notes in progress
From the practice dashboard, you can view and resume clinical notes that were started but that are still in progress. A clinical note is considered to be in progress if a clinical note with you as the provider was started from a template with quick-picks, and the progress was saved before all the prompts were responded to.
To resume clinical notes
-
On the Home menu, under Location, select Overview.
The location's Overview page (dashboard) opens.
-
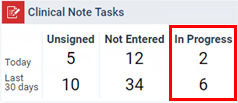
Click (or tap) the In Progress column of the Clinical Note Tasks box. This column displays how many clinical notes were started today and during the previous 30 days that are still in progress. A clinical note is considered to be in progress if a clinical note with you as the provider was started from a template with quick-picks, and the progress was saved before all the prompts were responded to.
The Clinical Note Tasks page opens with the In Progress tab selected.

-
By default, the Date Range is set to display patients with incomplete notes for the last 30 days, but you can change the date range to filter the list as needed. Select Today, Yesterday, Last 7 Days, Last 30 Days, Last 180 Days, This Month (since the first day of the current month), or Custom Range (specify the Start Date and End Date, and then click, or tap, Done).
-
Select a patient.
On the right, the options for resuming the corresponding clinical note appear. Under Note in progress for [Patient Name], the procedures posted for the selected patient on the corresponding date appear for your reference. Also, any existing text that was entered for the note appears for your reference.
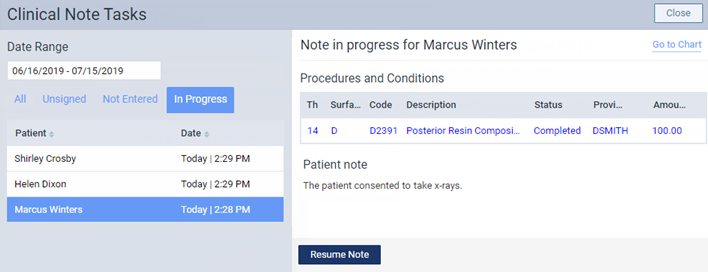
Note: To open the Chart page of the patient's clinical record in a new browser tab, click (or tap) the Go to Chart link in the upper-right corner. On the Chart page, you can review the patient's clinical information and enter or sign clinical notes. Then, you can close the new tab or select the original tab to return to the Clinical Note Tasks page.
-
To resume responding to prompts, starting from the one that was being displayed when the progress was saved, click (or tap) Resume Note.
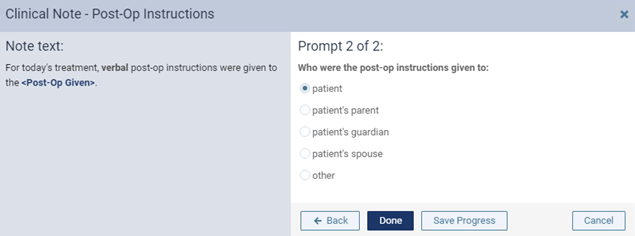
The Clinical Note dialog box appears and displays the applicable prompt.
-
Finish responding to the prompts, and then click (or tap) Done.
-
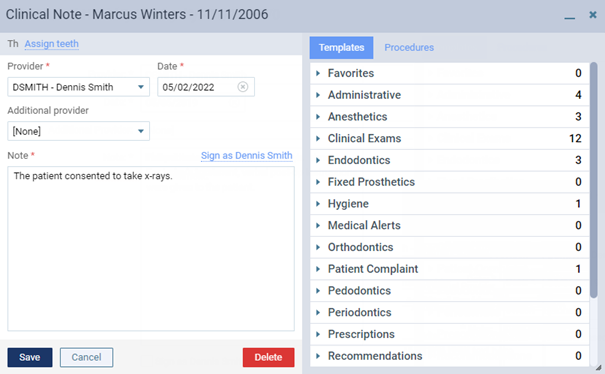
In the Clinical Note dialog box, do any of the following as needed: modify the assigned tooth numbers (Th), change the Provider; change the Date; select, or change the Additional Provider; and edit the Note text, and/or insert additional notes from Templates.
-
If the note is complete, and if you are the selected provider or have permission from the provider, you can sign the note. To sign the note, click (or tap) the Sign as [provider name] link, and then enter the selected provider's or, if you are the provider, your password in the Password box that appears. However, if the note needs to be finished later, or if the provider has to review the note, the note can be signed later.
Note: The Sign as [provider name] link is available only if a digital signature for the selected provider has been set up.
-
Click (or tap) Save.
-
Repeat steps 3-8 as needed to resume and sign other clinical notes.
Note: You can also resume entering a clinical note from the following areas of Dentrix Ascend:
-
The Clinical Notes menu. The note that is in progress is indicated by "[In Progress]."
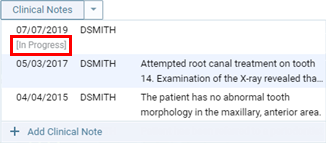
-
The Progress Notes tab. The note that is in progress is indicated by a red dot on the note symbol.

3. Claims
Creating claims
Creating claims
You can quickly create claims for procedures that are not attached to insurance claims. Also, you can edit any unattached procedure before you create a claim for that procedure.
Tip: You can create a claim for a patient's procedures while performing a patient checkout.
Note: Creating claims requires the "Create Insurance Claims" security right.
To create claims
-
If you are not already viewing the correct location, select it on the Location menu.
-
On the Home menu, under Insurance, select Create Claims.
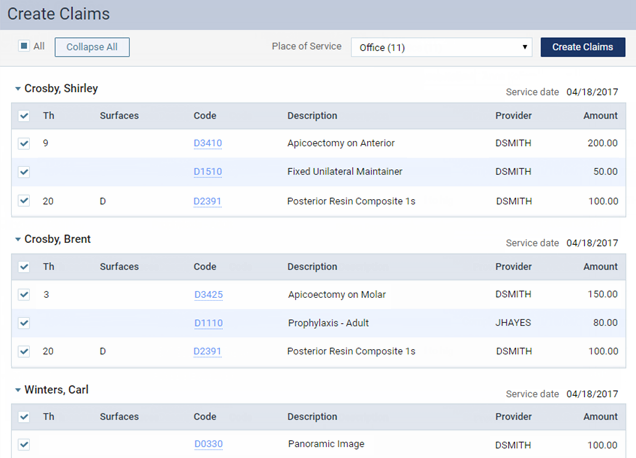
The Create Claims page opens.
-
Do one of the following:
-
To create claims for all procedures for all patients listed, leave the All checkbox at the top of the page selected.
-
To create claims for specific procedures for a specific patient, clear the All checkbox at the top of the page, and then, under the appropriate patient's name, select the checkboxes of the procedures to include or the All checkbox to include all procedures.
Notes:
-
For an unattached procedure to appear on the Create Claims page, the service date of that procedure must fall within the coverage dates of a patient's insurance plan, and that procedure must be marked as billable to insurance.
-
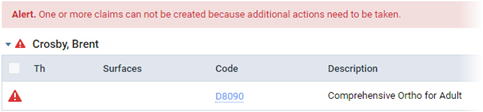
For an orthodontic procedure (D8001-D8999), if the treatment information is missing, a warning message appears at the top of the page, and a warning symbol appears next to the corresponding patient's name and next to the applicable procedure. To include the procedure on a claim, you must first enter the treatment information.
Tips:
-
To edit a procedure before creating a claim for it, click (or tap) the procedure code link, make the necessary changes, and then click (or tap) Save.
-
To hide the procedures and show only the patient names, click (or tap) Collapse All.
-
To hide or show the procedures for a specific patient, click (or tap) the header with that patient's name.
-
-
For the selected procedures, the associated diagnoses appear. You can have up to four ICD-10 codes per claim. If you have more than four, either remove ICD-10 codes from the claim (by clicking, or tapping,
 on the coresponding codes), or split the procedures between separate claims (clear the checkboxes of the procedures that you do not want on this claim, so you can create one or more additional claims for those procedures).
Note: Removing ICD-10 codes from a claim does not affect the corresponding procedures. All diagnoses remain attached to their corresponding procedures as currently posted in the patient's ledger and progress notes.
If there are two, three, or four ICD-10 codes, select the one that you want to be the primary diagnosis.

-
Select the Place of Service for the claims that will be created for the selected procedures.
Note: You can change the place of service for a claim later if needed.
-
Click (or tap) Create Claims.
For each patient with procedures selected, separate claims are created for the service dates of the selected procedures.
For example, Billy has six unattached procedures selected with varying service dates:
-
Procedure 1 - 10/10/2013
-
Procedure 2 - 10/10/2013
-
Procedure 3 - 11/11/2013
-
Procedure 4 - 11/11/2013
-
Procedure 5 - 11/11/2013
-
Procedure 6 - 12/12/2013
Three claims will be created (one for procedures 1 - 2, one for procedures 3 - 5, and one for procedure 6).
-
Adding attachments to claims
Adding attachments to claims
You can attach the following to an unpaid claim: a patient's images from Dentrix Ascend Imaging, images from a patient's document manager, a patient's perio exam, and a patient's clinical notes.
Notes:
-
For information about adding attachments to rejected claims, see the topic about resubmitting rejected claims.
-
You can attach images from a patient's document manager only if those images are .jpg/.jpeg files. You can attach only one perio exam to any given claim, but you can attach a perio exam to multiple claims. If you attach a clinical note as a narrative, Dentrix Ascend automatically converts it to a .jpg file.
-
You can have up to a total of 10 attachments per claim, but the total claim size (claim data and attached files) must be smaller than 15 MB.
Important: Henry Schein One maintains a database of supported payers. You can add attachments to claims only for insurance plans that are associated with supported carriers. However, if a payer does not accept electronic attachments, when you send a claim with attachments to that payer, the attachments will not be included, and the claim will have a status message that states that the attachments were rejected. If this is the case, you can mail the attachments to the payer separately from the claim. Alternatively, for payers that don't accept electronic attachments, you can print and mail the claim and attachments together.
To add an attachment to a claim
-
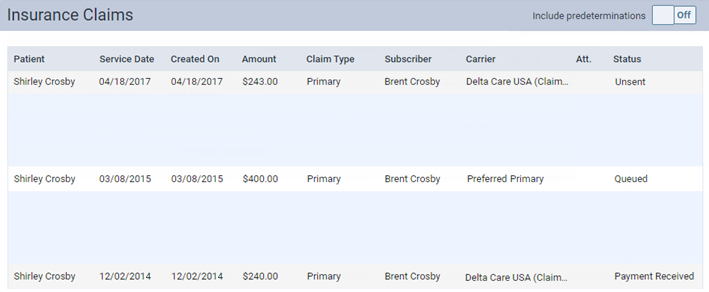
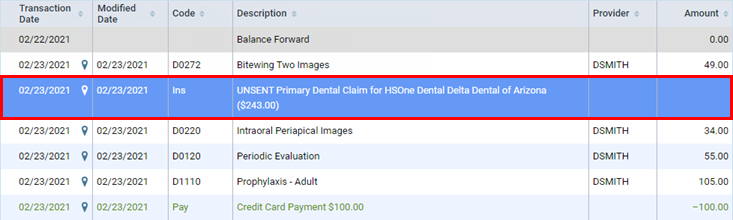
Click (or tap) a claim on one of the following pages:
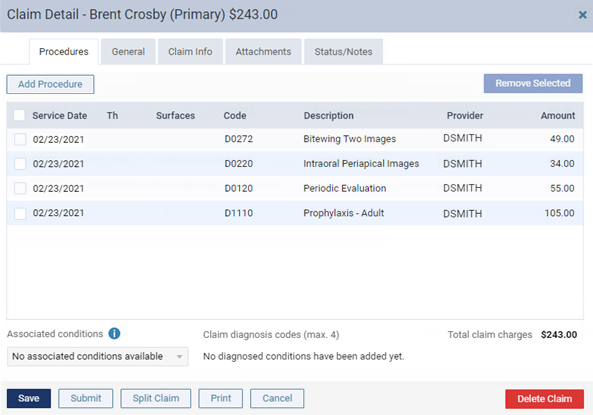
The Claim Detail dialog box appears (the appearance varies depending on the claim's status).
-
Unsent Claim:
-
Queued, Sent, or Printed Claim:

-
-
Click (or tap) the Attachments tab.
The options for adding attachments become available.
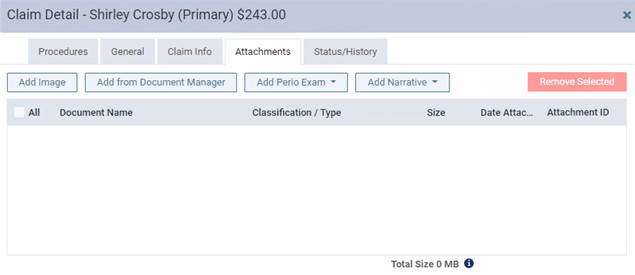
Note: To reduce delays or non-payments from insurance carriers, Dentrix Ascend alerts you when, according to NEA guidelines, supporting documentation is recommended for any procedures on a claim. An orange warning icon and a message with the applicable procedures and recommended attachment types appear when claim attachments are recommended. For a secondary (or tertiary or quaternary) insurance claim, a warning message includes a recommendation to attach the EOBs from the corresponding primary (and/or secondary and/or tertiary) claims before submitting the secondary (or tertiary or quaternary) claim.

You can ignore a warning and submit the claim without the recommended attachments.
Important: Ignore an attachment recommendation only if you are certain that the payer does not require supporting documentation for the procedure.
-
Do any of the following:
-
Add the patient's images from Dentrix Ascend Imaging.
Do the following:
-
Click (or tap) Add Image. This button is available only if the payer for this claim is a supported carrier (a carrier that was added to your practice database from the list of supported carriers that Henry Schein maintains; the payer ID of an unsupported carrier is 06126).
The Add from Imaging dialog box appears.
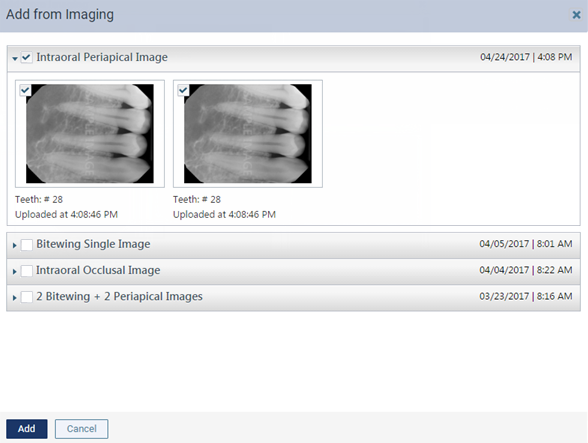
-
Click (or tap) a procedure with the correct date of service to view the corresponding images. Select the checkbox next to the procedure name to attach all the images in that section to the claim, or individually select the checkboxes of images that you want to attach to the claim. Repeat this process as needed.
Notes:
-
If all the images for a given procedure (such as a full mouth series) are selected, they are attached to the claim as a single image with a resolution of 1920 x 1080.
-
The applicable tooth numbers and date of each selected image are included.
-
-
Click (or tap) Add.
-
-
Add images and/or .pdf files from the patient's document manager.
Do the following:
-
Click (or tap) Add From Document Manager. This button is available only if the payer for this claim is a supported carrier (a carrier that was added to your practice database from the list of supported carriers that Henry Schein maintains; the payer ID of an unsupported carrier is 06126).
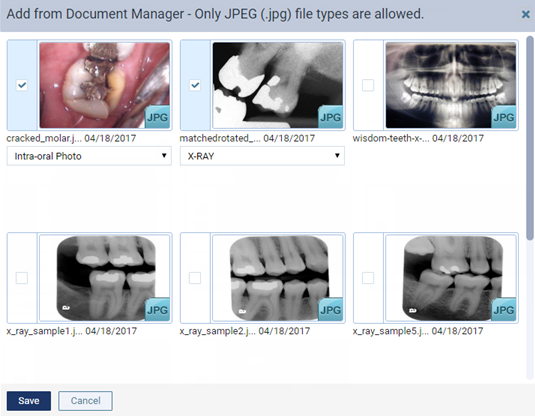
The Add From Document Manager dialog box appears.
-
Select the checkboxes of the images and/or .pdf files that you want to attach to the claim.
Note: Each page of a .pdf file counts as one attachment. In the example below, there are six attachments (one for the .jpg file, and five for the .pdf file).

-
Select a classification/type for each selected image.
Tip: If necessary, you can change the classification/type later by selecting a different option from the Classification/Type list on the Attachments tab.
-
Click (or tap) Save.
-
-
Add the patient's perio exam.
Do the following:
-
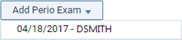
Click (or tap) Add Perio Exam to view a menu that lists the dates of the patient's perio exams. This button is available only if the patient has perio exams entered in his or her record and if the payer for this claim is a supported carrier (a carrier that was added to your practice database from the list of supported carriers that Henry Schein maintains; the payer ID of an unsupported carrier is 06126).
-
Click (or tap) the date of the perio exam that you want to attach to the claim.
-
-
Add narratives from the patient's clinical notes.
Do the following:
-
Click (or tap) Add Narrative to view a menu that lists the patient's clinical notes. This button is available only if the patient has clinical notes entered in his or her record and if the payer for this claim is a supported carrier (a carrier that was added to your practice database from the list of supported carriers that Henry Schein maintains; the payer ID of an unsupported carrier is 06126).
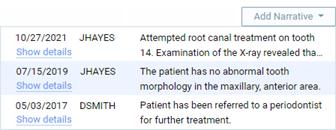
Note: You can click a clinical note's Show details link to view the entire note.
-
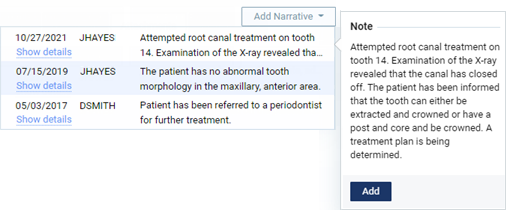
Click (or tap) the clinical note that you want to attach as a narrative to the claim.
Note: Alternatively, if you are viewing the details of a note that you want to attach, in the Note pop-up box, click Add to attach that narrative.
-
After attaching the narrative, to see it exactly as the insurance carrier will see it, click (or tap) that narrative's Document Name, which is a link. The image opens in a new browser tab.

-
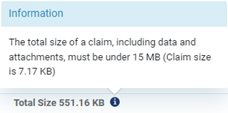
Note: The total claim size (claim data and attached files) must be smaller than 15 MB. You cannot submit the claim if the size is 15 MB or larger. For your reference, the Total Size appears below the list of attachments on the Attachments tab.
To view the size of the claim itself, click the "i" icon.
-
-
Do one of the following:
-
To save and close the dialog box, click (or tap) Save and then Cancel.
-
To save the changes and submit the claim, click (or tap) Submit.
-
Sending claims
Sending claims
You can send claims that were created previously but not submitted to insurance carriers.
Notes:
-
The clearinghouse processes claims every four hours, from 5:00 AM to 5:00 PM (Mountain time), Monday through Friday.
-
Sending claims requires the "Send Insurance Claims" security right.
To send claims
Do one of the following:
-
For one or more patients
-
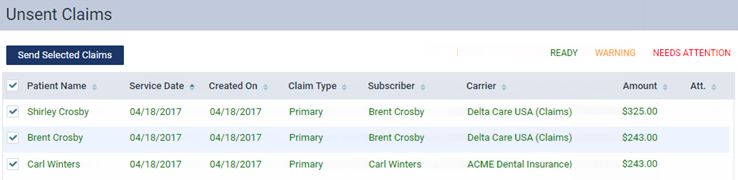
On the Unsent Claims page, select the checkbox of the claims that are ready to be sent. Claims displayed in the color green have a Ready status (all required information is present on the claim).
Notes:
-
By default, the claims are sorted by service date (oldest to newest), by patient last name (alphabetically), and then by amount (largest to smallest). You can click (or tap) any column header to sort the list by that column in ascending order and then click (or tap) the same column header again to sort the list by that column in descending order.
-
You can click (or tap) the Go to Ledger link under a patient's name to open that patient's Ledger page on a new browser tab.
Important: Fix the problems for claims with a yellow Warning status (information is missing from the claim but might not be required) and/or a red Needs Attention status (required information is missing from the claim) before attempting to submit the corresponding claims. To view and edit claim details, click (or tap) a claim.
Note: To reduce delays or non-payments from insurance carriers, Dentrix Ascend alerts you when, according to NEA guidelines, supporting documentation is recommended for any procedures on a claim. For a secondary (or tertiary or quaternary) insurance claim, a warning message includes a recommendation to attach the EOBs from the corresponding primary (and/or secondary and/or tertiary) claims before submitting the secondary (or tertiary or quaternary) claim.
An orange warning icon appears in a claim's Att. column when claim attachments are recommended. To see the applicable procedures and recommended attachment types, click the warning icon. In the pop-up message that appears, you can click Add Attachment(s) to open the claim so you can add attachments.
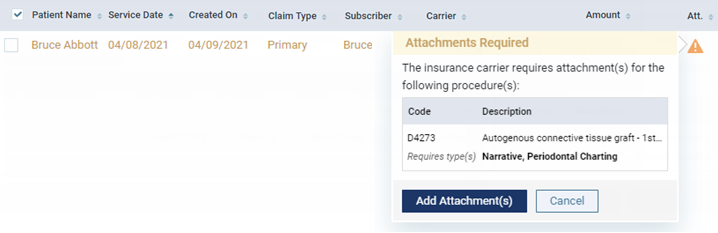
You can ignore a warning and submit the claim without the recommended attachments.
Important: Ignore an attachment recommendation only if you are certain that the payer does not require supporting documentation for the procedure.
-
-
Click (or tap) Send Selected Claims.
-
-
For a specific patient
-
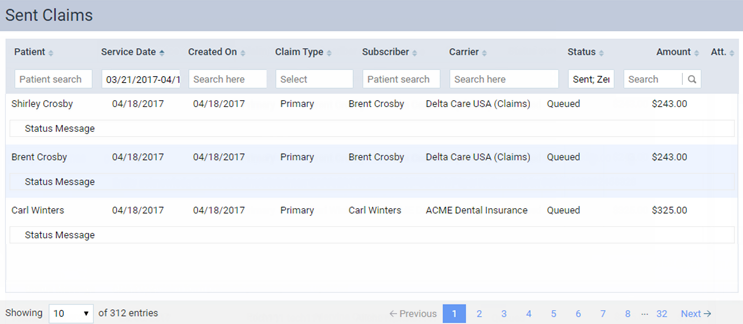
On one of the following pages, click (or tap) a claim with a status of Unsent:
The Claim Detail dialog box appears.
Note: For an electronic claim submission, Dentrix Ascend transmits separate service lines for identical procedures on the same claim. For the known carriers, such as Medicaid and Blue Cross/Blue Shield, that require a single line with a quantity value for identical procedures on the the same claim, claims are processed accordingly through the clearinghouse. If you receive a notice from a payer, stating that a quantity value is required for identical procedures, contact Dentrix Ascend Customer Support with that information so the needed functionality can be provided.
-
Click (or tap) Submit.
Note: This button is available only if the current location has an eTrans user ID, which is required for sending electronic claims.
-
4. Events
Scheduling events
Scheduling events
You can schedule an event. The event can be a one-time occurrence or recurring.
To schedule an event
-
Do one of the following:
-
Click (or tap) the Schedule menu.
-
On the Schedule menu, select Calendar.
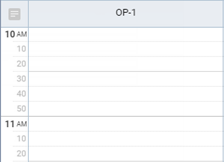
The Calendar page opens.
-
-
Navigate to a day or week.

-
Do one of the following:
-
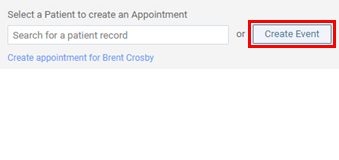
Click (or tap) an open time slot. Then, click (or tap) Create Event on the panel that appears to the right.
-
On the Actions menu, select Create Event.
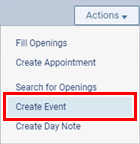
The Event Information panel opens.
-
-
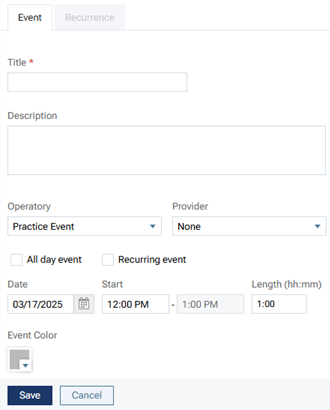
Enter a title and description; specify the operatories, date, and length; and set up the other options as needed.
Set up the following options:
-
Title - The title that you want to have appear at the top of the event.
-
Description - The description that you want to have appear on the event.
-
Operatory - The operatories to which you want to assign this event. By default, if you clicked (or tapped) an open time slot to start the event creation, that operatory is automatically added; otherwise, if you used the menu option to start the event creation, Practice Event appears (indicating that no operatories are selected).
To add or remove operatories, do the following:
-
Expand the Operatory list.
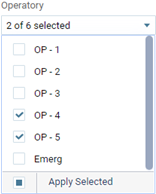
-
Select the checkboxes that correspond to the operatories that you want to add the event to. Clear the checkboxes that correspond to the operatories that you want to remove the event from. To quickly select or clear all checkboxes, select or clear the checkbox at the bottom of the list.
-
Click (or tap) Apply Selected or anywhere outside the list.
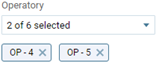
To quickly remove an operatory that you have added, under the Operatory list, click (or tap) the corresponding X.
-
-
Provider - The provider who you want to attach to this event. To not attach a provider to this event, select None. Only providers who have access to the current location are available.
-
Date and duration - Do one of the following:
-
For an all-day event, specify the Date of the event. Then, select the All day event checkbox.
-
For a partial-day event, specify the Date of the event. Next, enter the starting time of the event in the Start box. Then, adjust the Length of the event as needed by entering the correct number of hours and minutes in the hr and min boxes; the ending time of the event changes accordingly.
Tip: You can enter a time using various formats. For example, you can type 08:30, 8:30a, or 8:30 AM; 8a or 8am; 13:30, 1:30p, or 1:30 PM; or 1p or 1pm.
-
-
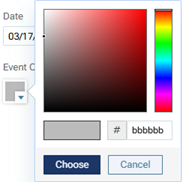
Event Color - The color for the event. Adding colors to events can help people more easily identify events and differentiate one type of event from another. An event color can also help convey a message or that a certain action must be taken. By default, the event is gray. To assign a different color, click (or tap) the Event Color box, select a color, and then click (or tap) Choose.
-
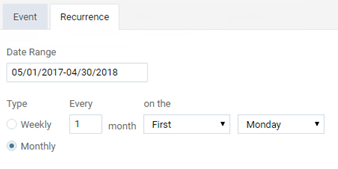
Recurring event - If this event will repeat at regular intervals, select the Recurring event checkbox, and then set up the following options on the Recurrence tab:
-
Date Range - Enter the range of dates within which the event will repeat.
-
Type - Specify the pattern to use for the recurring event:
-
Weekly - It repeats every number of weeks you enter and on the days of the week you select.
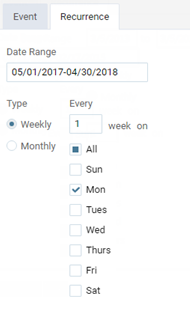
-
Monthly - It repeats every number of months you enter; on the first, second, third, fourth, or last week of the month; and on the day of the week you select.
-
-
-
-
Click (or tap) Save.
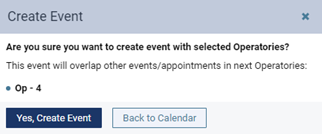
If the event conflicts with other events or appointments, a dialog box appears and displays a list of the applicable operatories.
-
To allow the overlap, click (or tap) Yes, Create Event.
5. Appointment confirmations
Confirming appointments
Confirming appointments
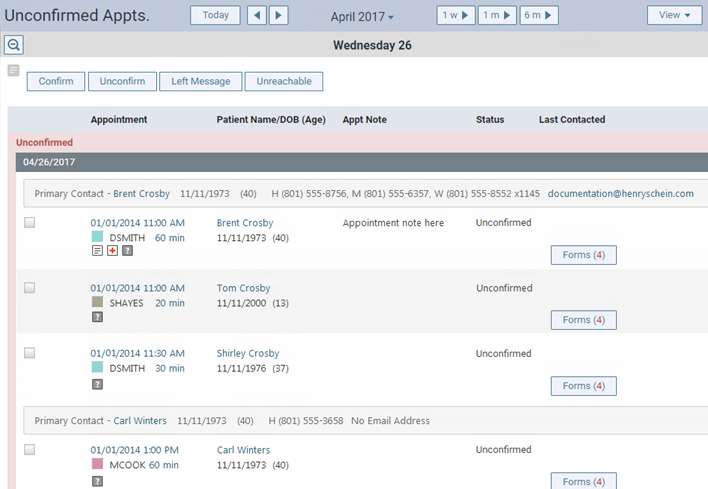
You can use the unconfirmed appointments list to contact patients or households and remind them of upcoming appointments.
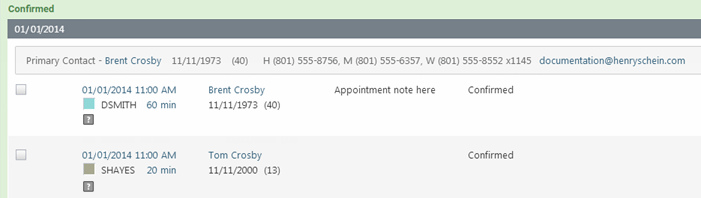
Note: The appointments on the unconfirmed appointments list are grouped by "Unconfirmed" and "Confirmed."
To confirm appointments
-
On the Schedule menu, select Unconfirmed Appointments.
The Unconfirmed Appts page opens.
-
Navigate to a day or week.

-
In the Unconfirmed section, as you go down the list of appointments, use the phone numbers and/or email address displayed for the primary contact person of each household to contact that household, and select the checkboxes of the appointments for patients whom you get confirmation from, leave a message for, or cannot reach. You can also view a patient's completed patient forms and send a request for the patient to complete patient forms.
Tips:
-
If an automated reminder was sent to a patient, the Last Contacted column indicates whether the communication was sent by text or email and when it was sent.
-
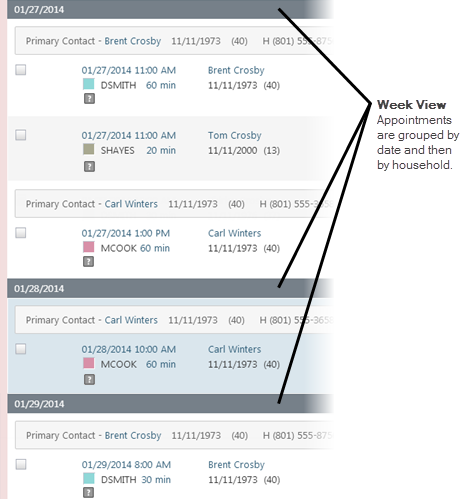
On the View menu, you can choose to view appointments by day or week. If you are viewing the list for a day, appointments are grouped by household and then listed chronologically. If you are viewing the list for a week, the appointments are grouped by date and then by household and then listed chronologically.
-
On the View menu, you can choose to view appointments for specific providers.
-
-
Click (or tap) Confirm, Left Message, or Unreachable.
Confirmed appointments move from the Unconfirmed section to the Confirmed section, and their statuses change from "Unconfirmed" to "Confirmed." Appointments that you left messages for stay in the Unconfirmed section, but their statuses change from "Unconfirmed" to "Left Message."
Tips:
-
You can click (or tap) the time link of any appointment to go to that appointment on the schedule.
-
You can click (or tap) the patient name link of any appointment to go to the Overview page of that patient's record.
-
If you need to move any appointments that were confirmed previously back to the Unconfirmed section, in the Confirmed section, select the checkboxes for those appointments, and then click (or tap) Unconfirm, Left Message, or Unreachable.
6. Appointment follow-ups
Following up with patients after visits
Following up with patients after visits
You can use the patient follow-up list to contact patients and follow up with them after their treatments.
Notes:
-
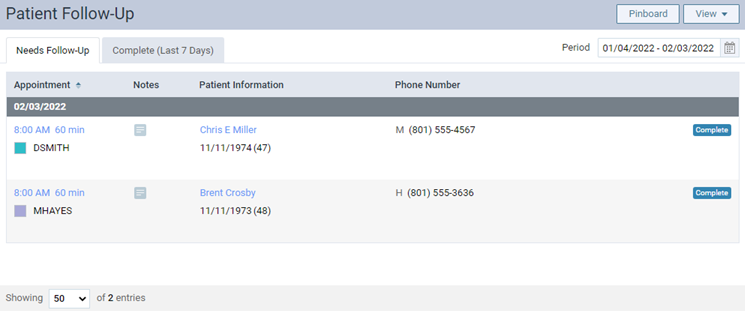
Appointments with the Needs Follow-Up option selected appear on the Needs Follow-Up tab of the Patient Follow-Up page until they are marked as having been followed up with from the Patient Follow-Up page.
-
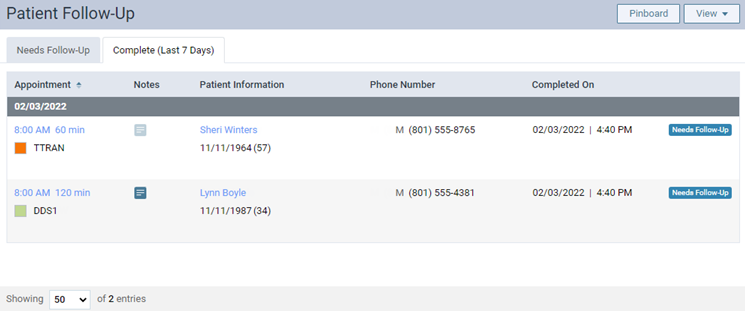
The Complete (Last 7 Days) tab of the Patient Follow-Up page lists the appointments for patients who have been followed up with in the past seven days.
To follow up with patients
-
On the Schedule menu, select Patient Follow-Up.
The Patient Follow-Up page opens.
-
By default, the Needs Follow-Up tab displays appointments for the past 30 days. To change the date range, do the following:
-
Click (or tap) in the Period box.

-
Select Last 30 Days, Last 4 Months, or Custom Range (select a start and end date).
-
Click (or tap) Done.
-
-
On the Needs Follow-Up tab, as you go down the list of appointments, use the phone number displayed to contact each patient, and click (or tap) Complete next to each appointment that you are able to follow up with the patient about.
Notes:
-
Appointments are grouped by date and then listed in chronological order, but you can sort the list by any of the column headers by clicking (or tapping) a header.
-
On the View menu, you can choose to view appointments for specific providers.
-
Clicking (or tapping) Complete moves the corresponding appointment to the Complete (Last 7 Days) tab if the date of that appointment is within the past seven days.
-
Tips:
-
You can click (or tap) the time link of any appointment to go to that appointment on the schedule.
-
You can click (or tap) the patient name link of any appointment to go to the Overview page of that patient's record on the Patient tab.
-
If you need to move an appointment (as long as its date is within the past seven days) back to the Needs Follow-Up tab, on the Complete (Last 7 Days) tab, click (or tap) Needs Follow-Up next to that appointment.