Performing Daily Tasks
This document provides instructions for the tasks that are done daily at any time during the day.
1. Scheduling
Scheduling appointments for new patients
Scheduling appointments for new patients
You can schedule an appointment for a patient that has not been seen at your office before.
To schedule an appointment for a new patient
-
Do one of the following:
-
Click (or tap) the Schedule menu.
-
On the Schedule menu, select Calendar.
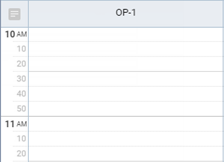
The Calendar page opens.
-
-
Navigate to a day or week.

-
Do one of the following:
-
Click (or tap) an open time slot.
-
On the Actions menu, select Create Appointment.
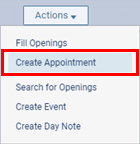
The Appointment Information panel opens.
-
-
Verify that the patient does not already exist in your practice database:
-
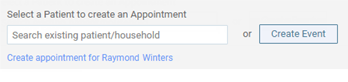
Click (or tap) in the Search for a patient record box.
-
Start typing a patient's first name, last name, chart number, or phone number (at least the first four digits). Continue typing as needed to narrow the search results list.
Note: You can include inactive patients in the search results by setting the Include inactive patients switch to On.
-
Do one of the following:
-
If you do not find the patient, proceed to the next step.
-
If the patient and no other members of the household have patient records, you can add a household (multiple patient records with the same primary contact). On the results list, click (or tap) the Create new household option, add the household members, and then click (or tap) Save. After creating those patient records, schedule an appointment for any of those patients. Ignore the remaining steps in this topic, and follow the instructions in the topic about scheduling appointments for existing patients.
-
If the patient already has a patient record, click (or tap) that patient name, and then schedule the appointment. Ignore the remaining steps in this topic, and follow the instructions in the topic about scheduling appointments for existing patients.
-
-
-
On the results list, click (or tap) New patient appt.
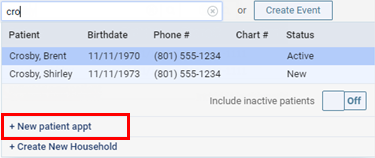
The options for the new patient's appointment become available.
-
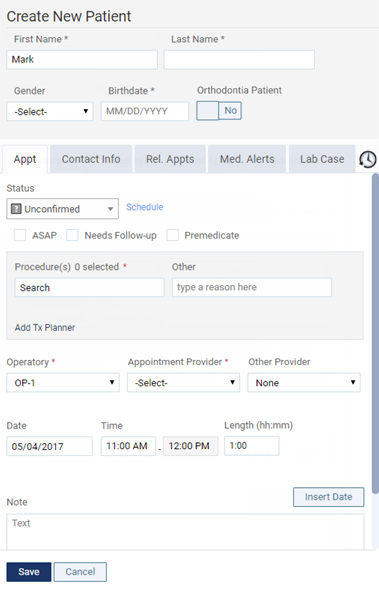
Enter the patient's name, birth date, select the procedures that are to be performed, and set up the other options as needed.
Set up the following options:
-
Patient - Finish typing the patient's first and last name.
-
Gender - Select the patient's gender: Male, Female, or Other.
-
Birthdate - Enter the patient's birth date.
-
Orthodontia Patient - Set the switch to Yes if the patient is currently undergoing orthodontic treatment, or leave the switch set to No if the patient is not currently undergoing orthodontic treatment.
-
Status - By default, all new appointments have Unconfirmed selected, but you can select a different status if necessary. The corresponding status icon appears on the appointment (for example, Unconfirmed is a question mark
 ).
). -
ASAP - Select this checkbox if the patient wants to be contacted if an earlier date and/or time becomes available. With this option selected, the patient will show on the ASAP List. With this option selected, the patient will show on the ASAP List, and an ASAP icon
 appears on the appointment.
 -
Needs Follow-up - Select this checkbox if any of the procedures for this appointment require you to follow up with the patient after his or her visit. The patient will show up on the Patient Follow-up list after his or her appointment.
-
Premedicate - Select this checkbox if the patient prefers to be medicated before any of the procedures are performed or if any of the procedures require premedication.
-
Procedure(s) - Click (or tap) in the box, begin typing procedure code, multi-code, or description, continue typing as needed to narrow the results, and then select the appropriate procedure from the results list. To select other procedures, repeat this process.
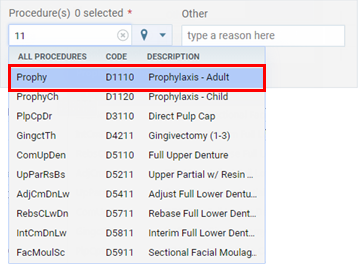
When you are searching for a procedure, procedures appear in the results list not only according to your search criteria but according to the selected filter.
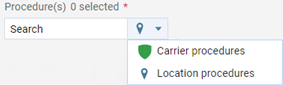
Select one of the following procedure filters as needed:
-
Carrier procedures - Only the carriers' allowed procedures are available. If the patient has any active insurance plans attached to his or her record, and if the selected Provider is contracted with any of the patient's carriers, Carrier procedures is selected by default.
-
Location procedures - Only the location's allowed procedures are available. If the patient is not covered by an insurance carrier that the provider is contracted with, Location procedures is selected by default.
Note: Carrier procedures is available only if the patient has any active insurance plans attached to his or her record, and if the selected Provider is contracted with any of the patient's carriers. Location procedures is available for any patient.
Important: If you schedule an appointment using a multi-code that includes some procedures that are not allowed by the the location or any of the patient's carriers, those procedures will not be attached to the appointment.
Note: If you select a procedure that is associated with a recare type, that recare type is attached to this patient's appointment automatically.
On the Appointment Information panel, a recare procedure that is attached to an appointment has a green stripe. A non-recare procedure does not have a colored stripe.

Note: To remove a procedure from the appointment, click (or tap) the corresponding Remove button
 .
. -
-
Other - Enter a reason, other than that of the selected procedures, for the appointment.
-
Operatory - Select an operatory from the list. If you selected a time slot in step 3 while viewing by operatory, an operatory is already selected, but you can select a different one. Alternatively, to quickly change the operatory, click (or tap) and hold and then click (or tap) an open time slot in a different operatory.
Note: The provider's default operatory (if one has been set up) will be selected automatically if you are viewing the schedule by provider.
-
Appointment Provider - Select an appointment provider from the list. If you selected a time slot in step 3 while viewing the schedule by provider, a provider is already selected, but you can select a different one. Alternatively, if you are viewing the schedule by provider, to quickly change the provider, click (or tap) and hold and then click (or tap) the column of a different provider. Only providers who have access to the current location are available. The exception to this is when a provider is associated with the appointment and no longer has access to the current location; that provider is available in the list unless you select a different provider and then save the change.
-
Other Provider - Select a secondary provider, such as a hygienist, for the appointment from the list. A colored box
 (determined by the provider color assigned to this provider) appears on the appointment. Only providers who have access to the current location are available. The exception to this is when a provider is associated with the appointment and no longer has access to the current location; that provider is available in the list unless you select a different provider and then save the change.
 -
Date - The date being viewed on the schedule is already selected by default, but you can change it. Click (or tap) in the box to select a different date. Alternatively, if you are viewing the schedule by week, to quickly change the date, click (or tap) and hold and then click (or tap) an open time slot on a different date.
-
Time - Click (or tap) in the box, and then enter a time. If you selected a time slot in step 3, the time is already entered, but you can change it. Alternatively, to quickly change the time, click (or tap) and hold and then click (or tap) a different open time slot.
Tip: You can enter a time using various formats. For example, you can type 08:30, 8:30a, or 8:30 AM; 8a or 8am; 13:30, 1:30p, or 1:30 PM; or 1p or 1pm.
-
Length - By default, the length of the appointment is determined by the location's default appointment length, but you can change the length as needed. The end time of the appointment changes accordingly.
-
Time Pattern - Add a time pattern to the appointment to represent who is providing care to the patient during the appointment.
-
Note - Enter a note regarding the appointment. To insert the current date where the text cursor is positioned in the field, click (or tap) Insert Date. If there is an appointment note, a note icon
 appears on the appointment.
 -
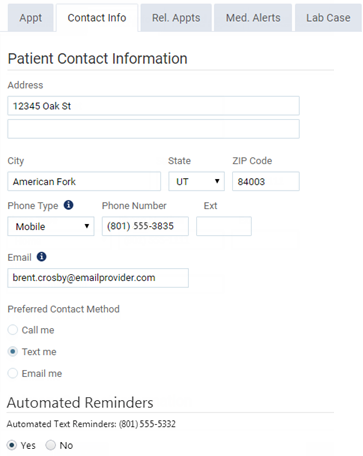
Contact Info - On the Contact Info tab, you can view or update the patient's contact information, contact preferences, and automated reminders preference (this option is available only if the patient is the primary contact for himself or herself or anyone else and has a supported mobile phone number). Any changes that you save from the appointment will be reflected in the patient's record.
Notes:
-
If the patient has someone else as his or her primary contact, but an email address has not been entered in that primary contact's patient record, "No email provided" appears. Also, a message to add the primary contact's email address appears below the Email box
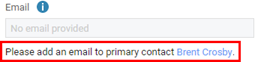
-
If the patient has someone else as his or her primary contact, and an email address has been entered in that primary contact's patient record, that primary contact's email address appears and will be used for this patient.
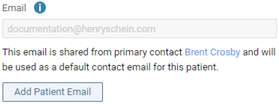
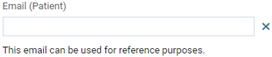
To enter a different email address for this patient, click (or tap) Add Patient Email, and then enter an address in the Email (Patient) box that appears. To clear the patient's email, click the X. This email address is for reference only. Dentrix Ascend will not use this email address to send out automated patient communications.
-
If the patient is his or her own primary contact, an email address is not entered, and the Preferred Contact Method is set to Email me, an error icon and message appear as a reminder for you to either enter an email address or change the preferred contact method.

-
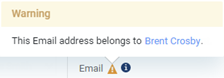
If you enter an email address that is already associated with another patient's record, a yellow warning icon appears next to the label of the Email box. Dentrix Ascend allows you to save a patient's record with a duplicate email address; the warning is only there for your reference in case, for example, your organization requires unique email addresses for all patients.
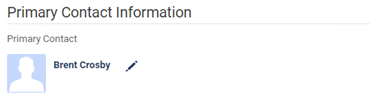
The patient's primary contact also appears.
Tips:
-
To change the primary contact person for the patient, click (or tap) the Edit button
 . In the search box, begin typing the contact's name, continue typing as needed to narrow the results, and then select the appropriate name from the list of matching results. Or, to make the patient whose appointment you are viewing the primary contact, click (or tap) Switch to "Self" at the bottom of the results list.
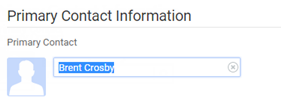
-
To assign the primary phone number of the patient's primary contact (if different from the patient) as the primary phone number of the patient on the appointment, click (or tap) the Copy Up button
 . To assign the patient's primary phone number as the primary phone number of the patient's primary contact (if different from the patient), click (or tap) the Copy Down button
  .
.
-
-
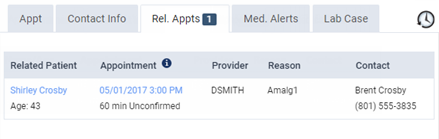
Rel. Appts - On the Rel. Appts tab, you can view the appointment information for other members of the patient's household who have appointments scheduled on the same day as this appointment. For your reference, the number of related appointments, if any, appears next to the name of the tab.
-
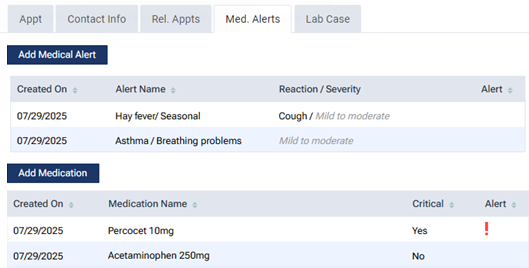
Med. Alerts - On the Med. Alerts tab, you can add medical alerts (allergies and problems) and medications to the patient's record as needed.
-
-
Click (or tap) Save.
Note: A patient record with minimal information is created for the patient.
Scheduling appointments for existing patients
Scheduling appointments for existing patients
You can schedule an appointment for an existing patient.
To schedule an appointment for an existing patient
-
Do one of the following:
-
Click (or tap) the Schedule menu.
-
On the Schedule menu, select Calendar.
The Calendar page opens.
-
-
Navigate to a day or week.
-
Do one of the following:
-
Click (or tap) an open time slot.
-
On the Actions menu, select Create Appointment.
The Appointment Information panel opens.
-
-
Do one of the following:
-
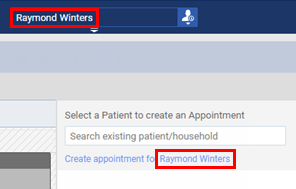
If you are currently accessing the record of the patient for whom you are scheduling the appointment (the patient's name appears in the Patient Search box), click (or tap) the Create Appointment for [patient name] link.
-
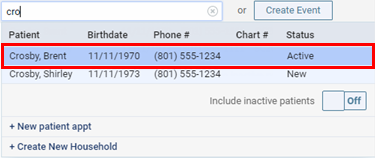
Click (or tap) in the Search for a patient record box. Start typing a patient's first name, last name, chart number, or phone number (at least the first four digits). Continue typing as needed to narrow the search results list. Then, select a patient name.
Note: You can include inactive patients in the search results by setting the Include inactive patients switch to On.
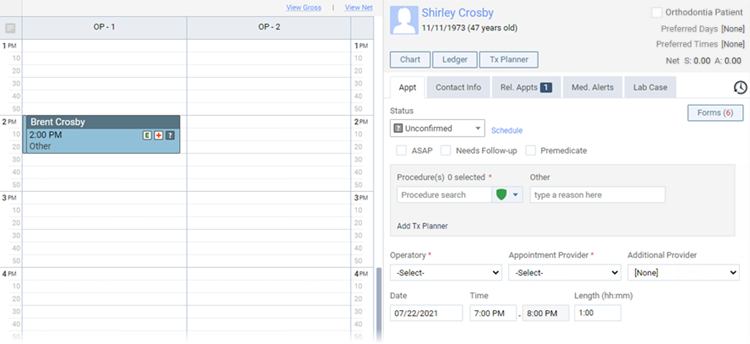
The options for the patient's appointment become available.
-
-
Select the procedures that are to be performed, and set up the other options as needed.
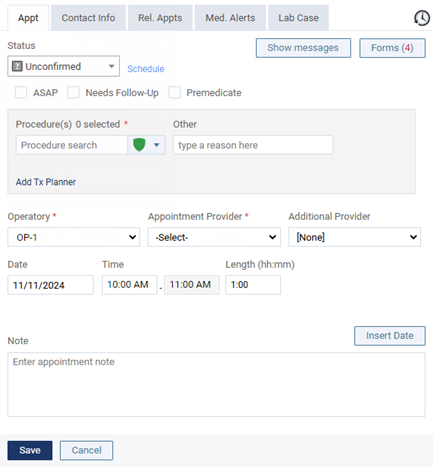
Set up the following options:
-
Orthodontia Patient - Select the checkbox if the patient is currently undergoing orthodontic treatment, or leave the checkbox clear if the patient is not currently undergoing orthodontic treatment.

-
Status - By default, all new appointments have Unconfirmed selected, but you can select a different status if necessary. The corresponding status icon appears on the appointment (for example, Unconfirmed is a question mark
). -
ASAP - Select this check box if the patient wants to be contacted if an earlier date and/or time becomes available. With this option selected, the patient will show on the ASAP List. With this option selected, the patient will show on the ASAP List, and an ASAP icon
appears on the appointment. -
Needs Follow-up - Select this check box if any of the procedures for this appointment require you to follow up with the patient after his or her visit. The patient will show up on the Patient Follow-up list after his or her appointment.
-
Premedicate - Select this check box if the patient prefers to be medicated before any of the procedures are performed or if any of the procedures require premedication.
Note: This checkbox is selected by default if the patient has an active medical alert that has the SNOMED code 398193008 assigned to it (such as "Pre-medicate need") in his or her record. You can clear the checkbox if premedication is not needed for this appointment.
-
Procedure(s) - Click (or tap) in the box, begin typing procedure code, multi-code, or description, continue typing as needed to narrow the results, and then select the appropriate procedure from the results list. To select other procedures, repeat this process.
When you are searching for a procedure, procedures appear in the results list not only according to your search criteria but according to the selected filter.
Select one of the following procedure filters as needed:
-
Carrier procedures - Only the carriers' allowed procedures are available. If the patient has any active insurance plans attached to his or her record, and if the selected Provider is contracted with any of the patient's carriers, Carrier procedures is selected by default.
-
Location procedures - Only the location's allowed procedures are available. If the patient is not covered by an insurance carrier that the provider is contracted with, Location procedures is selected by default.
Note: Carrier procedures is available only if the patient has any active insurance plans attached to his or her record, and if the selected Provider is contracted with any of the patient's carriers. Location procedures is available for any patient.
Important: If you schedule an appointment using a multi-code that includes some procedures that are not allowed by the the location or any of the patient's carriers, those procedures will not be attached to the appointment.
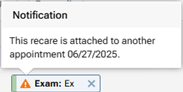
Note: If you select a procedure that is associated with a recare type, that recare type is attached to this patient's appointment automatically. However, if the same recare procedure is already attached to another appointment for this patient, and the other appointment's status is not Complete, an orange warning icon appears, and when you save this appointment, a message will appear so you can confirm that you want to attach the recare procedure to multiple appointments.
On the Appointment Information panel, a recare procedure that is attached to an appointment has a green stripe. A non-recare procedure does not have a colored stripe.
Note: To remove a procedure from the appointment, click (or tap) the corresponding Remove button
. -
-
Add Tx Planner - Click (or tap) this link to open the Tx Procedures dialog box. Select the checkbox of the visit (associated with a case) or the checkboxes of the individual treatment-planned procedures (not assigned to a case) that you want to attach to the appointment. Then, click (or tap) Update appointment.
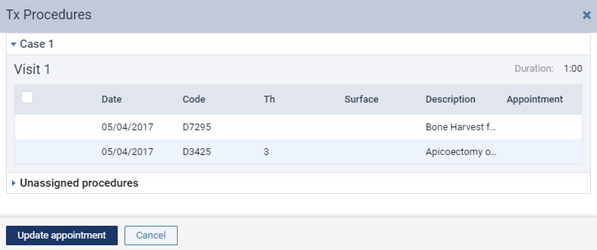
Notes:
-
If a visit (associated with a case) contains completed treatment-planned procedures, a message appears and informs you that the visit cannot be attached to the appointment until after those procedures have been moved to another visit. You can click the Treatment Planner link in the message to navigate to the Tx Planner tab of the patient's clinical record to make the change.
-
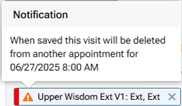
If you attach treatment-planned procedures that are already scheduled, an orange warning icon appears. When you save this appointment, a message will appear so you can confirm that you want to remove the planned procedures from the other appointment.
On the Appointment Information panel, a treatment plan that is attached to the appointment has a red stripe.

Note: When you position your mouse pointer over an attached treatment plan, one of the following occurs:
-
For a procedure that is not assigned to a case, details of that procedure appear.
-
For procedures that are assigned to a case, the case name, the visit number, and details of all the procedures in that visit appear.
-
-
Other - Enter a reason, other than that of the selected procedures, for the appointment.
-
Operatory - Select an operatory from the list. If you selected a time slot in step 3 while viewing by operatory, an operatory is already selected, but you can select a different one. Alternatively, to quickly change the operatory, click (or tap) and hold and then click (or tap) an open time slot in a different operatory.
Note: The provider's default operatory (if one has been set up) will be selected automatically if you are viewing the schedule by provider.
-
Appointment Provider - Select an appointment provider from the list. If you selected a time slot in step 3 while viewing the schedule by provider, a provider is already selected, but you can select a different one. Alternatively, if you are viewing the schedule by provider, to quickly change the provider, click (or tap) and hold and then click (or tap) the column of a different provider. Only providers who have access to the current location are available. The exception to this is when a provider is associated with the appointment and no longer has access to the current location; that provider is available in the list unless you select a different provider and then save the change.
-
Other Provider - Select a secondary provider, such as a hygienist, for the appointment from the list. A colored box
(determined by the provider color assigned to this provider) appears on the appointment. Only providers who have access to the current location are available. The exception to this is when a provider is associated with the appointment and no longer has access to the current location; that provider is available in the list unless you select a different provider and then save the change. -
Date - The date being viewed on the schedule is already selected by default, but you can change it. Click (or tap) in the box to select a different date. Alternatively, if you are viewing the schedule by week, to quickly change the date, click (or tap) and hold and then click (or tap) an open time slot on a different date.
-
Time - Click (or tap) in the box, and then enter a time. If you selected a time slot in step 3, the time is already entered, but you can change it. Alternatively, to quickly change the time, click (or tap) and hold and then click (or tap) a different open time slot.
Tip: You can enter a time using various formats. For example, you can type 08:30, 8:30a, or 8:30 AM; 8a or 8am; 13:30, 1:30p, or 1:30 PM; or 1p or 1pm.
-
Length - By default, the length of the appointment is determined by the location's default appointment length, but you can change the length as needed. The end time of the appointment changes accordingly.
-
Time Pattern - Add a time pattern to the appointment to represent who is providing care to the patient during the appointment.
-
Note - Enter a note regarding the appointment. To insert the current date where the text cursor is positioned in the box, click (or tap) Insert Date. If there is an appointment note, a note icon
appears on the appointment. -
Contact Info - On the Contact Info tab, you can view or update the patient's contact information, contact preferences, and automated reminders preference (this option is available only if the patient is the primary contact for himself or herself or anyone else and has a supported mobile phone number). Any changes that you save from the appointment will be reflected in the patient's record.
Notes:
-
If the patient has someone else as his or her primary contact, but an email address has not been entered in that primary contact's patient record, "No email provided" appears. Also, a message to add the primary contact's email address appears below the Email box
-
If the patient has someone else as his or her primary contact, and an email address has been entered in that primary contact's patient record, that primary contact's email address appears and will be used for this patient.
To enter a different email address for this patient, click (or tap) Add Patient Email, and then enter an address in the Email (Patient) box that appears. To clear the patient's email, click the X. This email address is for reference only. Dentrix Ascend will not use this email address to send out automated patient communications.
-
If the patient is his or her own primary contact, an email address is not entered, and the Preferred Contact Method is set to Email me, an error icon and message appear as a reminder for you to either enter an email address or change the preferred contact method.
-
If you enter an email address that is already associated with another patient's record, a yellow warning icon appears next to the label of the Email box. Dentrix Ascend allows you to save a patient's record with a duplicate email address; the warning is only there for your reference in case, for example, your organization requires unique email addresses for all patients.
The patient's primary contact also appears.
Tips:
-
To change the primary contact person for the patient, click (or tap) the Edit button
. In the search box, begin typing the contact's name, continue typing as needed to narrow the results, and then select the appropriate name from the list of matching results. Or, to make the patient whose appointment you are viewing the primary contact, click (or tap) Switch to "Self" at the bottom of the results list. -
To assign the primary phone number of the patient's primary contact (if different from the patient) as the primary phone number of the patient on the appointment, click (or tap) the Copy Up button
. To assign the patient's primary phone number as the primary phone number of the patient's primary contact (if different from the patient), click (or tap) the Copy Down button .
-
-
Rel. Appts - On the Rel. Appts tab, you can view the appointment information for other members of the patient's household who have appointments scheduled on the same day as this appointment. For your reference, the number of related appointments, if any, appears next to the name of the tab.
-
Med. Alerts - On the Med. Alerts tab, you can view the medical alerts (allergies and problems) and medications that are attached to the patient's record. You can also add medical alerts and medications to the patient's record as needed.
-
Lab Case - On the Lab Case tab, you can attach a lab case to the patient's appointment.

-
-
Click (or tap) Save.
-
Do one of the following if applicable:
-
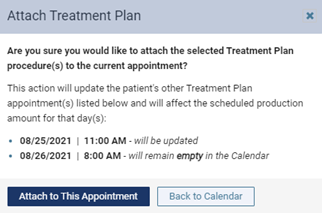
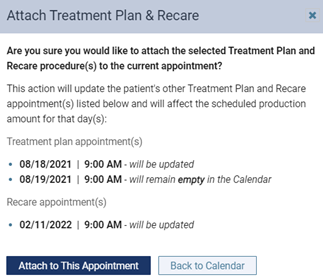
If you have attached treatment-planned procedures that are already scheduled, the Attach Treatment Plan message box appears so you can confirm that you want to remove the procedures from the other appointment. The message displays the date and time of the affected appointment and a note that it will be updated. However, if removing those procedures leaves another appointment empty, the message displays the date and time of the affected appointment and a note that it will remain scheduled on the calendar but be empty. To confirm that you want to move the procedures, click (or tap) Attach to This Appointment.
-
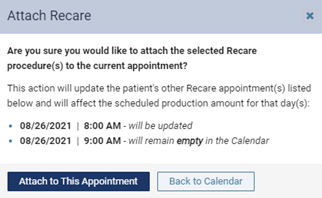
If you have attached recare procedures that are already attached to another appointment for this patient, and the other appointment's status is not Complete, the Attach Recare message box appears so you can confirm that you want the recare procedures to be attached to multiple appointments. The message displays the date and time of the other appointment. To confirm that you want to attach the recare procedures to mutliple appointments, click (or tap) Verify.
-
If you have attached treatment-planned procedures that are already scheduled, and if you have attached recare procedures that are already attached to another appointment for this patient, the Attach Treatment Plan & Recare message box appears so you can confirm that you want to remove the treatment-planned procedures from the other appointment and that you want the recare procedures to be attached to multiple appointments. The message displays the date and time of the affected treatment-planned appointment and a note that it will be updated; however, if removing those procedures leaves another appointment empty, the message displays the date and time of the affected appointment and a note that it will remain scheduled on the calendar but be empty. Also, the message displays the date and time of the other recare appointment. To confirm that you want to move the planned procedures and attach the recare procedures to multiple appointments, click (or tap) Verify.
-
Scheduling appointments for related patients
Scheduling appointments for related patients
If you are scheduling appointments for an entire family, you can quickly schedule appointments for those related patients without having to search for each patient individually.
To schedule appointments for related patients
-
With a patient selected so his or her name appears in the Patient Search box, schedule an appointment for that family member.

-
On the Patient Information ribbon, expand the Related Patients list.

Note: To show the Patient Information ribbon if it is hidden, click (or tap) the down arrow button below the Patient Search box.

-
Next to the name of the next family member you want to schedule, click (or tap) the Schedule new appointment button
 .
.Notes:
-
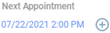
If a related person has an upcoming appointment in the location that you are currently accessing, a date and time link for that appointment appears next to his or her name in the Next Appointment column.
-
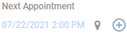
If a related person has an upcoming appointment in a different location from the location that you are currently accessing, the date and time of that appointment and a location icon appear next to his or her name in the Next Appointment column.
-
If a related person does not have an upcoming appointment, "None" appears next to his or her name in the Next Appointment column.
The Calendar page displays times near the first family member's appointment.
-
-
Schedule an appointment for this family member, selecting the procedures, operatory, provider, and other details as needed.
-
Repeat steps 2-4 as needed for any other family members you want to schedule.
2. Claims
Creating claims
Creating claims
You can quickly create claims for procedures that are not attached to insurance claims. Also, you can edit any unattached procedure before you create a claim for that procedure.
Tip: You can create a claim for a patient's procedures while performing a patient checkout.
Note: Creating claims requires the "Create Insurance Claims" security right.
To create claims
-
If you are not already viewing the correct location, select it on the Location menu.
-
On the Home menu, under Insurance, select Create Claims.
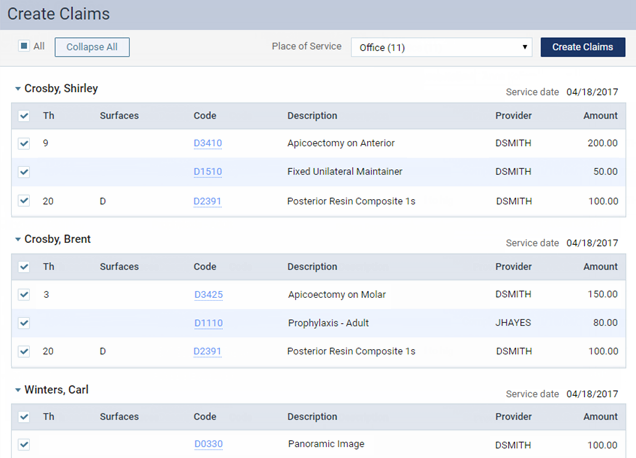
The Create Claims page opens.
-
Do one of the following:
-
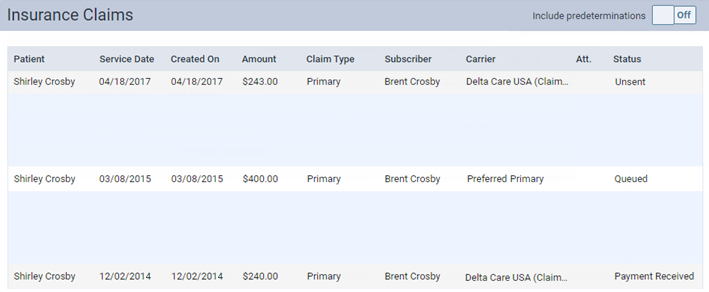
To create claims for all procedures for all patients listed, leave the All checkbox at the top of the page selected.
-
To create claims for specific procedures for a specific patient, clear the All checkbox at the top of the page, and then, under the appropriate patient's name, select the checkboxes of the procedures to include or the All checkbox to include all procedures.
Notes:
-
For an unattached procedure to appear on the Create Claims page, the service date of that procedure must fall within the coverage dates of a patient's insurance plan, and that procedure must be marked as billable to insurance.
-
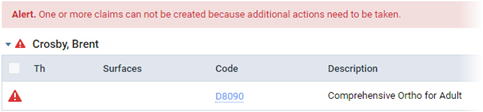
For an orthodontic procedure (D8001-D8999), if the treatment information is missing, a warning message appears at the top of the page, and a warning symbol appears next to the corresponding patient's name and next to the applicable procedure. To include the procedure on a claim, you must first enter the treatment information.
Tips:
-
To edit a procedure before creating a claim for it, click (or tap) the procedure code link, make the necessary changes, and then click (or tap) Save.
-
To hide the procedures and show only the patient names, click (or tap) Collapse All.
-
To hide or show the procedures for a specific patient, click (or tap) the header with that patient's name.
-
-
For the selected procedures, the associated diagnoses appear. You can have up to four ICD-10 codes per claim. If you have more than four, either remove ICD-10 codes from the claim (by clicking, or tapping,
 on the coresponding codes), or split the procedures between separate claims (clear the checkboxes of the procedures that you do not want on this claim, so you can create one or more additional claims for those procedures).
Note: Removing ICD-10 codes from a claim does not affect the corresponding procedures. All diagnoses remain attached to their corresponding procedures as currently posted in the patient's ledger and progress notes.
If there are two, three, or four ICD-10 codes, select the one that you want to be the primary diagnosis.

-
Select the Place of Service for the claims that will be created for the selected procedures.
Note: You can change the place of service for a claim later if needed.
-
Click (or tap) Create Claims.
For each patient with procedures selected, separate claims are created for the service dates of the selected procedures.
For example, Billy has six unattached procedures selected with varying service dates:
-
Procedure 1 - 10/10/2013
-
Procedure 2 - 10/10/2013
-
Procedure 3 - 11/11/2013
-
Procedure 4 - 11/11/2013
-
Procedure 5 - 11/11/2013
-
Procedure 6 - 12/12/2013
Three claims will be created (one for procedures 1 - 2, one for procedures 3 - 5, and one for procedure 6).
-
Adding attachments to claims
Adding attachments to claims
You can attach the following to an unpaid claim: a patient's images from Dentrix Ascend Imaging, images from a patient's document manager, a patient's perio exam, and a patient's clinical notes.
Notes:
-
For information about adding attachments to rejected claims, see the topic about resubmitting rejected claims.
-
You can attach images from a patient's document manager only if those images are .jpg/.jpeg files. You can attach only one perio exam to any given claim, but you can attach a perio exam to multiple claims. If you attach a clinical note as a narrative, Dentrix Ascend automatically converts it to a .jpg file.
-
You can have up to a total of 10 attachments per claim, but the total claim size (claim data and attached files) must be smaller than 15 MB.
Important: Henry Schein One maintains a database of supported payers. You can add attachments to claims only for insurance plans that are associated with supported carriers. However, if a payer does not accept electronic attachments, when you send a claim with attachments to that payer, the attachments will not be included, and the claim will have a status message that states that the attachments were rejected. If this is the case, you can mail the attachments to the payer separately from the claim. Alternatively, for payers that don't accept electronic attachments, you can print and mail the claim and attachments together.
To add an attachment to a claim
-
Click (or tap) a claim on one of the following pages:
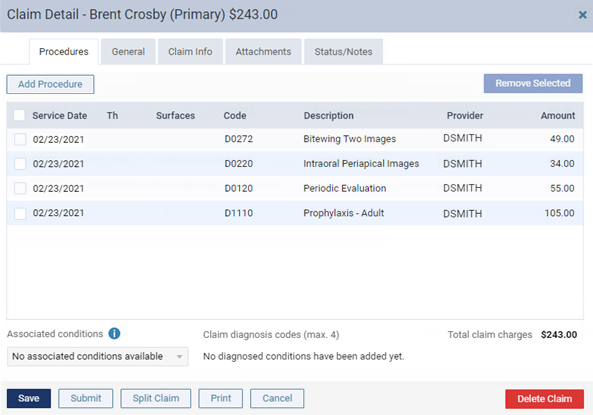
The Claim Detail dialog box appears (the appearance varies depending on the claim's status).
-
Unsent Claim:
-
Queued, Sent, or Printed Claim:

-
-
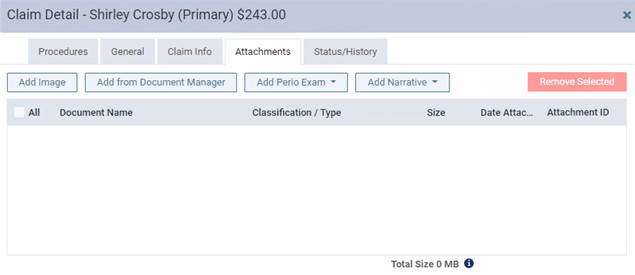
Click (or tap) the Attachments tab.
The options for adding attachments become available.
Note: To reduce delays or non-payments from insurance carriers, Dentrix Ascend alerts you when, according to NEA guidelines, supporting documentation is recommended for any procedures on a claim. An orange warning icon and a message with the applicable procedures and recommended attachment types appear when claim attachments are recommended. For a secondary (or tertiary or quaternary) insurance claim, a warning message includes a recommendation to attach the EOBs from the corresponding primary (and/or secondary and/or tertiary) claims before submitting the secondary (or tertiary or quaternary) claim.

You can ignore a warning and submit the claim without the recommended attachments.
Important: Ignore an attachment recommendation only if you are certain that the payer does not require supporting documentation for the procedure.
-
Do any of the following:
-
Add the patient's images from Dentrix Ascend Imaging.
Do the following:
-
Click (or tap) Add Image. This button is available only if the payer for this claim is a supported carrier (a carrier that was added to your practice database from the list of supported carriers that Henry Schein maintains; the payer ID of an unsupported carrier is 06126).
The Add from Imaging dialog box appears.
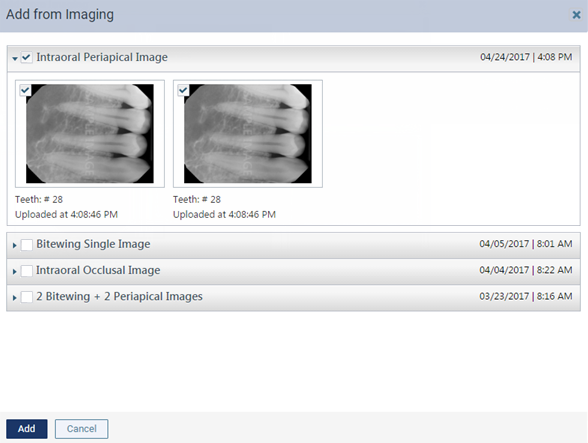
-
Click (or tap) a procedure with the correct date of service to view the corresponding images. Select the checkbox next to the procedure name to attach all the images in that section to the claim, or individually select the checkboxes of images that you want to attach to the claim. Repeat this process as needed.
Notes:
-
If all the images for a given procedure (such as a full mouth series) are selected, they are attached to the claim as a single image with a resolution of 1920 x 1080.
-
The applicable tooth numbers and date of each selected image are included.
-
-
Click (or tap) Add.
-
-
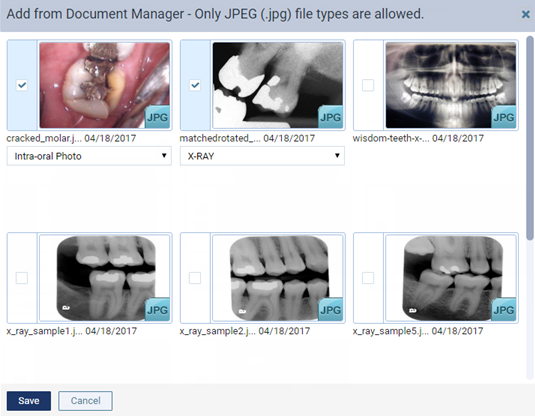
Add images and/or .pdf files from the patient's document manager.
Do the following:
-
Click (or tap) Add From Document Manager. This button is available only if the payer for this claim is a supported carrier (a carrier that was added to your practice database from the list of supported carriers that Henry Schein maintains; the payer ID of an unsupported carrier is 06126).
The Add From Document Manager dialog box appears.
-
Select the checkboxes of the images and/or .pdf files that you want to attach to the claim.
Note: Each page of a .pdf file counts as one attachment. In the example below, there are six attachments (one for the .jpg file, and five for the .pdf file).

-
Select a classification/type for each selected image.
Tip: If necessary, you can change the classification/type later by selecting a different option from the Classification/Type list on the Attachments tab.
-
Click (or tap) Save.
-
-
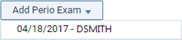
Add the patient's perio exam.
Do the following:
-
Click (or tap) Add Perio Exam to view a menu that lists the dates of the patient's perio exams. This button is available only if the patient has perio exams entered in his or her record and if the payer for this claim is a supported carrier (a carrier that was added to your practice database from the list of supported carriers that Henry Schein maintains; the payer ID of an unsupported carrier is 06126).
-
Click (or tap) the date of the perio exam that you want to attach to the claim.
-
-
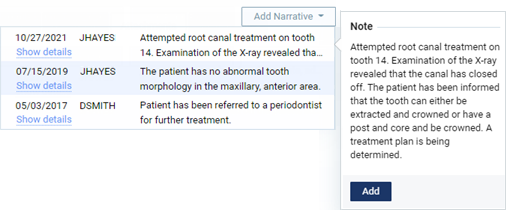
Add narratives from the patient's clinical notes.
Do the following:
-
Click (or tap) Add Narrative to view a menu that lists the patient's clinical notes. This button is available only if the patient has clinical notes entered in his or her record and if the payer for this claim is a supported carrier (a carrier that was added to your practice database from the list of supported carriers that Henry Schein maintains; the payer ID of an unsupported carrier is 06126).
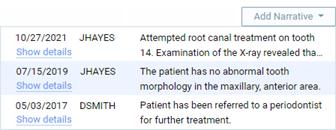
Note: You can click a clinical note's Show details link to view the entire note.
-
Click (or tap) the clinical note that you want to attach as a narrative to the claim.
Note: Alternatively, if you are viewing the details of a note that you want to attach, in the Note pop-up box, click Add to attach that narrative.
-
After attaching the narrative, to see it exactly as the insurance carrier will see it, click (or tap) that narrative's Document Name, which is a link. The image opens in a new browser tab.

-
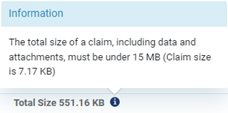
Note: The total claim size (claim data and attached files) must be smaller than 15 MB. You cannot submit the claim if the size is 15 MB or larger. For your reference, the Total Size appears below the list of attachments on the Attachments tab.
To view the size of the claim itself, click the "i" icon.
-
-
Do one of the following:
-
To save and close the dialog box, click (or tap) Save and then Cancel.
-
To save the changes and submit the claim, click (or tap) Submit.
-
Sending claims
Sending claims
You can send claims that were created previously but not submitted to insurance carriers.
Notes:
-
The clearinghouse processes claims every four hours, from 5:00 AM to 5:00 PM (Mountain time), Monday through Friday.
-
Sending claims requires the "Send Insurance Claims" security right.
To send claims
Do one of the following:
-
For one or more patients
-
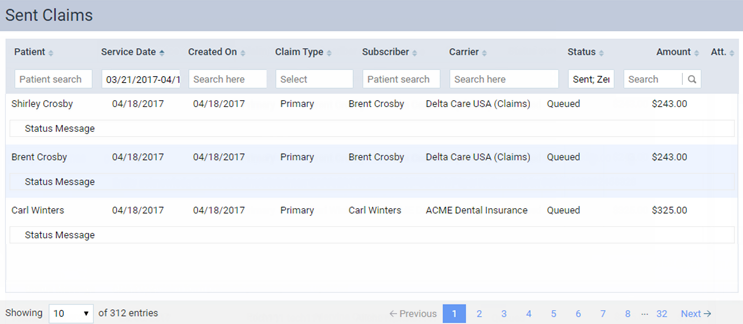
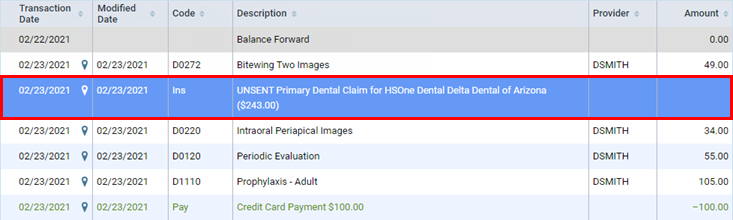
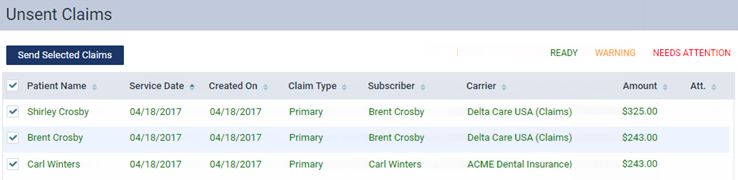
On the Unsent Claims page, select the checkbox of the claims that are ready to be sent. Claims displayed in the color green have a Ready status (all required information is present on the claim).
Notes:
-
By default, the claims are sorted by service date (oldest to newest), by patient last name (alphabetically), and then by amount (largest to smallest). You can click (or tap) any column header to sort the list by that column in ascending order and then click (or tap) the same column header again to sort the list by that column in descending order.
-
You can click (or tap) the Go to Ledger link under a patient's name to open that patient's Ledger page on a new browser tab.
Important: Fix the problems for claims with a yellow Warning status (information is missing from the claim but might not be required) and/or a red Needs Attention status (required information is missing from the claim) before attempting to submit the corresponding claims. To view and edit claim details, click (or tap) a claim.
Note: To reduce delays or non-payments from insurance carriers, Dentrix Ascend alerts you when, according to NEA guidelines, supporting documentation is recommended for any procedures on a claim. For a secondary (or tertiary or quaternary) insurance claim, a warning message includes a recommendation to attach the EOBs from the corresponding primary (and/or secondary and/or tertiary) claims before submitting the secondary (or tertiary or quaternary) claim.
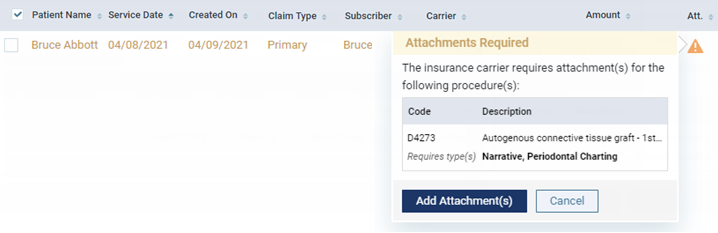
An orange warning icon appears in a claim's Att. column when claim attachments are recommended. To see the applicable procedures and recommended attachment types, click the warning icon. In the pop-up message that appears, you can click Add Attachment(s) to open the claim so you can add attachments.
You can ignore a warning and submit the claim without the recommended attachments.
Important: Ignore an attachment recommendation only if you are certain that the payer does not require supporting documentation for the procedure.
-
-
Click (or tap) Send Selected Claims.
-
-
For a specific patient
-
On one of the following pages, click (or tap) a claim with a status of Unsent:
The Claim Detail dialog box appears.
Note: For an electronic claim submission, Dentrix Ascend transmits separate service lines for identical procedures on the same claim. For the known carriers, such as Medicaid and Blue Cross/Blue Shield, that require a single line with a quantity value for identical procedures on the the same claim, claims are processed accordingly through the clearinghouse. If you receive a notice from a payer, stating that a quantity value is required for identical procedures, contact Dentrix Ascend Customer Support with that information so the needed functionality can be provided.
-
Click (or tap) Submit.
Note: This button is available only if the current location has an eTrans user ID, which is required for sending electronic claims.
-