Adding and editing referrers
Referrers are professional, personal, patient, and marketing (such as an advertisement in the phone book or on the internet) referral sources you can create and maintain profiles for. You can add and edit referral source profiles as needed.
To add or edit a referrer
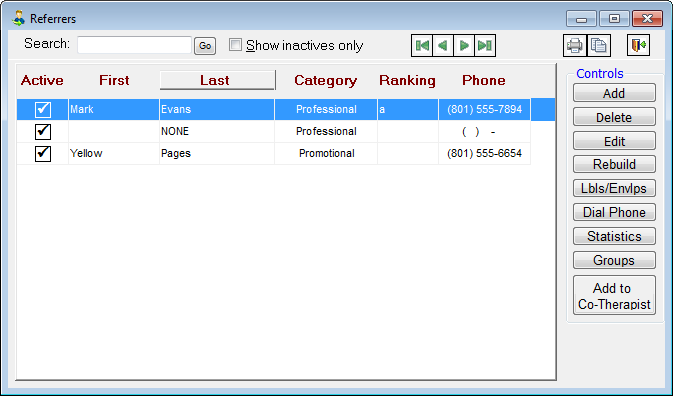
From the File menu, click Referrers.
The Referrers window appears.
Do one of the following:
To add a referrer, click Add.
To edit an existing referrer, select a referrer, and then click Edit.
Tip: If the provider you want to access is inactive, select the Show inactives only check box to view only inactive referrers.
The Edit Referrer dialog box appears.
If the referrer you are creating a record for is an existing patient, from the Other section on the left pane, click the Create From Patient link to select the patient and create a referrer record using information from that patient's record.
Set up the options on each tab:
Main tab:
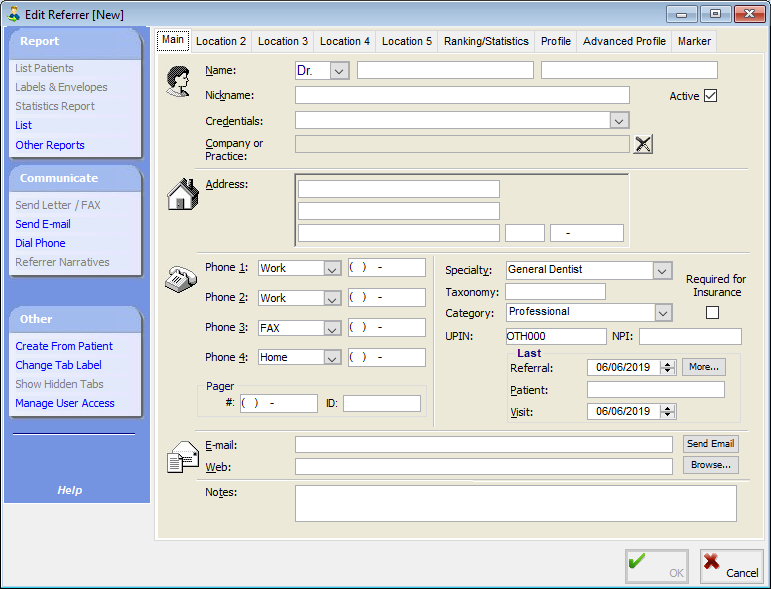
The Main tab stores general information about the referrer and the referrer's location:
Name – Select a prefix. Type the referrer's first and last name, or type the name of the advertisement or marketing campaign. Each field has a limit of 20 characters.
Active - This check box is selected by default when adding a referrer. To make a referrer inactive, clear the check box. The referrer's status can change automatically, according to a preference setting.
Nickname - Type a nickname (informal name) for the referrer. This field has a limit of 30 characters.
Company or Practice – To attach the name of the company or practice this referrer is associated with, double-click the field to select and paste in the appropriate referrer group.
Tip: When you click Paste, if the referrer group includes address and phone number information not yet added to the new referrer, you will be asked if you want to update the referrer's existing address/phone data. If you click yes, the address and phone information from the referrer group is added to the new referrer.
Note:
You can click the delete button ![]() next to the Company or Practice field to clear any previous selection.
next to the Company or Practice field to clear any previous selection.
By default, the group selected on the Main tab is entered automatically on the Location tabs. However, you can select a different referrer group for each Location tab (for example, a doctor might work at three locations, which correspond to three different companies or practices, so you would select different groups on the Main, Location 2, and Location 3 tabs).
Address – Type the referrer's street address, city, state, and ZIP Code. You can type the ZIP Code and press the Tab key to automatically populate the city and state fields. These fields each have a limit of 40 characters.
Phone 1-4 – Use the drop-down list to specify the phone number type, and then type the referrer's phone number(s).
Specialty – Select the referrer's specialty. If the referrer does not have a specialty, open the list, and then press the Delete key to clear the selection.
Tip: You can filter reports according to referrers' specialties.
Category – Select whether the referrer is a Professional, Personal, or Promotional (marketing) referral source.
UPIN - Type the referrer's UPIN.
NPI - Type the referrer's NPI.
Last - See "Viewing the last referral" for information on reviewing referrals.
E-mail – Type the referrer's email address. This field has a limit of 40 characters.
Tip: You can click Send Email to send the referrer an email.
Web – Type the referrer's website address. This field has a limit of 30 characters.
Tip: You can click Browse to open your default Internet browser to the specified address.
Notes – Type any notes regarding the referrer.
Profile tab:
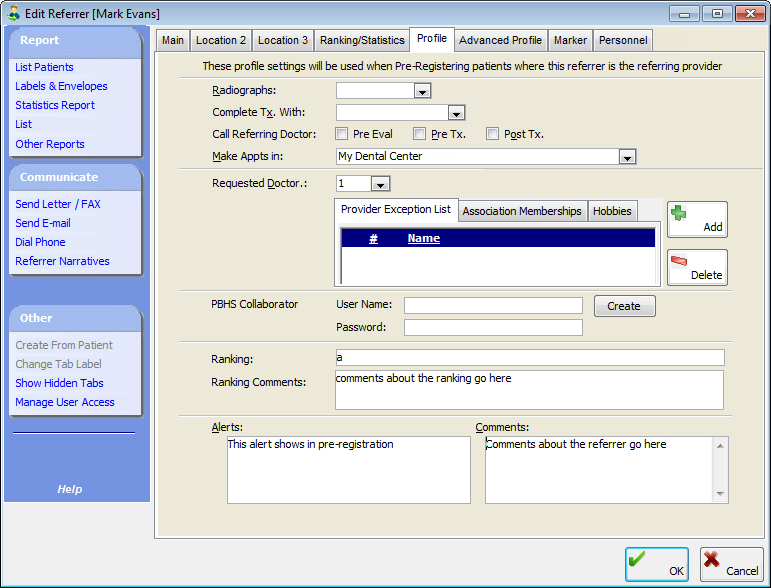
The Profile tab stores the settings that will be used when pre-registering patients that have this referrer attached.
Radiographs - Select a status for the patient's X-rays: Bringing, Sent, Needs, Call G.P., Not Needed, blank, or Have.
Complete Tx - Select the option that corresponds to the way the referrer usually prefers to have the procedure finished: Temporize, Post Space, Post, Pre-Fabricated, Post & Core, Cast, Crown Buildup w/Pins, Buildup, Not Applicable, or blank.
Call Referring Doctor - Select when the referrer prefers to be called relative to the treatment: Before Tx. and/or After Tx.
Make Appts in - Select the location at which the referrer prefers to have appointments made.
Requested Doctor - Select the provider who a referring doctor prefers his or her patients to see.
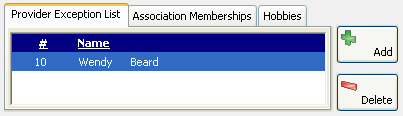
Provider Exception List - This tab is selected by default. To exclude a provider that a referring doctor does not want his or her patients to see, click Add to select and paste in a provider. To remove a provider from the list, select the provider, and then click Delete.
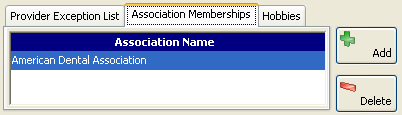
Association Memberships - To add an association to the referrer, click Add to select and paste in an association. To remove an association from the list, select the association, and then click Delete.
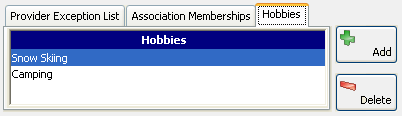
Hobbies - To add a hobby to the referrer, click Add to select and paste in a hobby. To remove a hobby from the list, select the hobby, and then click Delete.
Ranking - You can rank referrers for tracking and reporting purposes. Type a letter or number in the Ranking field. The default value for the field is determined by a preference setting. Type any comments about the ranking in the Ranking Comments field.
Note: You can view statistics for the referrer on the Ranking/Statistics tab.
Comments - Type any comment regarding the referrer. The comments can appear during the pre-registration process.
Alerts - Type the text you want to appear in a message that appears when attaching a general dentist to a pre-registered patient.
Advanced Profile tab:
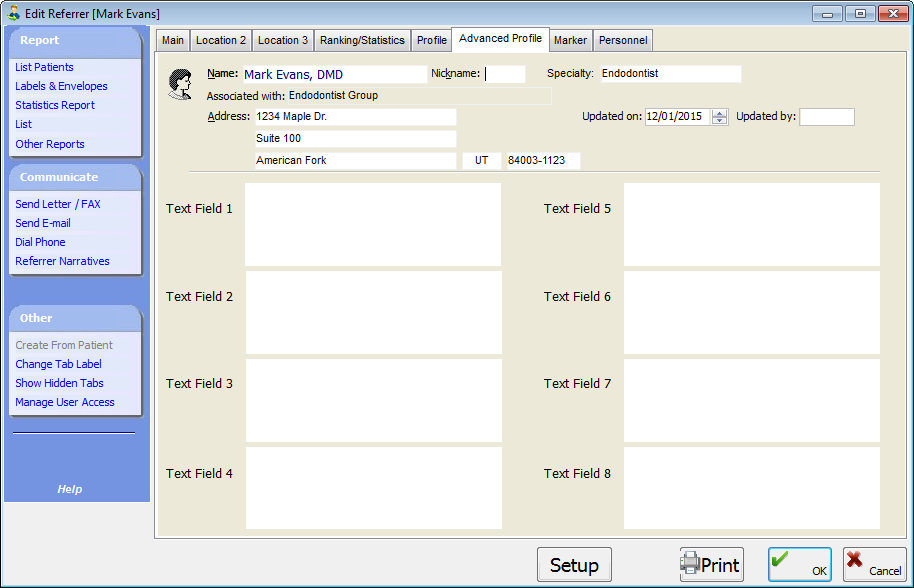
The Advanced Profile tab displays the Name, Specialty, Associated with, and Address fields from the Main tab for your reference. Also, this tab provides the following options:
Updated on - By default, the selected date is today's date, but you can double-click in the field to change that date to the correct date that the information on this tab was updated. Whenever you make changes to the text fields on this tab, the field will be updated automatically to the current date. Printing the advanced profile information does not affect the date.
Updated by - Type up to 10 characters to identify who is updating the information.
Text fields - There are eight custom fields that you can enter text in. Each field has a 600–700 character limit. As you begin typing in a text field, a formatting toolbar appears, so that you can change the font properties and modify the layout of the text.

Note: You can also have the fields populated according to the setup options (see "Setting Up Advanced Profile Defaults").
Marker tab:
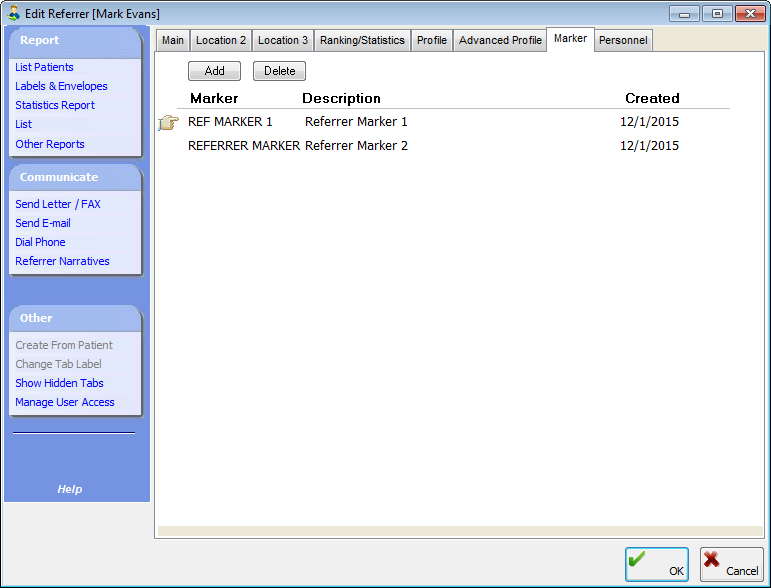
The Marker tab stores markers, which can be used for reporting and tracking purposes:
To add a marker, click Add to select and paste in a marker.
To delete a marker, select the marker, click Delete, and then click Yes on the confirmation message that appears.
Personnel tab:
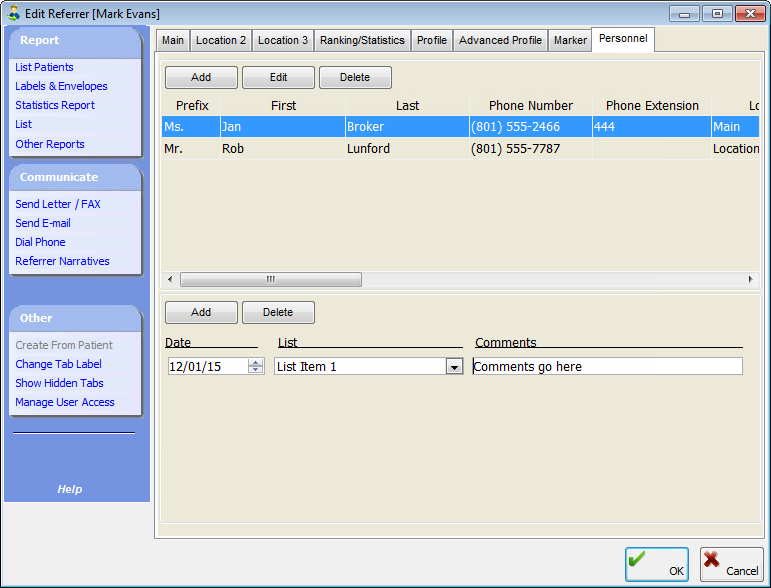
The Personnel tab stores the personnel information that work at the referrer's office (for example, a receptionist).
Note: If you are adding a new referrer, you cannot add personnel until after you save the referrer's information and re-open the Edit Referrer dialog box.
The top section on this tab provides the following options:
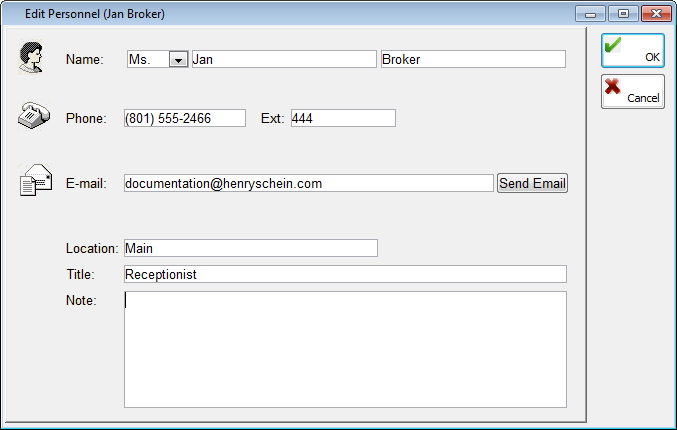
Add - Click this button to open the Edit Personnel dialog box to add personnel. Enter the Name, Phone number and extension, E-mail (you can click Send E-mail to send an email message to the specified address), and Title of the person. Also, select the Location where the person works (the locations correspond to the location tabs across the top of the Edit Referrer dialog box), and write any Notes pertinent to the person. Then, click OK to save the information.
Edit - Click this button to edit any of the information for the selected person. Then, click OK.
Delete - Click this button to delete the selected person. Click Yes on the confirmation message that appears.
The bottom section on this tab provides a way for tracking specified referrer information, such as gratuities:
Add - Click this button to add a new item. Change the Date if needed. Select a List item. Type any relevant Comments.
Edit - You can edit any of the information for an item.
Delete - Click this button to delete the selected item. Click Yes on the confirmation message that appears.
Click OK.
Need more help?
You can visit our website or contact OMSVision Customer Support.