Reviewing updated plan options from an import
If your location has an Eligibility Pro subscription, and the options for an insurance plan have been updated due to a manual import, you can review the updates and then accept or reject them.
Any of the following plan options can be affected by an import:
-
Source of payment.
-
Missing tooth clause.
-
Crown/bridges paid on.
-
Coverage percentages.
-
Coverage exceptions.
-
Required deductibles and maximum benefits.
-
Coordination of benefits methods.
Notes:
-
You can revert the updated values from an import back to their previous values within 30 days.
-
Changing information for an insurance plan affects all patients covered by that plan.
-
Changing information for an insurance plan requires the "Edit Insurance Plans" security right.
To review updated plan information
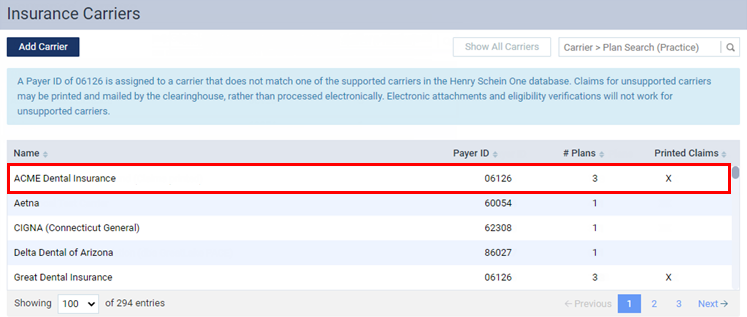
On the Home menu, under Insurance, select Carriers.
The Insurance Carriers page opens.
-
Select an insurance carrier.
Tip: To help you locate an insurance carrier quickly, in the Filter box, enter part or all of a carrier's name, plan/employer, or group number to filter the carrier list so that it displays only those carriers that match what you enter.
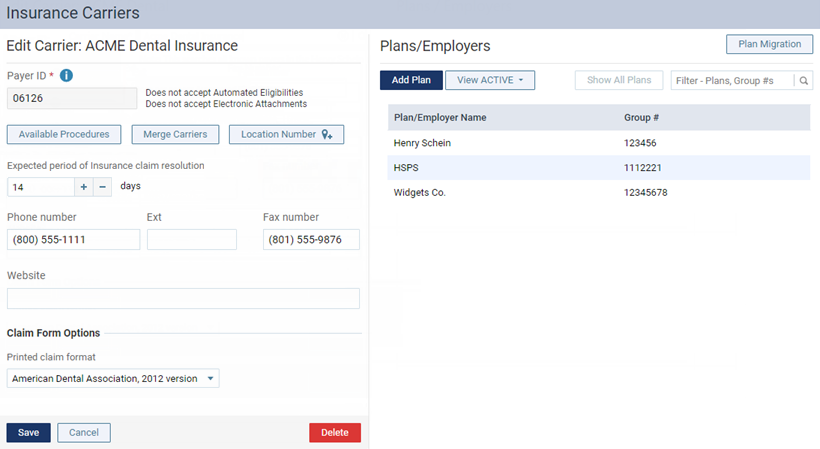
The options to edit the insurance carrier become available.
-
Under Plans/Employers, select an insurance plan.
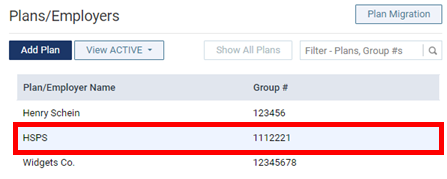
Tip: To help you locate a plan quickly, in the Filter box, enter part or all of the plan/employer name or group number to filter the plan list so that it displays only those plans that match what you enter.
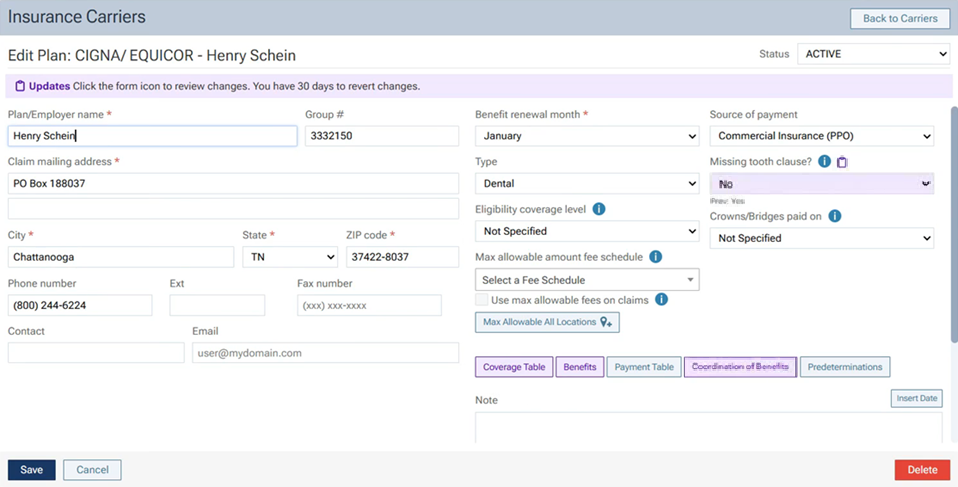
The options for editing the insurance plan become available. If any of the plan options have been updated due to an import within the past 30 days, a purple Updates notification appears, which explains that you have 30 days to revert any of the updates.
Notes:
-
If 30 days have elapsed since updates were made, the purple highlights, icons, and revert options do not appear, and the updates cannot be reviewed.
-
If a second set of updates occurs before the first set of updates is reviewed and accepted, the first updates cannot be reviewed.
-
-
Review the updates for any of the following as needed:
-
Source of payment option, missing tooth clause option, and/or crown/bridges paid on option.
If any of the following options have been updated, those options are purple and have an Update icon
 :
:-
Source of payment.
-
Missing tooth clause?.
-
Crown/bridges paid on.
To revert an individual value, click the corresponding Update (clipboard) icon. In the pop-up box, the updated and previous values appear. Click the Revert link. Repeat this for any other updated value that you want to revert.
Note: Reverted values will not be saved until you click (or tap) Save. However, be aware that clicking (or tapping) Save accepts not only the updates to the plan options (source of payment, missing tooth clause, and crown/bridges paid on date) and the coordination of benefits methods but also any updates to the required deductibles, maximum benefits, coverage percentages, and/or coverage exceptions. Make sure you review those updates and revert any values as needed before you click (or tap) Save. Once you click (or tap) Save, the purple notification and revert options disappear.
-
-
Coverage percentages and/or coverage exceptions.
If the coverage percentages and/or coverage exceptions have been updated, the Coverage Table button is purple. Do the following:
-
Click (or tap) Coverage Table.
The Coverage Table for [Plan Name] dialog box appears.
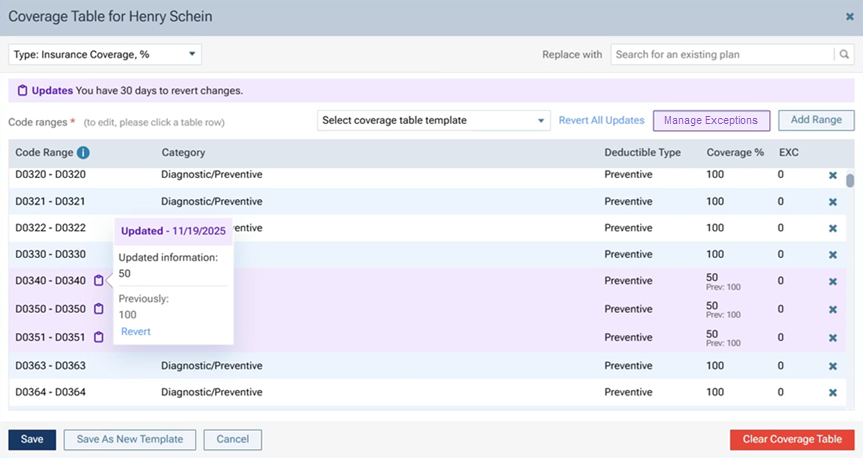
When there are updates that need to be reviewed and accepted, the following appear:
-
A purple Updates notification appears at the top.
-
If coverage exceptions have been updated, the Manage Exceptions button is purple.
-
If the coverage percentages have been updated, each range that has been updated is purple and has an Update icon
, and the previous value appears below the updated value in the Coverage % column.
-
-
If the coverage percentages have been updated, do one of the following:
-
To revert an individual value, click (or tap) the corresponding Update (clipboard) icon. In the pop-up box, the updated and previous values appear. Click (or tap) the Revert link. Repeat this for any other updated value that you want to revert.
-
To revert all values, click the Revert All Updates link in the upper-right corner.
-
To close the dialog box without accepting any changes, click (or tap) Cancel.
Note: Be aware that clicking (or tapping) Save accepts not only the percentage updates but also any exception updates (if applicable for the import), so make sure you review those updates and revert any values as needed before you click (or tap) Save.
-
-
If the coverage exceptions have been updated, click (or tap) Manage Exceptions.
The Manage Exceptions for [Plan Name] dialog box appears.
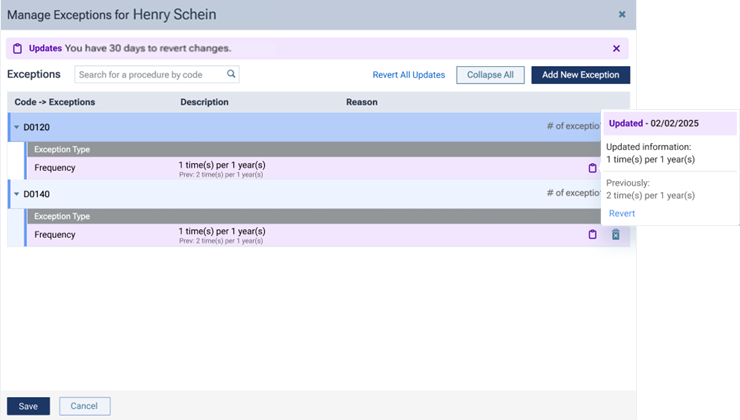
When there are updates that need to be reviewed and accepted, the following appear:
-
A purple Updates notification appears at the top.
-
Each range that has been updated is purple and has an Update icon
, and the previous value appears below the updated value in the Description column.
-
-
Do one of the following:
-
To accept all the updated values, click (or tap) Save.
-
To revert an individual value, click (or tap) the corresponding Update (clipboard) icon. In the pop-up box, the updated and previous values appear. Click (or tap) the Revert link. Repeat this for any other updated value that you want to revert. Then, click (or tap) Save to save the reverted values and accept all the updated values that were not reverted.
-
To revert all values, click the Revert All Updates link in the upper-right corner. Then, click (or tap) Save to accept the reverted values.
-
To close the dialog box without accepting any changes, click (or tap) Cancel.
If you click (or tap) Save, the purple notification and revert options disappear from the Manage Exceptions for [Plan Name] dialog box; in the Coverage Table for [Plan Name] dialog box, the purple notification disappears if there are no coverage percentage updates from the import that need to be reviewed, and the Manage Exceptions button is no longer purple; also, on the Edit Plan page, the purple notification disappears if there are no other updates from the import that need to be reviewed, and the Coverage Table button is no longer purple.
-
-
In the Coverage Table for [Plan Name] dialog box, click (or tap) Save to save any reverted values and accept all the updated values that were not reverted.
Note: Be aware that clicking (or tapping) Save accepts not only the percentage updates but also any exception updates (if applicable for the import), so make sure you review those updates and revert any values as needed before you click (or tap) Save.
If you click Save, the purple notification and revert options disappear from the Coverage Table for [Plan Name] dialog box, and the Manage Exceptions button is no longer purple if it was before; also, on the Edit Plan page, the purple notification disappears if there are no other updates from the import that need to be reviewed, and the Coverage Table button is no longer purple.
-
-
Required deductibles and maximum benefits.
If the required deductibles and maximum benefits have been updated, the Benefits button is purple. Do the following:
-
Click (or tap) Benefits.
The Deductibles and Benefits dialog box appears.
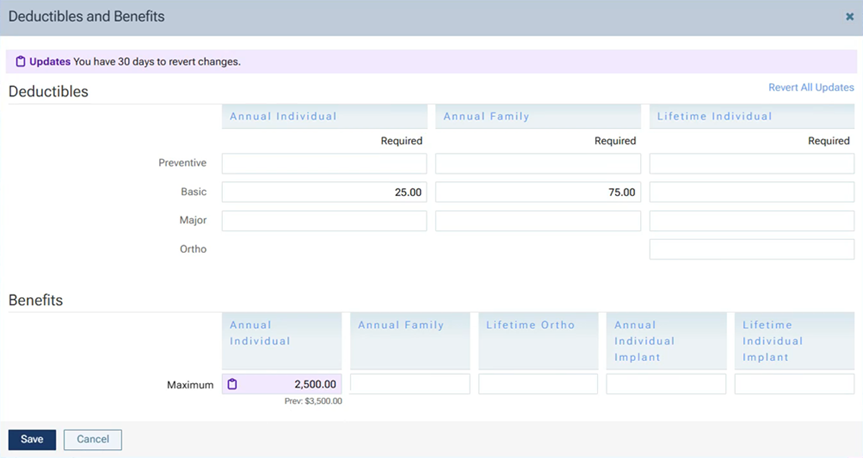
When there are updates that need to be reviewed and accepted, the following appear:
-
A purple Updates notification appears at the top.
-
For each updated value, the box is purple and has an Update icon
, and the previous value appears below the box.
-
-
Do one of the following:
-
To accept all the updated values, click (or tap) Save.
-
To revert an individual value, click (or tap) the corresponding Update (clipboard) icon. In the pop-up box, the updated and previous values appear. Click (or tap) the Revert link. Repeat this for any other updated value that you want to revert. Then, click (or tap) Save to save the reverted values and accept all the updated values that were not reverted.
-
To revert all values, click (or tap) the Revert All Updates link in the upper-right corner. On the confirmation message that appears, click (or tap) Yes. You are returned to the Deductibles and Benefits dialog box. To accept the reverted values, click (or tap) Save.
-
To close the dialog box without accepting any changes, click (or tap) Cancel.
If you click (or tap) Save, the purple notification and revert options disappear from the Deductibles and Benefits dialog box; also, on the Edit Plan page, the purple notification disappears if there are no other updates from the import that need to be reviewed, and the Benefits button is no longer purple.
-
-
-
Coordination of benefits methods.
If the coordination of benefits methods have been updated, the Coordination of Benefits button is purple. Do the following:
-
Click (or tap) Coordination of Benefits.
The Coordination of Benefits for [Plan Name] dialog box appears.
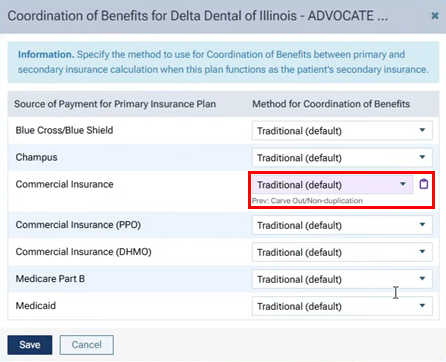
For each updated value, the list box is purple and has an Update icon
, and the previous value appears below the list box. -
To revert an individual value, click (or tap) the corresponding Update (clipboard) icon. In the pop-up box, the updated and previous values appear. Click (or tap) the Revert link. Repeat this for any other updated value that you want to revert. Then, click (or tap) Save.
Notes:
-
Reverted values will not be saved and updated values that were not reverted will not be accepted until you click (or tap) Save on the Edit Plan page.
-
To close the dialog box without accepting any changes, click (or tap) Cancel.
-
-
-
-
Do one of the following:
-
To save any reverted values and accept all the updated values that were not reverted, click (or tap) Save.
-
To close the page without accepting any updated and reverted values that have not already been accepted, click (or tap) Cancel.
If you click (or tap) Save, the purple notification and revert options disappear.
-