Online booking overview and workflow
The online booking feature allows new and existing patients to book recare and other types of appointments online.
Pre-requisites for using online booking
-
Recare patient communications. Patients receive email and text message reminders with the option to book online.
-
No roaming providers. Providers must be assigned to always work in certain operatories. Online booking offers open time slots to a patient based on which operatories providers can be scheduled in.
Setting up online booking
-
Set up or modify recare types. Ensure that the intervals and attached procedures are correct and that the Primary Recare Type checkbox is selected.
-
For each location, verify that the information is correct, and upload a logo. These will be seen by patients.
-
For each provider, verify that his or her user information is correct, and upload a photo. These will be seen by patients.
-
For each location, set up the appointment reasons for online booking.
-
For each location, set up the default appointment lengths for online booking.
-
For each location, set up the available hours for online booking.
-
For each location, enable online scheduling, or upgrade to the new online scheduler.
-
For each location, set up or modify patient communications. Ensure that there is at least one active recare email reminder. In the sample email messages for your active recare email reminders, you should see a Book Now button.
-
For each location, enable the ASAP option for appointments booked online.
-
On the website for each of your locations, use the HTML provided by Dentrix Ascend to include a link to the online booking website for that location.
Tip: To view your progress with getting a location completely set up for online booking, with the correct location selected, select the Schedule Template option on the Settings menu to open that location's Schedule Template page, and then click (or tap) Online Utilization.
Workflow for booking from an email or a text message reminder (existing patient)
-
When the patient or the patient's representative receives an email or a text message reminder regarding booking a recare appointment, he or she clicks (or taps) Book Now (for an email message) or the link (for a text message).
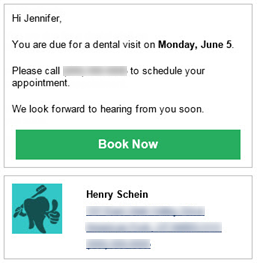
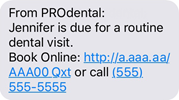
The online booking website opens.
-
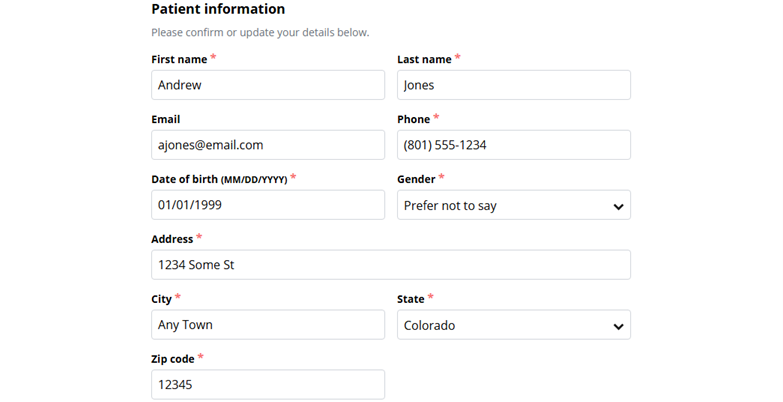
The person confirms the details of the patient whom the appointment is for and enters any missing information.
-
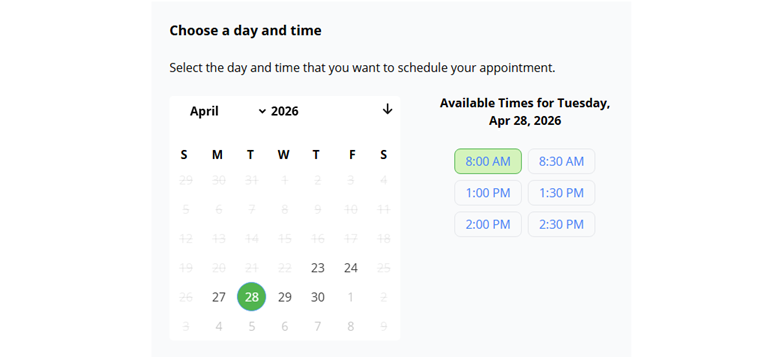
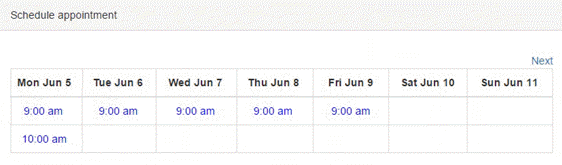
The person selects the desired date to view the available appointment time slots (if any) and then selects the desired time slot.
Notes:
-
Open times that don't conflict with appointments and events that are already scheduled appear.
-
Open times that are at least as long as the default appointment length for the appointment (based on the recare appointment type, new patient appointment reason, or existing patient appointment reason) appear.
-
When you create, move, or delete an appointment or event, the change is published to online booking within 30 seconds.
-
When you inactivate a provider or an operatory, it is purged immediately from online booking, and the corresponding hours are removed from the available hours setup.
-
Nightly, online booking automatically searches for openings for the next several months.
-
Changes to online booking hours is published nightly.
-
Office hours are not taken into account.
-
-
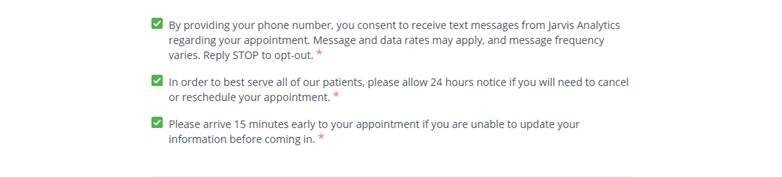
The person selects each of the following checkboxes:
-
Add me to the ASAP List for a sooner appointment if a time slot opens up (if he or she wants his or her appointment to be added to the ASAP list and contacted if an earlier time slot becomes available)
Note: This checkbox is available only if the ASAP option was enabled for the location.
-
By providing your phone number, you consent...
-
In order to best serve our patients, please all 24 hours notice...
-
Please arrive 15 minutes early...
-
-
The person clicks (or taps) Book Appointment.

The appointment request is submitted.
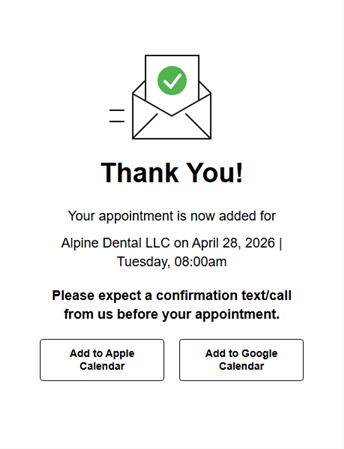
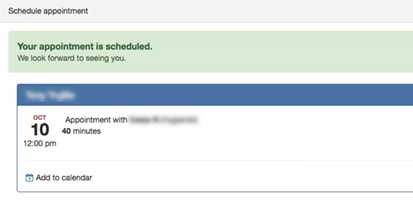
When the submission is complete, a thank you message appears.
Workflow for booking from a link on your website (new or existing patient)
-
When the patient or the patient's representative visits your location's website, he or she clicks (or taps) the link to book an appointment online.
The online booking website opens.
-
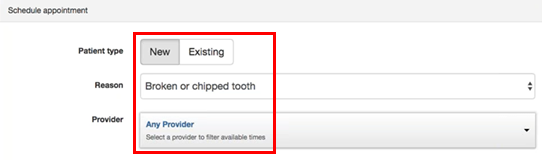
The person selects whether the appointment is for a New Patient (a prospective patient) or an Existing Patient (a patient of record).

-
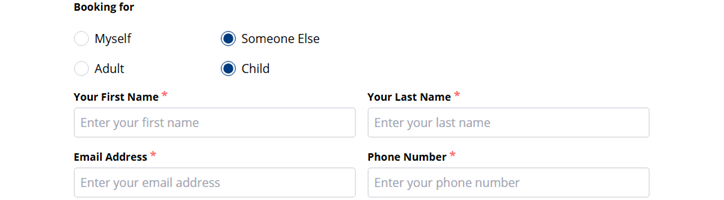
The person selects whom the appointment is for: Myself (the patient is completing the booking) or Someone Else (the patient's representative is completing the booking).
-
The person selects whether the appointment is for an Adult or a Child.
-
If Someone Else is selected, the person completing the booking enters his or her name (Your First Name and Your Last Name), Email Address, and Phone Number.
-
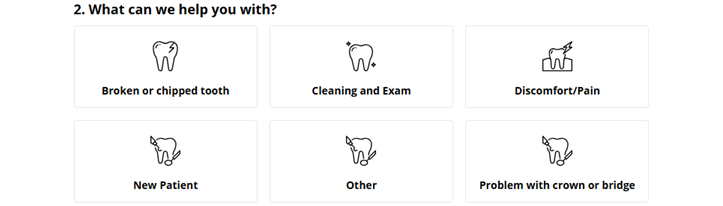
The person selects the reason for the appointment. The available reasons may vary according to the specified patient type (new or existing).
The available appointment time slots (if any) appear based on which time blocks allow online booking for the specified patient type (new or existing) and appointment reason.
Notes:
-
Open times that don't conflict with appointments and events that are already scheduled appear.
-
Open times that are at least as long as the default appointment length for the appointment (based on the recare appointment type, new patient appointment reason, or existing patient appointment reason) appear.
-
When you create, move, or delete an appointment or event, the change is published to online booking within 30 seconds.
-
When you inactivate a provider or an operatory, it is purged immediately from online booking, and the corresponding hours are removed from the available hours setup.
-
Nightly, online booking automatically searches for openings for the next several months.
-
Changes to online booking hours is published nightly.
-
Office hours are not taken into account.
-
-
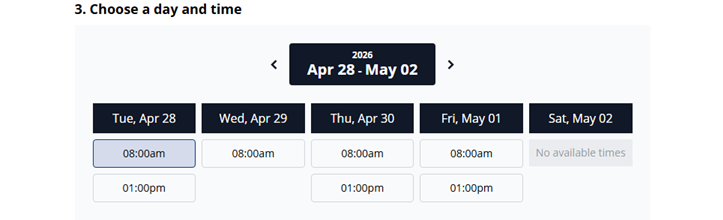
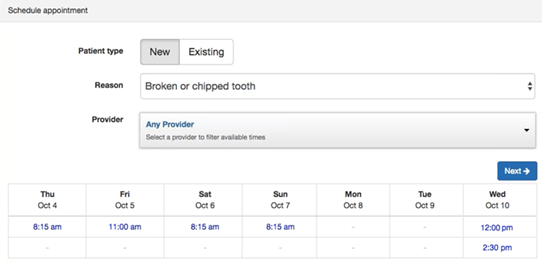
The person locates the desired date and then selects the desired time slot.
-
The person clicks (or taps) Next.

-
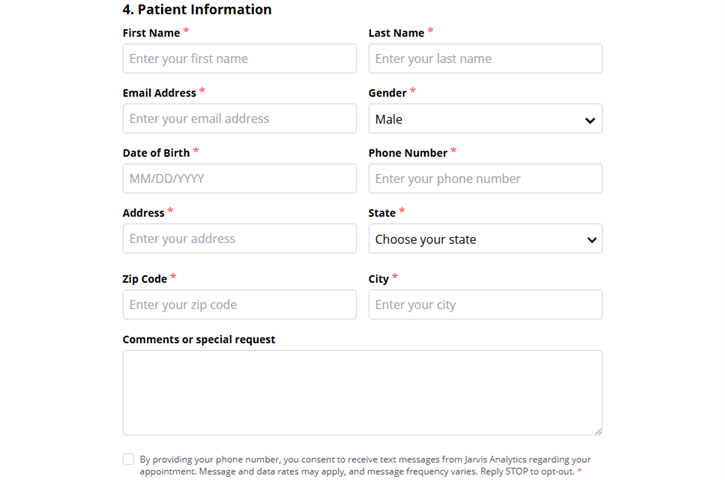
The person enters the following information for the patient (the person whom the appointment is for): First Name, Last Name, Email Address, Gender, Date of Birth, Phone Number, Address, State, Zip Code, and City. Optionally, the person can enter comments or a request in the Comments or special request box; those will be added as a note to the appointment.
-
The person selects the Add me to the ASAP List for a sooner appointment if a time slot opens up checkbox if he or she wants his or her appointment to be added to the ASAP list and contacted if an earlier time slot becomes available.
Note: This checkbox is available only if the ASAP option was enabled for the location.
-
The person selects the By providing your phone number, you consent to receive text messages... checkbox.
-
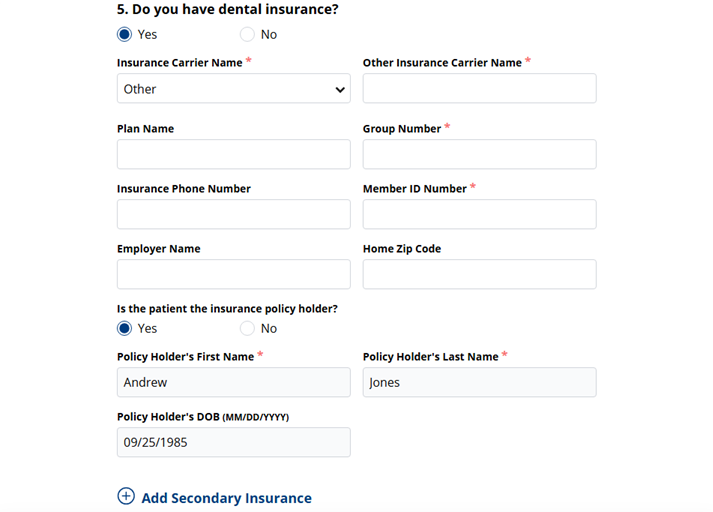
For the question regarding dental insurance, if the patient has insurance, the person selects Yes. If the patient does not have insurance, the person leaves No selected.

-
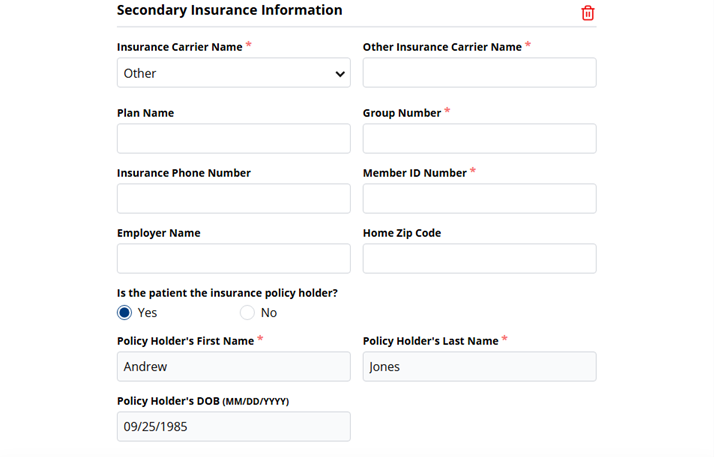
If Yes is selected, the person enters the primary insurance plan information.
-
If the patient has secondary dental insurance, the person clicks (or taps) Add Secondary Insurance and then enters the secondary insurance plan information.
-
The person clicks (or taps) Book Appointment.

The appointment request is submitted.

When the submission is complete, a thank you message appears.

Workflow for booking using the legacy online booking service (patient)
Note: These steps are relevant only if your practice has not upgraded to the new online scheduler.
-
The patient does one of the following:
-
If booking from an email or a text message reminder (recare):
-
When the patient receives an email or a text message reminder, he or she clicks (or taps) Book Now (for an email message) or the link (for a text message).
The patient is taken to the online booking website and sees available times for dates spanning from the recare due date to two months after.
-
-
If booking from a link on your website (new or existing patient):
-
When the patient of record or a prospective patient visits your location's website, he or she clicks the link to book an appointment online.
The patient is taken to the online booking website.
-
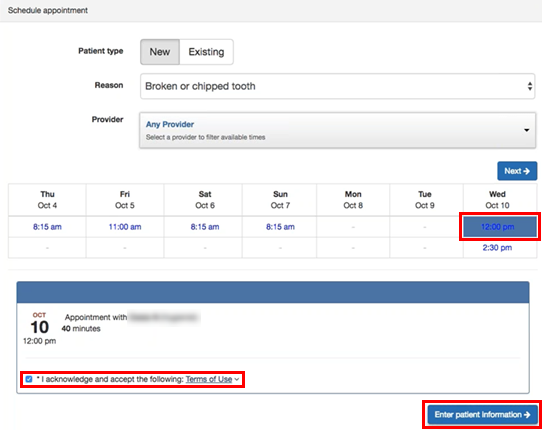
The patient selects whether he or she is a prospective patient (New) or a patient of record (Existing). The patient selects an appointment Reason and a Provider (if known, and the patient has a preference).
The available appointment time slots (if any) appear based on which time blocks allow online booking for the specified Patient type, Reason, and Provider.
-
Notes:
-
Open times that don't conflict with appointments and events that are already scheduled appear.
-
Open times that are at least as long as the default appointment length for the appointment (based on the recare appointment type, new patient appointment reason, or existing patient appointment reason) appear.
-
Within a time block, for each open space of time that can fit multiple appointments (based on the default appointment lengths associated with those appointments), Dentrix Ascend offers only the first available time slot (if the Only show first available slot switch is set to On for the location's online booking settings). For example:
-
A patient is trying to schedule a 60-minute appointment.
-
You have openings from 8:00 AM to 11:00 AM and from 1:00 PM to 2:00 PM in the applicable time block.
-
The patient will see availability only for 8:00 AM and 1:00 PM.
-
After the patient takes the 8:00 AM time slot, the next patient will see availability only for 9:00 AM and 1:00 PM.
-
-
When you create, move, or delete an appointment or event, the change is published to online booking within 30 seconds.
-
When you inactivate a provider or an operatory, it is purged immediately from online booking, and the corresponding hours are removed from the available hours setup.
-
Nightly, online booking automatically searches for openings for the next several months.
-
Changes to online booking hours is published nightly.
-
Office hours are not taken into account.
-
-
The patient does one of the following:
-
If booking from an email or a text message reminder (recare):
-
The patient selects an available time slot and then clicks (or taps) Book now.
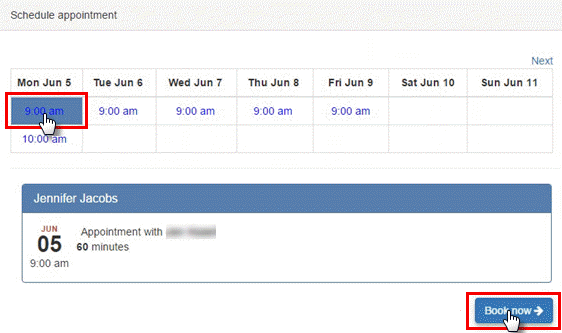
Within 30 seconds, the patient is informed that the appointment has been booked or, if there is an error, to call the office.
If an "appointment scheduled" patient communication has been set up, the patient will receive that notification.
-
-
If booking from a link on your website (new or existing patient):
-
The patient selects an appointment time, selects the I acknowledge and accept the following: Terms of Use checkbox, and then clicks (or taps) Enter patient information.
-
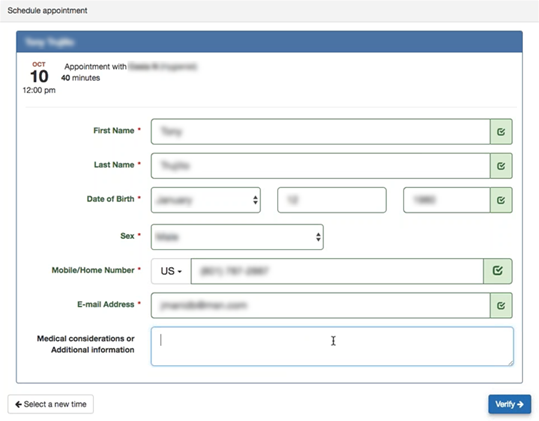
The patient enters his or her name, birth date, phone number, and email address; optionally types comments for the office; and then clicks (or taps) Verify.
-
Dentrix Ascend sends the patient an email message with a verification code, which the patient must enter to finish booking the appointment.
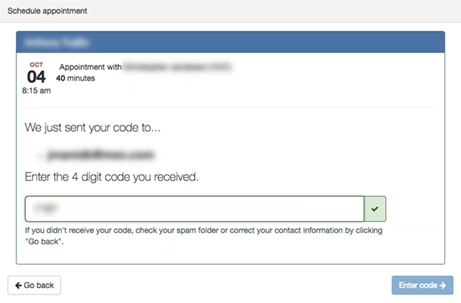
Within five minutes, the patient is informed that the appointment has been booked or, if there is an error, to call the office.
If an "appointment scheduled" patient communication has been set up, the patient (even if he or she is a new patient) will receive that notification.
-
-
Workflow for handling appointments booked online (office)
Identify and verify information for appointments that were booked online:
-
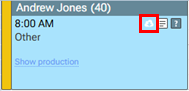
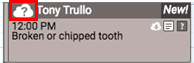
The appointment tile has a booked online (cloud) symbol to indicate that it was booked online by the patient.
Tip: You can also identify appointments that were booked online by generating the Appointments Booked Online Report.
-
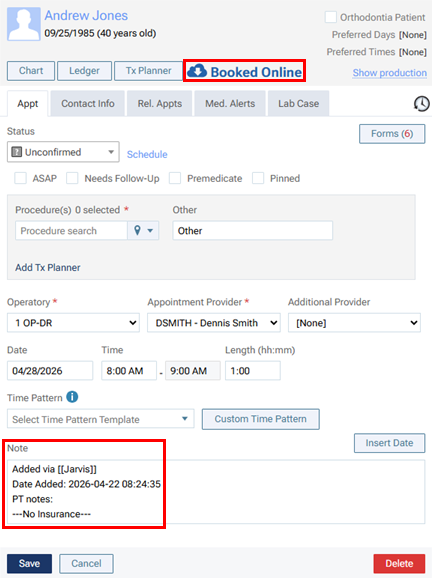
On the Appointment Information panel, the appointment has the "Booked Online" text and symbol in the upper-right corner. Also, the appointment has a note that the appointment was booked online by the patient and when it was booked. It also includes any comments from the patient. Additionally, if the ASAP option was selected when the patient booked the appointment online, the ASAP checkbox is selected to indicate that the appointment is on the ASAP list.
-
On the Appointment Information panel, the appointment has an Unconfirmed status.

-
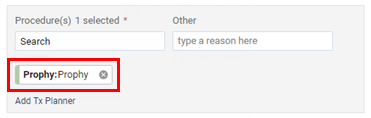
On the Appointment Information panel, the appointment has a recare procedure attached (recare appointments from email and text message reminders only).
-
On the Appointment Information panel, the appointment reason appears in the Other box (new patient or existing patient appointments from website links only).

-
If the patient for the appointment appears to be new or is not a perfect match for an existing patient on record, Dentrix Ascend asks you to verify the patient. When verification is needed, a symbol appears in the upper-left corner of the appointment tile to indicate that the booking needs to be assigned to a patient.
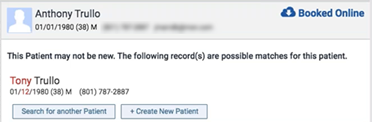
To finalize the patient assignment, click (or tap) the appointment tile to view the appointment information, and then do one of the following:
-
Click (or tap) one of the possible matches (if any are listed; up to two may be listed). Text and numbers in red indicate the differences between what is in Dentrix Ascend and what the patient entered online.
Note: If your organization has multiple locations, Dentrix Ascend shows possible matches only for patients whose preferred location is a location that your user account has access to.
-
Click (or tap) Search for another Patient to view additional matches or to use the search box to find the correct patient.
-
Click Create New Patient to create a new patient record and keep the patient's information attached to the appointment.
-
Note: Each time a patient books an appointment online, a corresponding entry is added to the audit log.