Configuring online booking links
Each of your locations has its own online booking website. On each of your locations' websites, you can include a link to that specific location's online booking website. Dentrix Ascend provides you with a way to quickly get the necessary HTML code for these links and to activate Reserve with Google (available only for practices with a Pro or Accelerate subscription to Dentrix Ascend).
Notes:
-
When you enable online scheduling or upgrade to the new online scheduler, be sure to communicate with your website manager that he or she will need to assist you in configuring or updating the booking links or widget on your website. More information about that process can be found here: https://scheduler-doc.jarvisanalytics.com/docs/installation/quick-start.
-
When you upgrade to the new online scheduler, recare text messages are updated automatically with the new booking links.
-
Online booking links are location specific (each location of your organization has its own online booking links).
-
Accessing the online booking links and configuring Reserve with Google requires the "View and Edit Schedule Templates" security right.
To configure online booking links
-
If you are not already viewing the correct location, select it on the Location menu.
-
On the Settings menu, under Location, select Schedule Template.
The Schedule Template page opens.
-
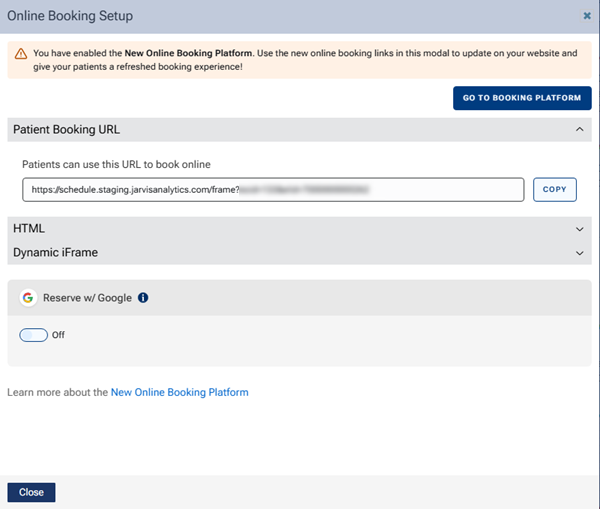
Click (or tap) Online Booking Setup.
The toolbar looks like this image if you have enabled online scheduling.

The toolbar looks like this image if you upgraded to the new online scheduler.

The Online Booking Setup dialog box appears.
-
Do any of the following:
-
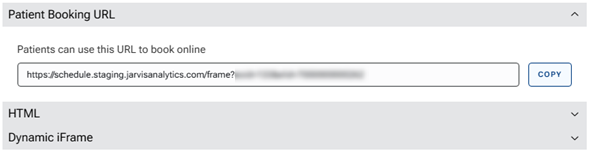
Expand Patient Booking URL to use the URL provided to offer patients a URL (such as in an email message) that directs them to your location's online booking website. To copy the URL so that you can paste it elsewhere (such as in an email message), click (or tap) Copy.
-
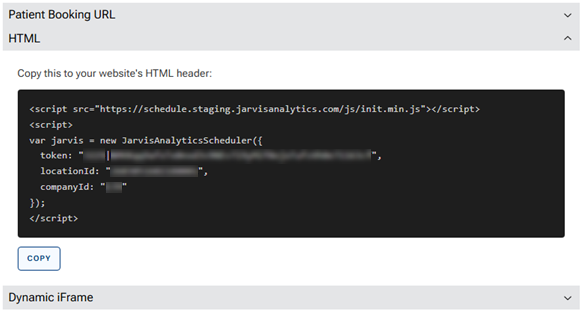
Expand HTML to use the code provided to add a link to the online booking website on your location's website. To copy the HTML so that you can paste it into the code of your website, click (or tap) Copy.
-
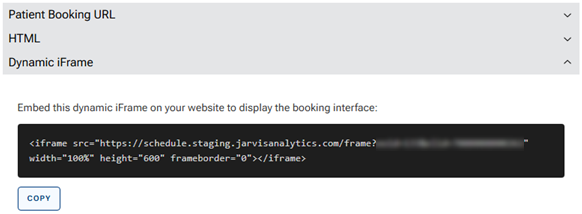
Expand Dynamic IFrame - Advanced to use the code provided to embed the online booking website in your location's website. To copy the HTML so that you can paste it into the code of your website, click (or tap) Copy.
-
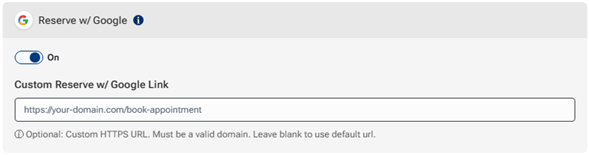
Under Reserve w/ Google, to activate Reserve with Google (available only for practices with a Pro or Accelerate subscription to Dentrix Ascend) so patients can book appointments right from your Google Business Profile on Google Search and Google Maps, turn the switch On.
Important: Before you activate Reserve with Google, the location must have the following:
-
A valid physical address. (See the "Updating location information" topic.)
-
At least one appointment reason must be enabled for online booking. (See the "Customizing appointment reasons for online booking" topic.)
-
A verified Google Business Profile with matching location details. (See Setting Up Booking on Google My Business for a guides that provides detailed instructions on how to set up and manage your booking functionality effectively. It is an invaluable tool for ensuring that your practice takes full advantage of the direct booking capabilities, enabling a seamless integration and a smoother patient experience. Utilizing this resource will help you navigate the setup process and ensure that your practice maximizes its online presence and appointment management efficiency.)
Optionally, you can enter a Custom Reserve w/ Google Link.
-
Without a URL entered, patients are sent to the online booking website.
-
With a URL entered, patients are sent to your custom page (such as your practice website). From there, they can access the online booking website.
URL requirements:
-
Must start with https://
-
Must be a valid web address
-
Must be 255 characters or fewer
-
Note: Google may take up to 24 hours to display the Book button.
-
-
-
Click (or tap) Close.