Managing a patient's orthodontic treatment
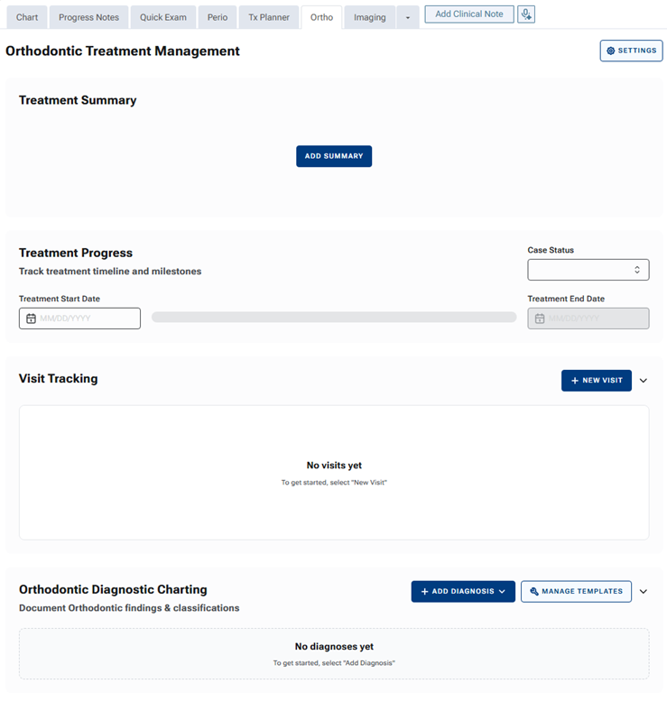
The Ortho tab is a dedicated clinical workspace inside Dentrix Ascend that gives orthodontic teams everything they need to manage a patient's treatment in one place—without having to dig through general clinical notes. The Ortho tab includes the following:
-
A treatment summary for quick, at-a-glance context.
-
A visual progress bar that automatically tracks where a patient is in his or her treatment timeline based on start and end dates.
-
An initial diagnosis section powered by fully customizable dynamic templates that you can build once and reuse for every patient.
-
A visit tracking section that lets providers log arch wires, elastics, appliances, hygiene, and adjustment notes for each appointment—creating a clean, ortho-specific record that grows with the patient over time.
Everything is permission-controlled, designed for multi-provider practices, and built to replace the workarounds you are currently doing inside general clinical notes for documenting ortho treatments.
Note: The Ortho tab is available only if you have purchased the Orthodontics package. The Orthodontics package is an add-on feature that you can purchase separately from your Dentrix Ascend subscription. If you do not see the Ortho tab, contact your Henry Schein One account representative.
To manage a patient's orthodontic treatment
-
If the correct patient is not already selected, use the Patient Search box to access the patient's record.

-
On the Patient menu, under Clinical, select Orthodontics.
The patient's clinical record opens with the Ortho tab selected.
-
Manage the patient's orthodontic treatment in the following sections as needed:
-
Treatment Summary:
In the Treatment Summary section, enter the most important information regarding the patient's ortho treatment.
To add a summary, do the following:
-
Click (or tap) ADD SUMMARY.

-
Enter the relevant text, and then click (or tap) SAVE.

The summary appears.

Notes:
-
To edit the summary, click (or tap) EDIT, change the text as needed, and then click (or tap) SAVE.
-
There is a time stamp to show when the last update took place and who made the update.
-
Edits can be tracked in the audit log.
-
The summary cannot be deleted.
-
-
Treatment Progress:
In the Treatment Progress section, specify the Treatment Start Date and Treatment End Date. The visual progress bar gives patients and clinicians an intuitive, date-driven view of how far along a patient is in his or her orthodontic treatment. The visual progress bar will move forward monthly based on the start and end date entered. Also, select a Case Status.

Note: The case statuses are customizable. For more information, see the topic about configuring orthodontic treatment settings.
-
Visit Tracking:
In the Visit Tracking section, document what happens at each visit instead of using clinical notes and then having to search through those clinical notes for the pertinent information.
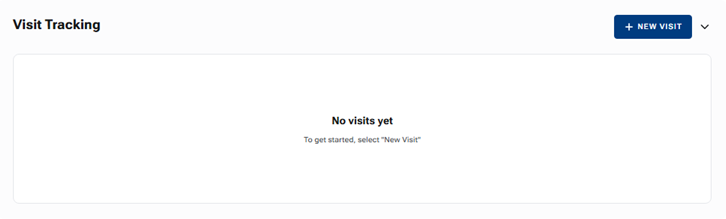
To create a visit, do the following:
-
Click (or tap) + NEW VISIT.

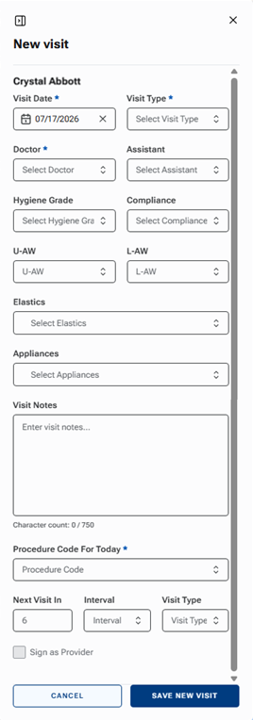
A New visit panel opens on the right.
-
Complete the form as applicable.
Notes:
-
Many of the lists on the form are customizable. For more information, see the topic about configuring orthodontic treatment settings.
-
You can designate which user accounts appear in the Doctor list.
-
You can designate which user accounts appear in the Assistant list.
-
-
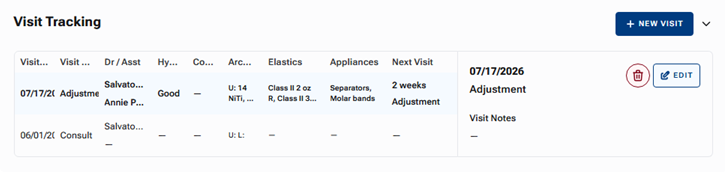
Click (or tap) SAVE NEW VISIT.
Visits are listed in reverse chronological order.
-
-
Orthodontic Diagnosis Charting:
In the Orthodontic Diagnosis Charting section, document findings and classifications through the use of dynamic templates.

To create a new template, do the following:
-
Click (or tap) MANAGE TEMPLATES.
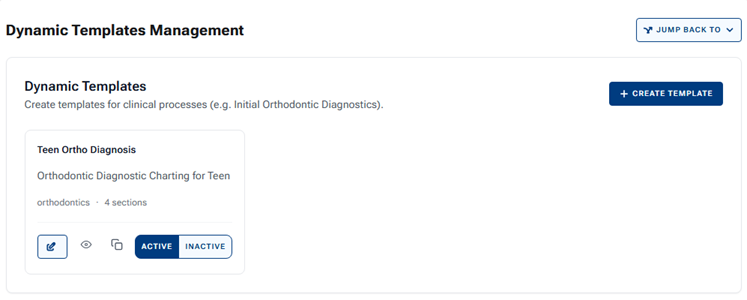
The Dynamic Templates Management page opens.
-
Click (or tap) + CREATE TEMPLATE.
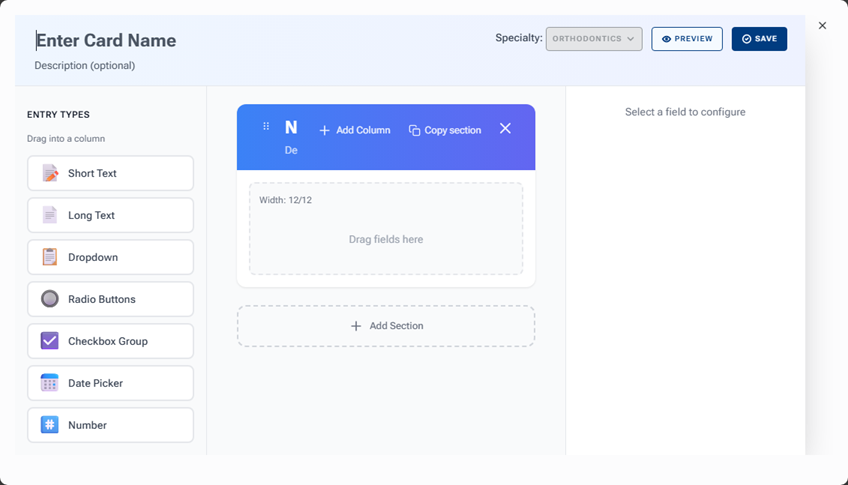
A dialog box with the options for building your own fully customizable questionnaire appears.
-
At the top, replace "Enter Card Name" with clear, descriptive template name. This name is what your clinical team will select when adding a diagnosis at the patient level. Make it specific (such as, "Adult Ortho Initial Exam" or "Peds Ortho Consult").
-
To add questions and fields to your template, drag fields from the ENTRY TYPES panel (on the left) to the preview area (in the middle). Arrange fields in the order that matches your clinical workflow. Also, make sure that the template includes fields for all the findings that your clinicians need to document during an initial consultation.
The following fields are available:
-
Short Text - To enter brief text (such as tooth notation or brief notes).
-
Long Text - To enter notes (such as clinical observations).
-
Dropdown - To select an option from a pre-defined list of options (such as Skeletal Class I, II, or III).
-
Radio Buttons - To select one option among multiple options (such as Yes versus No questions).
-
Checkbox Group - To select one or more options among multiple options (such as for clinical findings: crowding, spacing, crossbite, and so forth).
-
Date Picker - To select a date.
-
Number - To enter a number (such as for measurements: overjet, overbite, arch width, or so forth).
Note: To preview how the template will look, click (or tap) PREVIEW.
-
-
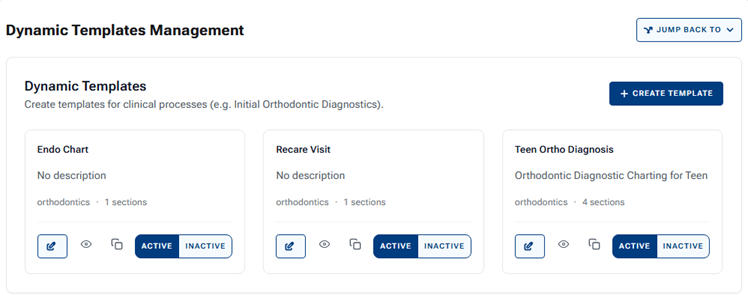
Click (or tap) SAVE. Then, close the dialog box.
The template is published and becomes available for clinical staff to use for any patient.
-
To return to the Ortho tab, click (or tap) JUMP BACK TO, and then select ORTHODONTICS.
Note: Templates cannot be deleted; however, they can be deactivated. Also, deactivated templates can be reactivated.
To use a template to add a diagnosis, do the following:
-
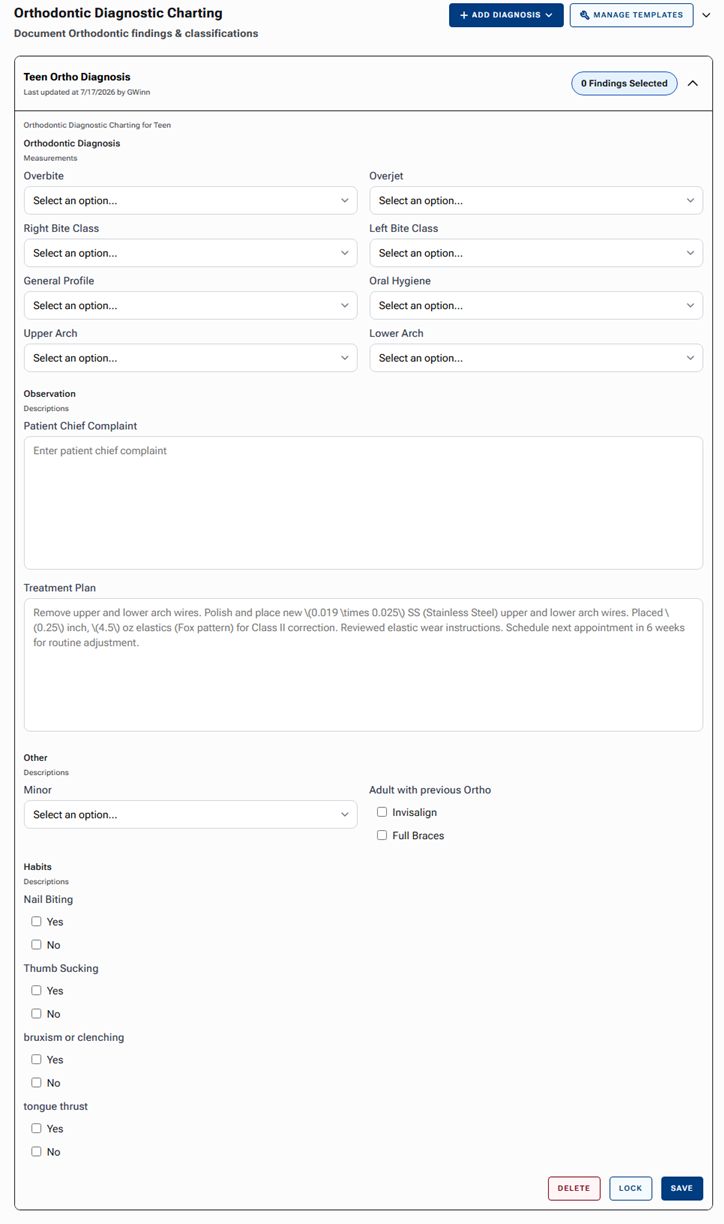
On the ADD DIAGNOSIS menu, select a template.

The template appears for your patient and clinician to complete.
-
Complete the diagnosis form.
-
Click (or tap) SAVE.
Notes:
-
Users with certain security rights can lock and delete a diagnosis.
-
You can add multiple diagnoses per patient. You can add more than one "Initial Diagnosis" record to a patient's chart (for example, an initial consult record and a re-evaluation record after a break in treatment). Each diagnosis is stored as a separate, independent record.
-
Records are never overwritten. Adding a new diagnosis does not replace or alter previous diagnoses. All records are preserved in the patient's history.
-
-