Editing claim payments associated with a bulk insurance payment
You can edit a claim payment that has been posted from a bulk insurance payment. Changes to the claim payment will be reflected in the patient's Ledger.
Notes:
-
You can edit insurance payments according to your security rights for the Ledger.
-
A change to a claim payment appears in the audit log.
To edit a claim payment
-
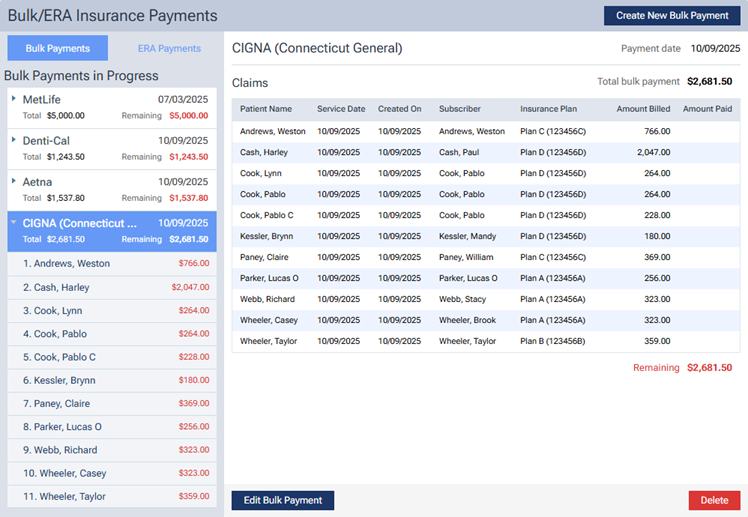
On the Home menu, under Insurance, click (or tap) Bulk/ERA Insurance Payments.
The Bulk/ERA Insurance Payments page opens. The Bulk Payments tab is selected by default.

-
On the left panel, select a bulk insurance payment.
The claims that the bulk insurance payment applies to appear.

-
On the left panel, select a claim.
The claim details appear.

Note: To open the selected patient's Ledger page on a new browser tab (to prevent an interruption in editing applied payments to claims), click the Go to Ledger link near the top of the page.
-
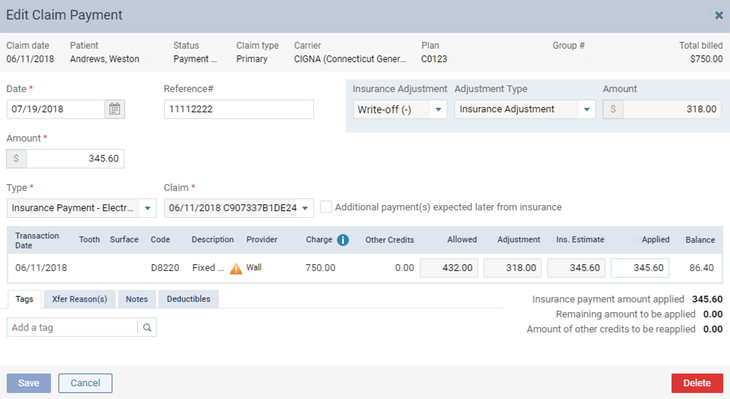
Click (or tap) Edit Claim Payment.
The Edit Claim Payment dialog box appears.

-
Except for the payment type and claim, change the payment details as needed.
-
If you have changed the Date, Amount, Check #, Reference #, Transaction ID, Bank/branch #, Applied amounts, Tags, or Deductibles, the Reason for Revision tab is available. Select the tab. In the box provided, enter the reason for the changes.

Note: A reason is required only if a certain ledger option is enabled.
-
If you have changed the Amount of the payment or any of the Applied amounts, on the Xfer Reason(s) tab, select or create reasons for the transfer of responsibility as needed.

To select or create a reason, do the following:
-
In the Add a tag search box, begin typing the name of a reason. Once you have entered at least two characters, the results list appears with any matches (not case-sensitive). Continue typing as needed to narrow the results list.
-
Do one of the following:
-
If the correct reason is listed, select that reason to attach it.

-
If the correct reason does not exist, finish typing the name of the reason (spaces are allowed). Make sure that the name is capitalized as desired. Then, select + Create [reason name] to create the reason and attach it.

Note: The reason that you have created is now available to all Dentrix Ascend users in your organization.
-
Note: To save the payment after you add reasons for a transfer of responsibility, your user account must have the security right "Edit responsibility transfer reason" enabled.
-
-
Click (or tap) Save.