
In most offices there are typically three tasks that are completed as a patient checks out after a visit. The Fast Checkout button, located in the Ledger toolbar, combines these three tasks together. You can collect a payment, generate an insurance claim, and print a receipt. As part of your setup, customize the Fast Checkout button to meet the needs of your office.
For more information on setting up the Fast Checkout, see Setting up Fast Checkout options.
To use the Fast Checkout feature
1. With a patient selected in the Ledger, make sure you have posted procedures for the patient.
2. In the Ledger toolbar, click Fast Checkout.
If you selected Always Show Checkout Options when you set up Fast Checkout, the Fast Checkout Options Setup dialog box appears.
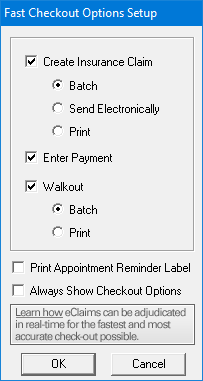
3. Select the checkout options that you want to use for Fast Checkout, and then click OK.
If you have set your checkout options to prompt you for a payment, the Enter Payment dialog box appears.

4. Enter the payment information and click OK.
An insurance claim for the account is created, and a walkout statement is printed, according to the options you have selected.
Note: If the selected patient does not have insurance coverage, a message appears and indicates that an insurance claim was not created. Click OK to continue with the checkout process.