

|
Making and editing appointments
You can schedule and edit appointments in the Appointment Book.
Note: You can also make an appointment in the emergency/overflow column.
To make or edit an appointment
1. In the Appointment Book, navigate to the desired date.
2. Do one of the following:
· Double-click an available time slot in the desired column.
· Click an available starting time slot for the appointment in the desired column, and then drag downward until you reach the ending time slot for the appointment.
· Right-click an available time slot in the desired column, and then click Make.
· To make an appointment over an In block, right-click an available time slot of an In block, and then click Make Appt. Over In Block.
· From the Tools button menu, point to Appointments/Single Blocks, and then click Make.
The Edit Appointment dialog box appears.

3. To select a Patient, do one of the following:
· To select a patient from the call list, click Call List to select and paste in that patient’s name.
· To select a pre-registered patient, click Pre-Reg to select and paste that patient’s name.
· To select a registered patient, type the first and last Name of that patient, or double-click in a Name field (or, with the cursor in a Name field, click Lookup) to select and paste in that patient’s name. If a certain preference setting is enabled, you cannot type a patient’s first and last in the Name field.
Any markers and/or alerts that have been set up to appear in the Appointment Book for the selected patient appear. After you have read those messages, click OK to close them.
If the patient is on the call list, the Update Call List for dialog box appears.

Select the Tag check boxes of the entries that you want to remove from the call list. To schedule this appointment with the appointment service attached to a specific entry, select that entry, and then select the Make appointment from highlighted entry check box. Next, click Ok.
Notes:
· The prefix of a patient’s name appears on appointments. You cannot edit the prefix from the Edit Appointment dialog box, but you can in the Patient Information Center.
· The age and date of birth of the selected registered or pre-registered patient appears automatically to the right of his or her name, the guarantor for registered patients appears below the name, and the doctor of record for registered and pre-registered patients appears below the age and birth date.
· This Due next on recall date appears in red above the Alerts. The date is calculated from the Last recall date and Frequency (for example, 6 months) on the Appointments tab of the patient's Patient Information Center.
· Under Alerts, the icons for any alerts associated with the selected patient appear.
4. Set up the following options:
· Who is taking patient to/from office – Type the name of the person who will be responsible for transporting the patient to and from the office.
· Lab – To attach a lab case or view the lab cases attached to the appointment, click this button. This button is available only if a patient and service has been added to the appointment.
· Staff Time – To set up the doctor and staff time for the appointment service, do the following:
a. Click Staff Time.
The Set Provider/Assistant dialog box appears.
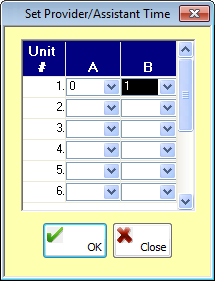
b. For each time unit of the appointment service, select a doctor (A) and/or assistant (B) to specify the times during the performance of the service when the doctor and assistant are treating a patient.
c. Click OK.
In the Appointment Book, the staff time appears in the A and B columns to the right of each column. If a service that has staff time associated with it is attached to an appointment, the staff time is automatically added to the appointment.
· Tx. Plan – If a patient is selected for this appointment, click this button to select and paste in the procedures from a treatment plan that you want to schedule for this appointment,if applicable. This button is available only if a patient has been added to the appointment.
· Provider – Select the provider who will be performing the treatment for this appointment.
· Nurse – Select the person who will be assisting the doctor for this appointment.
· Phone Numbers – This information comes from the selected patient’s Patient Information Center but can be changed. Type or change the home and work phone numbers and email address as needed. To go to the Communication tab of the patient's Patient Information Center, click Others.
Note: Any changes made to the phone numbers and email address in the Edit Appointment dialog box for a registered patient will be reflected in that patient’s Patient Information Center.
· AutoRemind - To send a reminder to the patient, according to the setup of the AutoRemind feature, select this check box.
· Date – The date that you are making the appointment for appears for your reference.
· Time – If necessary, change the beginning time of the appointment. You can select only an open time from the list.
· Service – Type an appointment service, or double-click in the field to select and paste in an appointment service.
· Units – The default number of units is 1 if you double-clicked a time slot to make an appointment. If you attach a service, the number of units changes to the number of units that were set up for the appointment service. If necessary, change the number of time units required to complete this appointment.
· Recall Type – If this appointment is a recall appointment, select a recall type.
· Column – If necessary, change the column the appointment is in. You can select only an available column from the list.
· Amount – The amount is filled in automatically according to the service that is attached to the appointment. The amounts for all the appointments for a specific column are used to calculate the total scheduled amount at the bottom of the chair in the Appointment Book. If necessary, change the amount used to calculate the total scheduled production.
· Confirmation – By default, new appointments are unconfirmed, but you can select a different status.
· Location – The location of the Appointment Book configuration currently being viewed appears for your reference.
· EHR Case – Select the case type,
if applicable. You can click the Remove
button  to clear any previous selection.
· EHR Tx – Select the case template,
if applicable. You can click the Remove
button to clear any previous selection.
· X-rays received - If this option is selected, an X-ray icon appears on the appointment block.
· Insurance verified - If this option is selected, a profiles umbrella with a green check mark appears on the appointment block.
· Place on Call List – If a patient and service are selected for this appointment, select this check box to put the patient on the call list automatically after you schedule the appointment, if applicable. This option is available only if a service is attached to the appointment.
· Comments – Type any comments regarding the appointment. Special notes attached to the patient already appear in the field. If the pop-up comments setting has been enabled in the Preferences dialog box, comments entered in the Comments field will appear in any pop-up comments.
Note: Any comments added to an appointment carry over to the call list when the appointment is canceled or missed. That way, when the appointment is rescheduled, the comments show on the new appointment.
· Foreground and/or Background Color – The default foreground and background colors for the appointment are black and gray, respectively. Or, if a service is attached to the appointment, the pre-defined colors for that service change the foreground and background colors. However, you can click Foreground and Background to choose different colors.
4. Use any of the other options to perform additional functions as needed:
· History – To view the created time and date of the appointment, time and date of the change, confirmed status and who confirmed (the user ID), checked in status and who checked the patient in (the user ID), and the last change, click this button. This button is available only if you are editing the appointment and you have made changes to the appointment.
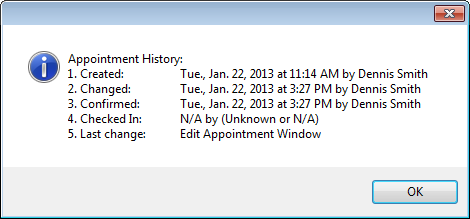
Note: If security has not been set up, Unknown or N/A will appear in parentheses instead of the user IDs. If the appointment has not been confirmed, N/A by (Unknown or N/A) will appear instead of the date, time and user ID. If the patient has not been checked in, N/A by (Unknown or N/A) will appear instead of the date, time, and user ID.
· Availability – This button is available only if you schedule appointments using the Provider Availability system (the feature is enabled in the Preferences dialog box). To see the availability of the treating provider, click this button.
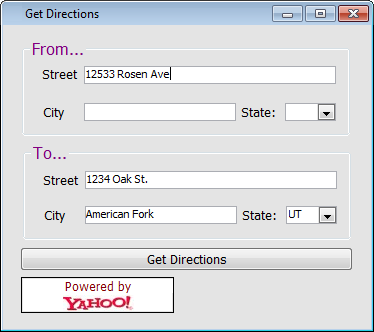
· Get Directions – To open the Get Directions dialog box, click this button. You can enter the address of the source location and destination and then click Get Directions to view driving directions provided by Yahoo! Maps®. You must be connected to the Internet to use this feature.
· Blocks – Refer to the topic about making and editing single blocks for information about how to make a single block.
· Account Balances – This section displays all the patient's family members (patients with the same guarantor) and balances. Also, you can click a patient name link to access that patient’s Patient Information Center (to return to the Edit Appointment dialog box, from the Window menu, click Edit Appointment).

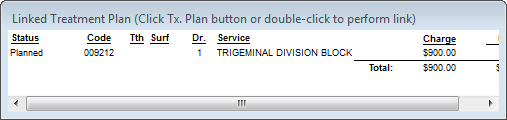
· Linked Treatment Plan – This panel displays any treatment plans linked to the appointment. You can double-click the panel to add and paste in treatment-planned procedures.
· Other upcoming appointments for – If the patient has any future appointments, this panel is available. The panel displays the patient’s upcoming appointments with the date, time, number of units, provider, and service. You can move the panel to view the Linked Treatment Plan panel underneath.

· Cancel Appt – Click this button to cancel the appointment.
5. Click OK.
Need more help?
You can visit our website, contact OMSVision Customer Support, or suggest a new feature or improvement on User Voice.