

|
Cancelling appointments
You can cancel an appointment and at the same time charge a cancellation fee or add an entry to the call list.
To cancel an appointment
1. In the Appointment Book, right-click the appointment that you want to cancel, and then click Cancel.
A confirmation message appears.
2. Click Yes.
The Cancel Appointment dialog box appears.
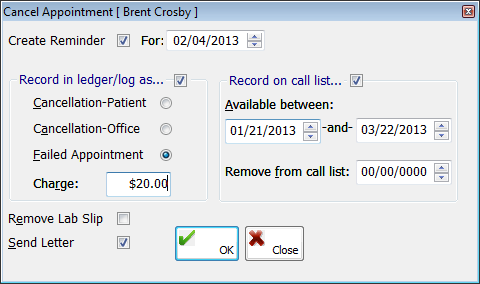
3. Set up the following options for canceling the appointment:
· Create Reminder – To have a reminder to reschedule the patient be created, select this check box, and then enter the date when you want the reminder to appear.
· Record in ledger/log as – To record this cancelation in the patient’s Ledger and in the cancelation log, select this check box, and then select whether you want the cancelation to be recorded as an appointment that was canceled by the patient, canceled by the office, or missed by the patient. You can also enter a fee to Charge for the canceled appointment.
· Record on call list – To place this patient (along with the specifics of the cancelled appointment) on the call list so that you can reschedule the appointment at a later date, select this check box. Enter the date range that the patient is available to be rescheduled, and then enter the date that you want the patient to be removed from the call list
· Remove Lab Slip - If the patient has a lab case associated with the canceled appointment, and if you want to remove the lab slip from the patient's lab case, select this check box. This option is available only if a lab case is associated with the appointment.
· Send Letter - Select this check box to open the default cancelation letter in the word processor automatically after you cancel the appointment. You can set up the default cancelation letter in the Preferences dialog box.
4. Click OK to continue with the cancellation.
A comment dialog box appears.
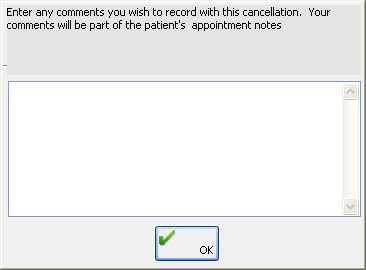
5. Type any comments regarding the cancelation. These comments will appear on the cancellation list when you print or export the list.
Note: If you chose to add this patient to the call list, the entry that will be added to the call list will have an automated message attached to it as a comment that contains the following information: a note that comments were entered during the cancelation (if any were entered), the date the appointment was canceled, and the date and time of the original appointment. Also, comments from a Call List entry carry over to the notes for an appointment that you schedule from the Call List.
6. Click OK.
Need more help?
You can visit our website, contact OMSVision Customer Support, or suggest a new feature or improvement on User Voice.