

|
Managing treatment plans
You can create, edit, and delete treatment plan data and treatment plan templates for the case. The descriptions of the treatment plans items appear in the Plan - Teeth/Quads/Areas section.
To document planned treatment for the future
1. With a case selected (in the Cases section), in the Plan - Teeth/Quads/Areas section of EHR, click Tx Plan.
The Edit Treatment Plan for dialog box appears.
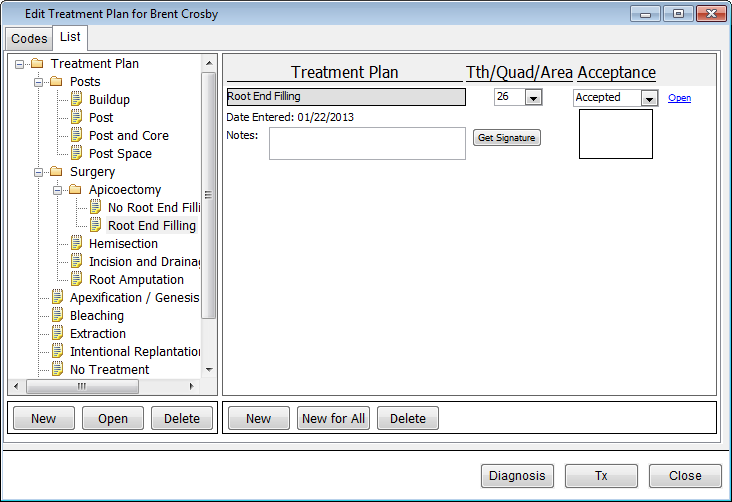
Note: As needed, expand or collapse the tree by clicking the plus (+) or minus (-) signs next to the category folders in the left pane.
2. On the List tab, do any of the following:
· To add a template, in the left pane, select the folder into which you want to add a template, click New, type a name for the template, and then press the Enter key.
· To rename a template, in the left pane, select a template, click Open, change the name of the template, and then press the Enter key.
· To delete a template, select a template, and then click Delete.
· To arrange the template in a specific order in the categories, drag the templates to the desired positions.
· To add a plan from the left pane to the right pane, in the right pane, select a plan, and then click New. For the plan in the right pane, select a tooth or area, select a status (the acceptance of the treatment by the patient), click Get Signature to acquire a digital signature from the patient (if a signature pad is set up), and type any relevant notes. You can click the Edit List link to select items for the list.
· To add a plan from the left pane to the right pane for a case where multiple teeth have been added, in the right pane click New For All. For each plan in the right pane, verify that the correct tooth/quad/area is specified, update the acceptance status (Accepted, Considering, Declined, etc.), click Get Signature to acquire a digital signature from the patient (if a signature pad is set up), and type any relevant notes.
· To remove a plan, in the right pane, select a plan, and then click Delete.
3. On the Codes tab (which lists each CDT code for the case along with the tooth or area, description, acceptance, status, and surfaces), to add and delete RapidPost Forms that are attached to the patient’s appointment for the case, click Add/Remove From Form. Close the RapidPost Forms for Appointment window when you are finished.
Note: If the patient does not have forms attached, clicking the button does nothing.
4. To enter treatment for the case, click Tx.
5. To access the diagnoses for the case, click Diagnosis.
6. Click Close to close the Edit Treatment Plan for dialog box.
Need more help?
You can visit our website, contact EndoVision Customer Support, or suggest a new feature or improvement on User Voice.