

|
Entering treatment
You can add treatment using a treatment template.
To enter treatment
1. In EHR, with a case selected in the Cases section, in the Treatment Summary section, click Tx.
The Treatment window appears.
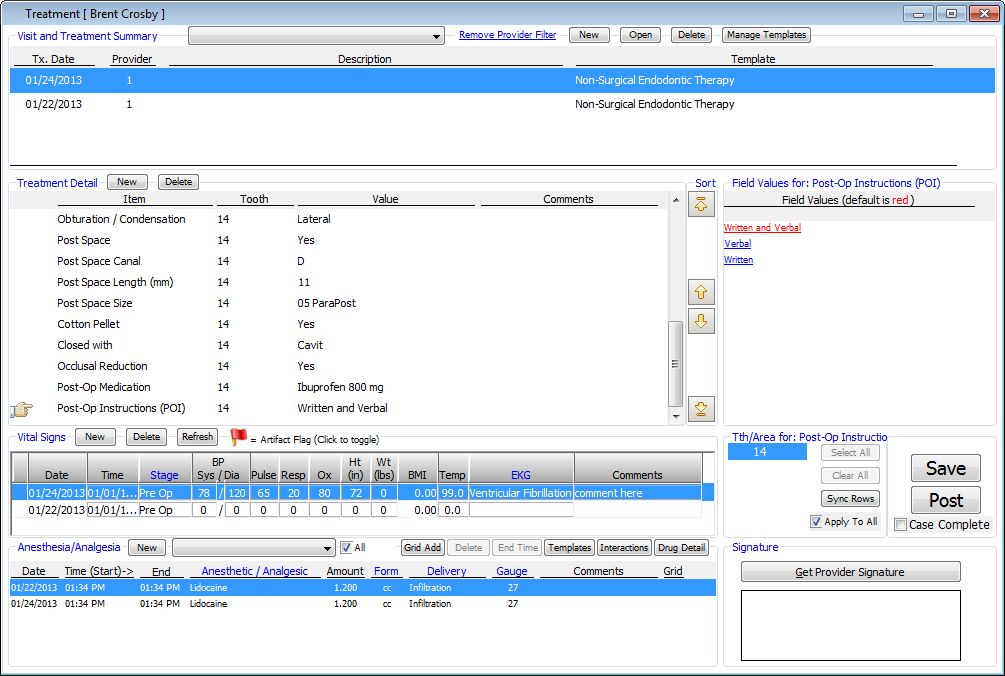
2. In the Visit and Treatment Summary section, do one of the following:
· To add a treatment header, click Add.
· To edit an existing treatment header that is not locked, select a treatment header, and then click Edit.
The Edit Treatment Header dialog box appears with the creation date displayed at the top.

3. Enter the following information:
· Treatment Date – Type the date of the treatment.
· Provider – Select the rendering provider.
· Template – Select the template description.
· Description – Type a description for the treatment.
· Comments – Type any comments about the treatment.
· Digital Signature – If a signature pad is installed, click this button to acquire a digital signature from the patient.
4. Click OK.
5. Under Treatment Detail, to add details even if the selected template has populated the Treatment Detail section, click Add to open the Treatment Template Items dialog box to select and paste in an item and its associated default value. To delete an item, select it, and then click Delete.
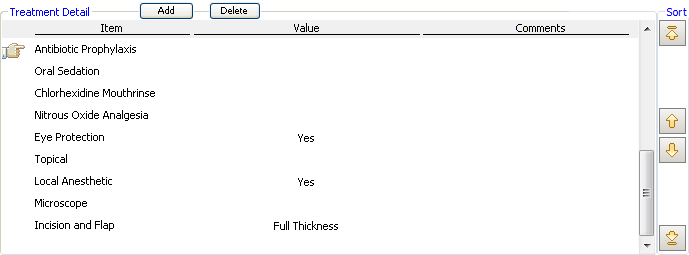
Tip: When you add an item it is placed at the bottom of the list, but you can arrange the list in any order. To rearrange items in the list, select an item, and then click the Move Up, Move Down, Move to Top, and Move to Bottom arrow buttons.
6. For each item under Treatment Detail, do the following:
a. Type any Comments.
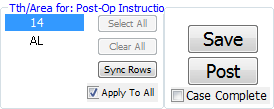
b. In the Tth/Area for section, select the teeth or areas being treated to assign that selection to the selected treatment item. You can select a value for each item separately for each tooth/teeth selected. You can deselect a tooth if that tooth does not pertain to that item so that a tooth number is not assigned incorrectly to the item for which you are selecting values.
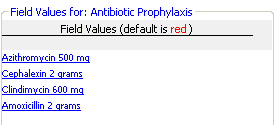
c. In the Field Values for section, click a Field Values link to assign that value to the selected treatment item. A default Field Values link is red. Any items that have a blank value will not show in the Treatment Summary section.
7. To set the EHR case for the treatment complete when you save or post the treatment, select the Case Complete check box.
8. Under Vital Signs, the patient’s vital signs from the Vital Signs tab of the Objective - History section of EHR appear. You can enter the patient’s vital signs as needed.
9. Under Anesthesia/Analgesia Record, add anesthesia records as needed using one of the following methods:
· Single entry – To add a record, do the following:
a. Click Add.

b. Set up the following options:
· Date – Enter the date.
· Time (start) – Enter the start time.
· End – Enter the end time. To insert the current time, click End Time.
· Anesthetic/Analgesic – Select the anesthetic used.
· Amount – Type the amount of anesthetic administered.
· Form – Select the form of the anesthetic.
· Delivery – Select the method the anesthetic was administered.
· Gauge – Select the gauge of the needle.
· Comments – Type any comments.
· Grid format – To add anesthesia in a grid format based on an anesthesia template, do the following:
a. Click Grid Add.
The Grid Add Anesthesia dialog box appears.

Tip: The anesthesia grid uses the description of the drug, so make sure all your anesthesia templates have, in addition to a name, a unique description.
b. The Date, Start Time, Minutes (360 minute limit), End Time, and Time Units are populated automatically, but you can change the values.
Note: The default Time Units is determined by the Anesthesia Time preference.
c. For each template listed, do any of the following:
· To specify that a single dose of the drug was administered, click once to place an asterisk (*) at the appropriate time in the grid.
· To specify that the drug is being administered continuously , click twice to place an underscore (_) at the appropriate times in the grid.
· To make a cell blank, clicking a third time in that cell.
· To insert underscores in the corresponding template row from the cell after the last one with an asterisk or underscore to the last cell in the series, click End Time.
Tip: Since you cannot go back and view or print the information in a grid format after you click OK, to save a snapshot of the anesthesia grid before you click OK, while holding down the Alt key, press the Print Screen key to copy the dialog box to the Windows Clipboard. You can then paste the Clipboard contents into another Windows application and save and/or print the anesthesia grid.
d. Click OK.
The anesthesia record is added to the case.
10. To acquire a digital signature from the provider of the treatment (if a signature pad is installed), under the Signature section, click Get Provider Signature.
11. Do one of the following:
· To save the treatment, next to the Tth/Area for section, click Save. This button is available only if at least one Field Value for a Treatment Detail item has been selected or if a change has been made to any previous selection.
· To post the treatment, next to the Tth/Area for section, click Post.
Need more help?
You can visit our website, contact EndoVision Customer Support, or suggest a new feature or improvement on User Voice.