You can link insurance payments to the corresponding dental insurance claims. To help you make sure insurance payments are linked correctly, when you post an insurance payment, Dentrix Enterprise will automatically itemize the payment for each procedure according to the estimated insurance portion, but you can easily edit or remove the applied amount as needed. Deductibles met and benefits used will be updated according to the dental insurance plan's coverage table automatically, but you can change or remove any amounts as needed. Also, you can write off an amount (make an adjustment) while posting the payment.
Notes:
If your office has converted from another practice management system to Dentrix Enterprise, and if the dental insurance claim for which you are posting a payment was not created using Dentrix Enterprise, post the insurance payment as a guarantor payment. A payment type called "Insurance Payment" can be added in the Practice Definitions to distinguish these payments from patient payments.
Viewing claims requires the "Insurance Claims, Open" security right.
Posting insurance payments requires the "Ins Payments, Enter" security right.
To post a dental insurance payment
With a patient selected in Ledger, double-click a dental insurance claim.
If applicable, do one of the following:
If the Password - Insurance Claims, Open dialog box appears, user verification has been assigned to the "Insurance Claims, Open" task. Do one of the following:
If your user account has been granted the "Insurance Claims, Open" security right, enter your credentials in the User ID and Password boxes, and then click OK.
If your user account has not been granted the "Insurance Claims, Open" security right, have a user with permission temporarily override this restriction so you can view a claim this one time. The overriding user enters his or her credentials in the User ID and Password boxes and then clicks OK.
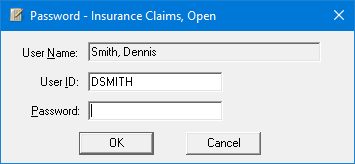
If a message appears, informing you that you do not have rights to this operation, your user account has not been granted the "Insurance Claims, Open" security right. To have a user with permission temporarily override this restriction so you can view a claim this one time, do the following:
On the message, click Yes.

In the Password - Insurance Claims, Open dialog box, the overriding user enters his or her credentials in the User ID and Password boxes and then clicks OK.

The insurance claim window opens.
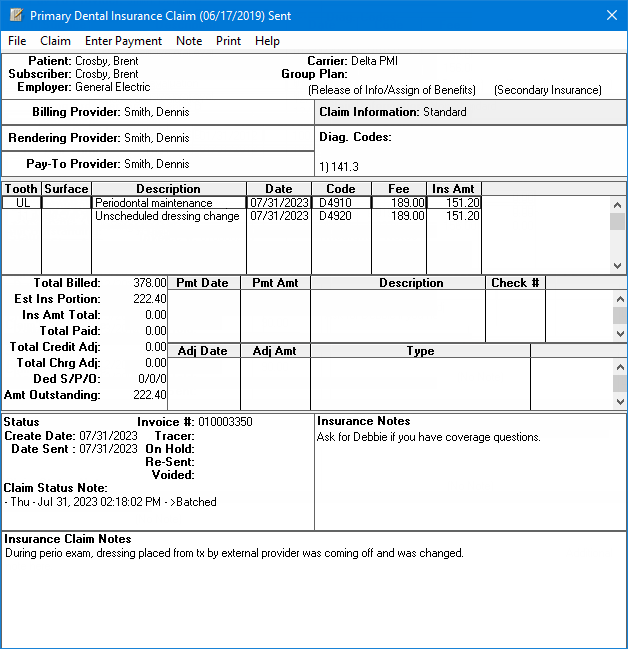
On the menu bar, click Enter Payment.
If applicable, do one of the following:
If the Password - Ins Payments, Enter dialog box appears, user verification has been assigned to the "Ins Payments, Enter" task. Do one of the following:
If your user account has been granted the "Ins Payments, Enter" security right, enter your credentials in the User ID and Password boxes, and then click OK.
If your user account has not been granted the "Ins Payments, Enter" security right, have a user with permission temporarily override this restriction so you can enter an insurance payment this one time. The overriding user enters his or her credentials in the User ID and Password boxes and then clicks OK.
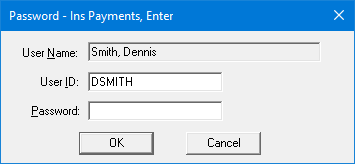
If a message appears, informing you that you do not have rights to this operation, your user account has not been granted the "Ins Payments, Enter" security right. To have a user with permission temporarily override this restriction so you can enter an insurance payment this one time, do the following:
On the message, click Yes.

In the Password - Ins Payments, Enter dialog box, the overriding user enters his or her credentials in the User ID and Password boxes and then clicks OK.

The Enter Insurance Payment dialog box appears.
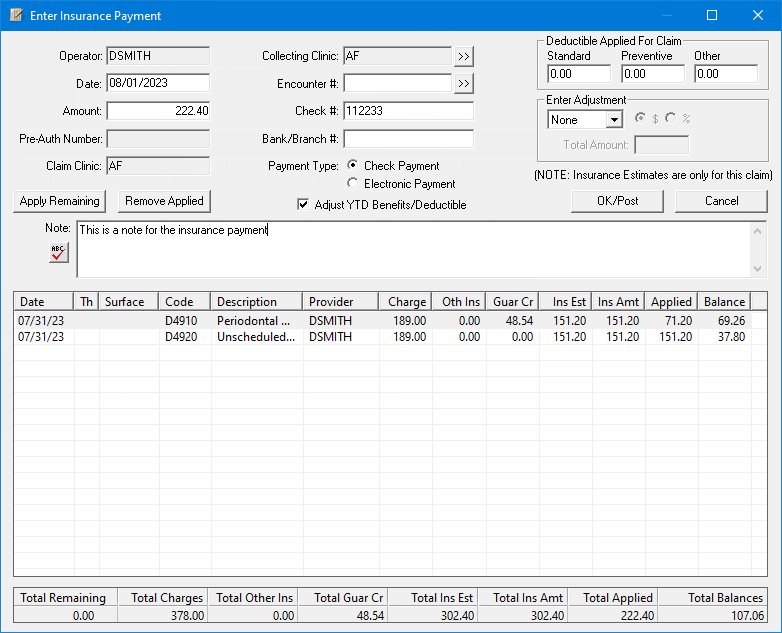
Set up the following options:
Date - The date that the payment was collected. By default, today's date is entered. If the payment was collected on a previous date, enter that date (in a mm/dd/yyyy format) in the box.
Note: Dentrix Enterprise automatically adds slashes to dates when you enter six or eight numbers (mmddyy or mmddyyyy) and then press the Tab key.
Amount - The dollar amount of the payment. By default, the estimated insurance portion is entered, but you can enter a different amount if the paid amount on the check or in the electronic remittance is different from what appears in the box.
Note: For a whole dollar amount, you can enter a number without adding the decimal point and two zeros. For example, if you type 36 and then press Tab, Dentrix Enterprise will change the amount to 36.00.
Collecting Clinic - The clinic where the payment was collected. By default, the clinic that you are currently logged in to is entered automatically, but you can specify a different clinic.
Note: The Claim Clinic, or the claim where the claim was created, is displayed for your reference.
To change the collecting clinic, do the following:
Click the search button ![]() .
.
If applicable, do one of the following:
If the Password - Clinic ID Change dialog box appears, user verification has been assigned to the "Clinic ID Change" task. Do one of the following:
If your user account has been granted the "Clinic ID Change" security right, enter your credentials in the User ID and Password boxes, and then click OK.
If your user account has not been granted the "Clinic ID Change" security right, have a user with permission temporarily override this restriction so you can select a clinic this one time. The overriding user enters his or her credentials in the User ID and Password boxes and then clicks OK.
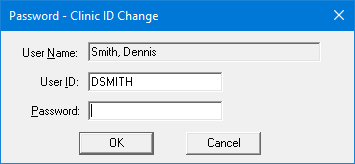
If a message appears, informing you that you do not have rights to this operation, your user account has not been granted the "Clinic ID Change" security right. To have a user with permission temporarily override this restriction so you can select a clinic this one time, do the following:
On the message, click Yes.

In the Password - Clinic ID Change dialog box, the overriding user enters his or her credentials in the User ID and Password boxes and then clicks OK.

The Select Clinic dialog box appears.
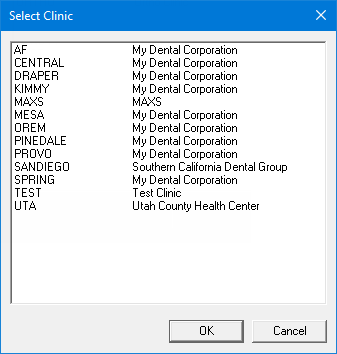
Note: If your user account has been granted the "View All Patients" security right for the Central clinic, the ID and name of all clinics appear in the list; otherwise, the ID and name of each clinic for which your user account has been granted the "My Clinics, View" security right (in the "Practice/Clinic Setup" category) appear in the list; however, if your user account has not been granted that right to any clinic, only the ID and name of the clinic that you are currently logged in to appear in the list.
In the list, select the correct clinic.
Click OK.
Encounter # - If a certain global setting has been enabled, this option is available. To specify the encounter number, do one of the following:
Enter an encounter number (numeric or alphanumeric, depending on a certain global setting).
Select an encounter number (if the applicable global setting is enabled).
Note: Depending on a certain global setting, the number may have to be unique for each patient, for each day, or for each patient per day.
Check # and Bank/Branch # - If the insurance carrier is paying with a check, enter the check number (up to 25 characters in length) in the Check # box and the bank account number in the Bank/Branch # box.
Notes:
Check numbers and bank account numbers appear on deposit slips. Check numbers appear as part of payment descriptions on family walkouts (enhanced and plain forms), billing statements, family ledger reports, and patient ledger reports.
For walkouts and statements, if the check number is longer than 14 characters, an ellipsis (...) and the last 11 characters will be displayed.
For family and patient ledger reports, if the check number is longer than 13 characters, an ellipsis (...) and the last 10 characters are displayed.
Due to space limitations, the following reports, although they do list insurance payments, do not show payment check numbers: Day Sheet (Charges and Receipts), Payment Summary, Suspended Credits Report, and Receipts Day Sheet.
Payment Type - The type of payment. Select one of the following options: Check Payment or Electronic Payment (EFT).
Adjust YTD Benefits/Deductible - This checkbox is selected by default to indicate that Dentrix Enterprise will adjust the patient's year-to-date (YTD) benefits used and deductibles met accordingly. To not adjust the YTD benefits and deductibles, clear the checkbox.
Deductible Applied For Claim - If money has been withheld toward a deductible, enter the withheld amount in any of the following boxes as applicable: Standard, Preventative, and/or Other.
Enter Adjustment - For instances where your practice does not bill the patient, such as with some preferred provider (PPO) plans, you can quickly create an adjustment to offset any remaining balance. Also, for instances where a negative payment (refund) is entered for a claim, you can enter an adjustment for that claim. To post an adjustment, do the following:
From the list, select one of the following options:
Credit (-) - To post a write-off or credit adjustment.
With this option selected, select one of the following options:
$ - To adjust off a specific dollar amount.
% - To adjust off a percentage of the claim's remaining balance.
Charge (+) - To post a refund or charge (debit) adjustment.
With this option selected, only the $ option is available, so you can post a charge adjustment only for a specific dollar amount.
Do one of the following options:
With Credit (-) selected, and with $ selected - By default, the unpaid balance of the claim appears in the Total Amount box, but you can enter a different amount.

With Credit (-) selected, and with % selected - By default, 100.00 appears in the % box, but you can enter a different percent. By default, the unpaid balance of the claim appears in the of box, but you can enter a different amount. Dentrix Enterprise calculates the adjustment amount and populates the = box.

With Charge (+) selected, and with $ selected - By default, the unpaid balance of the claim appears in the Total Amount box, but you can enter a different amount.

Note - Details regarding the insurance payment. To check the spelling of the note text, click the Check Spelling button ![]() (this button is available only if a certain preference setting has been enabled).
(this button is available only if a certain preference setting has been enabled).
When you enter an amount, Dentrix Enterprise automatically allocates the payment for the claim according to insurance estimates. The amount of the payment that is applied to each charge appears the Applied column. Do any of the following as needed:
To apply a remaining amount, select the desired charges, and then click Apply Remaining. The amount in the Total Remaining box is applied to the selected charges.
Note: To select multiple charges, click a charge, and then, while pressing the Ctrl key, click the other desired charges.
If the amount exceeds the insurance estimate, a dialog box appears.
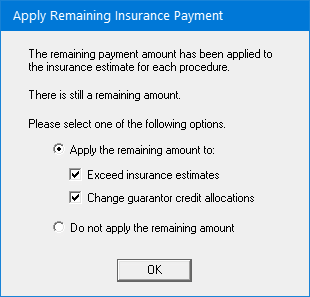
Do the following:
Select one of the following options:
To apply the remaining amount, select the Apply the remaining amount to option. With this option selected, select or clear the following checkboxes:
Exceed insurance estimates - With this checkbox selected, Dentrix Enterprise will apply the remaining amount up to the Total Charges.
Notes:
This checkbox is available only if at least one of the selected procedures has a remaining balance.
Using this option which will result in an insurance overpayment.
Change guarantor credit allocations - With this checkbox selected, Dentrix Enterprise will suspend the non-insurance credit amount and apply the insurance payment instead.
Notes:
This checkbox is available only if at least one of the selected procedures has a non-insurance credit amount (in the Guar Cr column) that can be suspended or re-allocated, and if one or more non-insurance credits have not been moved to history (when closing a month).
You can use this option in instances where you have a primary dental insurance claim with a pending secondary dental insurance claim and paying the balance might result in a remaining balance that is less than what will be paid by the secondary dental insurance carrier. However, it is more practical to deal with that scenario when the secondary claim is paid rather than with the payment for the primary claim.
To return to the Enter Insurance Payment dialog box without applying the remaining amount, select the Do not apply the remaining amount option.
Then, click OK.
To remove all the applied amounts, click Remove Applied.
To save the paid amount as a reference for future estimates, do the following:
Double-click the desired charge (or right-click the desired charge, and then click Edit Ins Payment Amount).
The Edit Ins Payment Amount for Procedure dialog box appears.
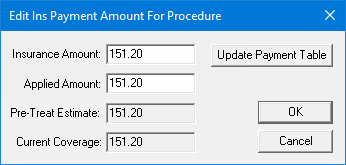
In the Insurance Amount box, enter the insurance amount from the insurance EOB.
If appropriate, click Update Payment Table to update the payment table.
Important: It is important that you only update the payment table when the payment amount applies to all patients covered by that plan. For example, if the estimated insurance portion is different from the payment amount because money is being withheld toward a deductible, do not update the payment table. Similarly, if a patient has exceeded their maximum benefit, do not update the payment table.
Click OK.
The next time any patient with this insurance plan has the same procedure recommended or completed, Dentrix Enterprise will use the payment amount as the insurance estimate.
To edit an applied amount, do the following:
Double-click the desired charge (or right-click the desired charge, and then click Edit Ins Payment Amount).
The Edit Ins Payment Amount for Procedure dialog box appears.

In the Insurance Amount box, enter the correct amount to be applied.
Click OK.
The applied amount cannot exceed the amount in the Charge column. If the applied amount exceeds the amount of the charge, a message appears. Click OK to return to editing the applied amount.
Click OK/Post.
If the payment amount exceeds the allocated amount and/or the estimated insurance portion exceeds the allocated amount, a dialog box (or message) appears. Choose how you want to handle the insurance overpayment.
If you specified an adjustment amount or percentage when setting up the insurance payment options for the claim, the Enter Credit Adjustment for Insurance Claim or Enter Charge Adjustment for Insurance Claim dialog box appears. Make any necessary changes to the credit or charge adjustment, and then click OK to post the insurance adjustment along with the insurance payment.
If the patient has secondary dental insurance coverage, a message appears and asks if you want to create a secondary dental claim. To create the secondary dental claim, click Yes.