Retaking images
You can retake the image in an exam with a single image, or you can retake one or more of the images in an exam with a series of images.
To retake images
-
If the correct patient is not already selected, use the Patient Search box to access the patient's record.

-
On the Patient menu, under Clinical, select Chart, Progress Notes, Quick Exam, Perio, Tx Planner, or Imaging.
The patient's clinical record opens with the Chart, Progress Notes, Quick Exam, Perio, Tx Planner, or Imaging tab selected.
-
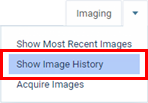
On the Imaging tab's menu, select Show Image History.
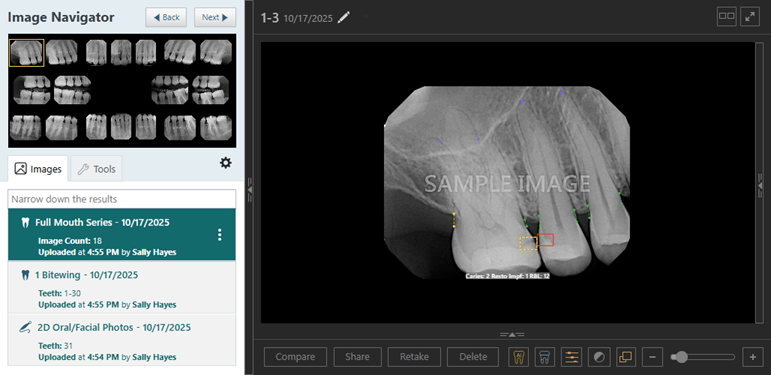
The patient's imaging page opens to the history view. The most recent image, series (such as a full mouth series or bitewings), set of photos (which was acquired using a custom imaging procedure), CAD/CAM scan, or 3D volume is selected by default on the Images tab.
Note: These steps apply to the Exam view only. If you are using the Modality view, before you can proceed, you must switch to the Exam view. For information about switching to the Exam view, refer to the topic about changing Dentrix Ascend Imaging settings.
-
Do one of the following:
Retake the image in an exam with a single image:
-
Select an exam with a single image.
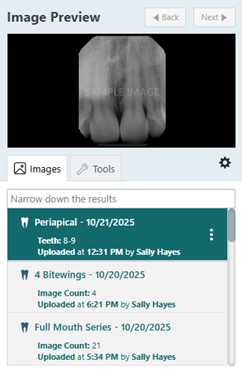
The image appears in the viewing area.

-
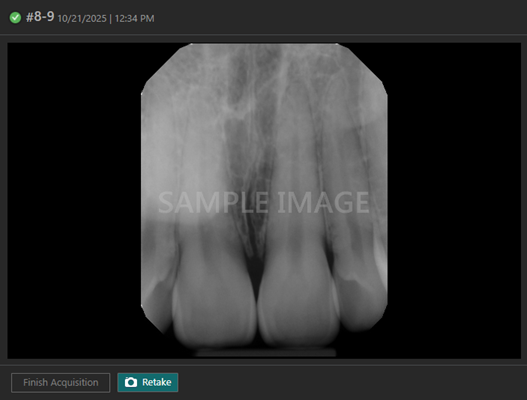
Click (or tap) Retake.
-
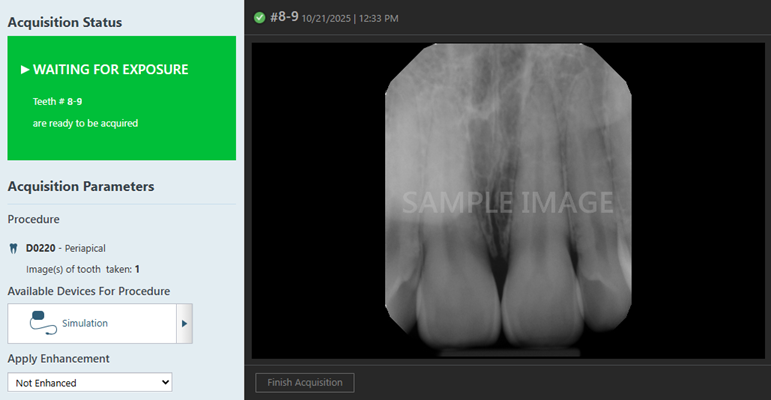
When the X-ray sensor becomes ready for exposure, acquire the image.
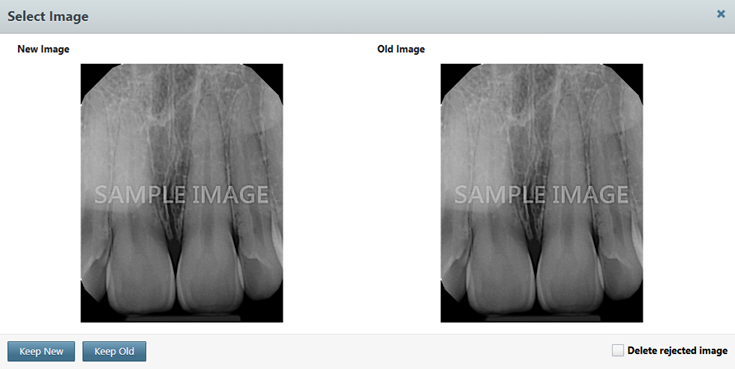
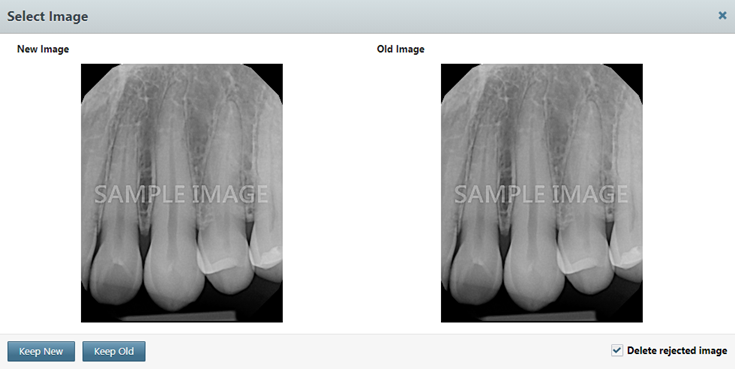
The Select Image dialog box appears. The recaptured image appears on the left under New Image. The existing image appears on the right under Old Image.
-
Either leave the Delete rejected image checkbox clear to have the rejected image be hidden when you choose one of the "Keep" options, or select the checkbox to have the rejected image be deleted when you choose one of the "Keep" options.
-
Click (or tap) either Keep New to keep the recaptured image and put it on the top of the image stack for the template slot or Keep Old to keep the existing image and leave it on the top of the image stack for the template slot.
The original or recaptured image appears in the viewing area.
-
To retake the image again, click (or tap) Retake. Then, repeat steps c-e.
-
Click (or tap) Finish Acquisition.
-
If the image fails to upload, a message appears and provides the option for you to recover the image. Click (or tap) Recover Images to begin the recovery process.
Retake one or more images in an exam with a series of images:
-
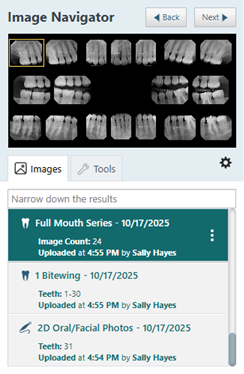
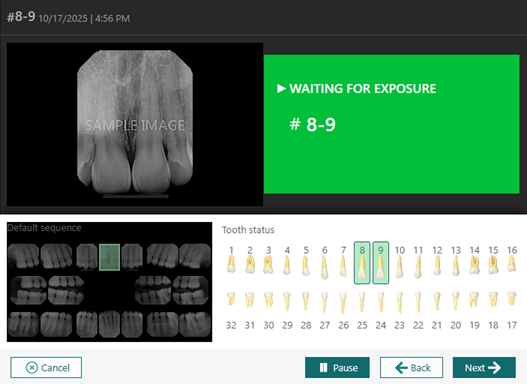
Select an exam with a series of images (such as a full mouth series or bitewings).
-
Under Image Navigator, click (or tap) the image that you want to retake.

The selected image appears in the viewing area.
-
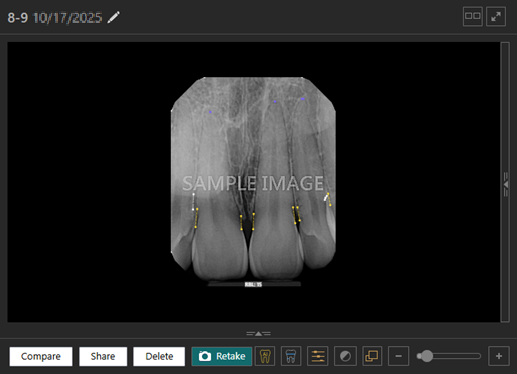
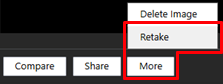
Either click (or tap) Retake, or select the Retake option on the More menu.
-
When the X-ray sensor becomes ready for exposure, acquire the image.
Note: The applicable step in the acquisition sequence for the template is selected automatically.
The Select Image dialog box appears. The recaptured image appears on the left under New Image. The existing image appears on the right under Old Image.
-
Either leave the Delete rejected image checkbox selected to have the rejected image be deleted when you choose one of the "Keep" options, or clear the checkbox to have the rejected image be hidden when you choose one of the "Keep" options.
-
Click (or tap) either Keep New to keep the recaptured image and put it on the top of the image stack for the template slot or Keep Old to keep the existing image and leave it on the top of the image stack for the template slot.
The original or recaptured image appears in the viewing area.
-
Do any of the following as needed:
-
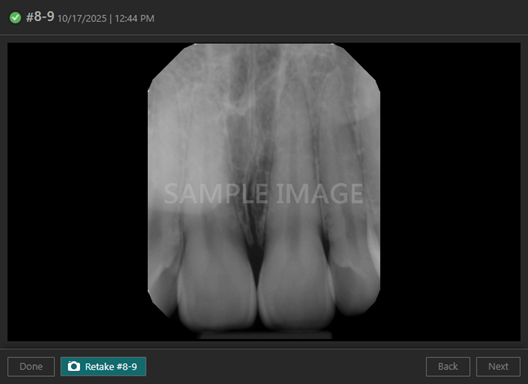
To retake the image again, click (or tap) Retake #[teeth]. Then, repeat steps d-f.
-
To retake a different image in the series, do the following:
-
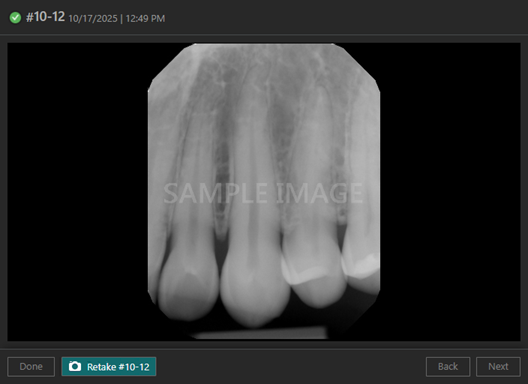
Click (or tap) Retake #[teeth].
The options for acquiring images in the series appear, and the X-ray sensor becomes ready for exposure.
-
Without triggering the sensor, navigate to the correct step in the acquisition sequence for the template by doing one of the following:
-
Click (or tap) Back or Next as needed to navigate to the correct step in the acquisition sequence for the template.
-
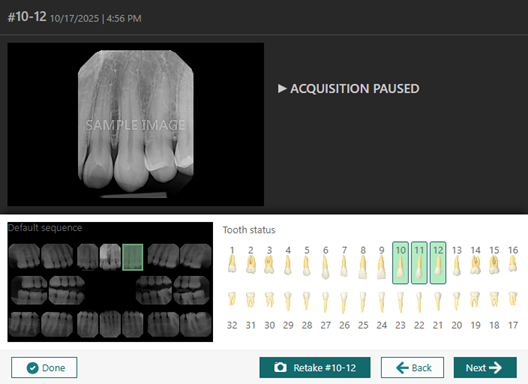
Click (or tap) the correct step in the acquisition sequence for the template.
The acquisition is paused automatically.
-
-
With the correct step in the acquisition sequence for the template selected, click (or tap) Retake #[teeth].
-
When the X-ray sensor becomes ready for exposure, acquire the image.
The Select Image dialog box appears.
-
Either leave the Delete rejected image checkbox selected to have the rejected image be deleted when you choose one of the "Keep" options, or clear the checkbox to have the rejected image be hidden when you choose one of the "Keep" options.
-
Click (or tap) either Keep New to keep the recaptured image and put it on the top of the image stack for the template slot or Keep Old to keep the existing image and leave it on the top of the image stack for the template slot.
The original or recaptured image appears in the viewing area.
-
-
-
Click (or tap) Done.
-
If any images fail to upload, a message appears and provides the option for you to recover the images. Click (or tap) Recover Images to begin the recovery process.
-