Resuming incomplete photo sets
If you acquired images using an imaging procedure for a set of intraoral or extraoral photos, but you skipped the acquisition of any of the images in the set or canceled the acquisition of the set before acquiring all the images, you can return to that set and complete the image acquisitions as needed.
To resume an incomplete set of photos
-
If the correct patient is not already selected, use the Patient Search box to access the patient's record.

-
On the Patient menu, under Clinical, select Chart, Progress Notes, Quick Exam, Perio, Tx Planner, or Imaging.
The patient's clinical record opens with the Chart, Progress Notes, Quick Exam, Perio, Tx Planner, or Imaging tab selected.
-
On the Imaging tab's menu, select Show Image History.
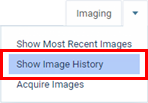
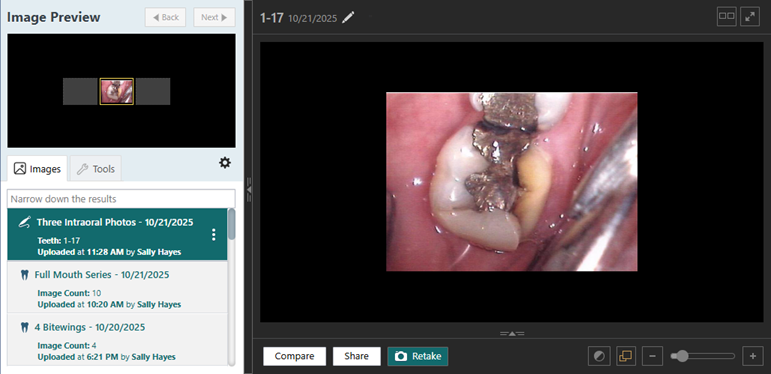
The patient's imaging page opens to the history view. The most recent image, series (such as a full mouth series or bitewings), set of photos (which was acquired using a custom imaging procedure), CAD/CAM scan, or 3D volume is selected by default on the Images tab.
Note: These steps apply to the Exam view only. If you are using the Modality view, before you can proceed, you must switch to the Exam view. For information about switching to the Exam view, refer to the topic about changing Dentrix Ascend Imaging settings.
-
Select a set of photos (which was acquired using a custom imaging procedure).
-
On the corresponding options menu, select Resume exam.
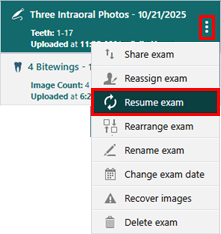
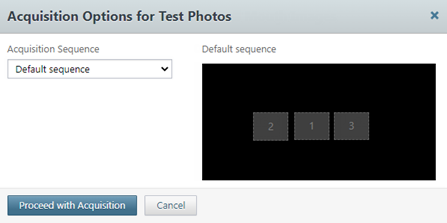
The Acquisition Options dialog box appears.
-
Under Acquisition sequence, select "Default sequence" or a custom order (if any).
-
Click (or tap) Proceed with Acquisition.
The options for acquiring images in the set appear.
-
Acquire one or more intraoral or extraoral photos according to the type of device that was used to acquire the images in the series originally.
Set of images with a camera
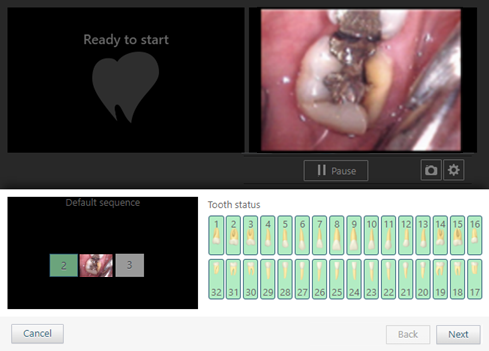
The first step in the acquisition sequence for the template is selected automatically (as indicated by the green, numbered box) on the sequence diagram, and the applicable teeth are selected on the Tooth status chart for your reference.
Also, the live video stream from your camera appears.
Notes:
-
To tune your camera's settings, you can click (or tap) the Tune Camera button
 .
. -
If you need to change the acquisition device, click (or tap) Pause to pause the video stream, select a different device on the Available Devices for Procedure menu, and then click (or tap) Discard to resume the video stream.
-
To skip ahead in the acquisition sequence by one step, click (or tap) Next (this button is available only if the current step in the sequence is not the last step).
-
To go backward in the acquisition sequence by one step, click (or tap) Back (this button is available only if the current step in the sequence is not the first step).
Do the following:
-
Point the camera at the patient or at the correct area inside the patient's mouth.
-
To pause or freeze the live video stream, with the camera properly positioned, do one of the following:
-
Press the button on your camera.
-
Click (or tap) Pause.
-
-
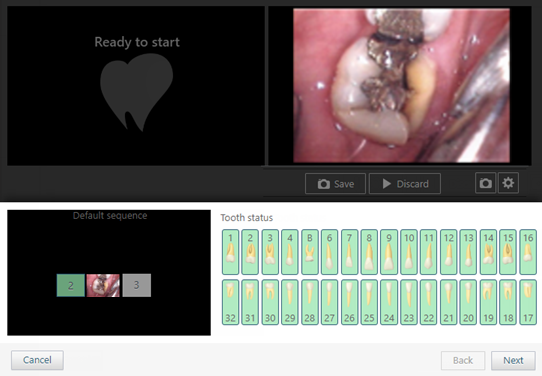
To capture the current video frame, do one of the following:
-
Press the button on your camera.
-
Click (or tap) Save.
Notes:
-
If alternative button functionality has been enabled for your camera in the acquisition agent preferences, you can push the button twice to not capture the current video frame.
-
To return to a live video stream without capturing the current video frame, click (or tap) Discard. Then, repeat steps a-c.
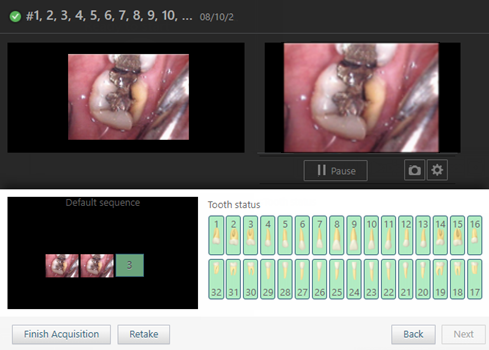
A preview of the resulting image appears. Also, if the image that you just acquired was not for the last step in the acquisition sequence, the next step with a missing image in the acquisition sequence is selected automatically (as indicated by the green, numbered box) on the sequence diagram, the applicable teeth are selected on the Tooth status chart for your reference, and the video stream automatically becomes live again.
Notes:
-
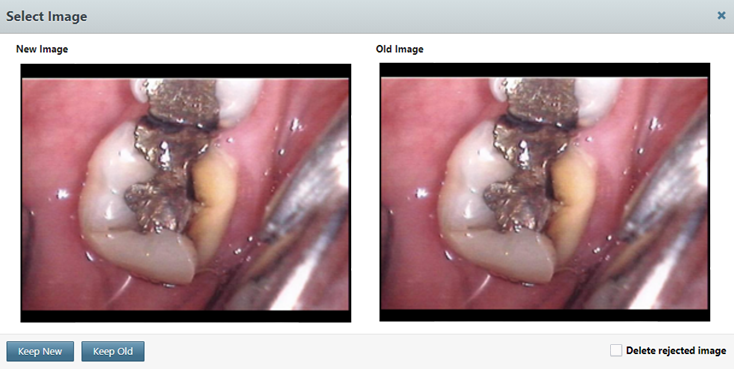
If you acquire an image for a step in the acquisition sequence that already has an image, the Select Image dialog box appears. The recaptured image appears on the left under New Image. The existing image appears on the right under Old Image. Either leave the Delete rejected image checkbox selected to have the rejected image be deleted when you choose one of the "Keep" options, or clear the checkbox to have the rejected image be hidden when you choose one of the "Keep" options. Then, click (or tap) either Keep New to keep the recaptured image and put it on the top of the image stack for the template slot or Keep Old to keep the existing image and leave it on the top of the image stack for the template slot.
-
To skip ahead in the acquisition sequence one step, click (or tap) Next. This button is available only if the current step in the sequence is not the last step.
-
To go backward in the acquisition sequence one step, click (or tap) Back. This button is available only if the current step in the sequence is not the first step, and if the previous step in the sequence does not have an image.
-
To replace the image that you acquired in the previous step of the acquisition sequence, click (or tap) Back to navigate to the previous step. With the camera properly positioned, click (or tap) Pause to pause the video stream, and then click (or tap) Save to capture the current video frame. The Select Image dialog box appears. Either leave the Delete rejected image checkbox selected to have the rejected image be deleted when you choose one of the "Keep" options, or clear the checkbox to have the rejected image be hidden when you choose one of the "Keep" options. Then, click (or tap) either Keep New to keep the recaptured image and put it on the top of the image stack for the template slot or Keep Old to keep the existing image and leave it on the top of the image stack for the template slot.
The original image and all recaptured images are saved to the patient's record.
-
-
Repeat steps a-c as needed to acquire other images in the set.
-
Click (or tap) Finish Acquisition.
-
If any images fail to upload, a message appears and provides the option for you to recover the images. Click (or tap) Recover Images to begin the recovery process.
Set of imported images
Do the following:
-
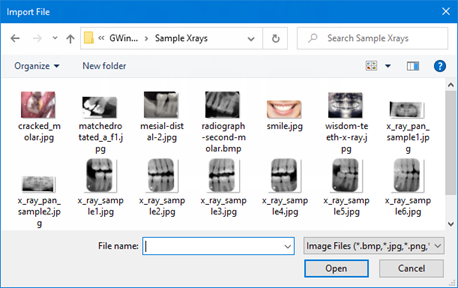
Click (or tap) Start Importing.
The Import File dialog box opens.
-
Select the correct image file, and then click (or tap) Open.
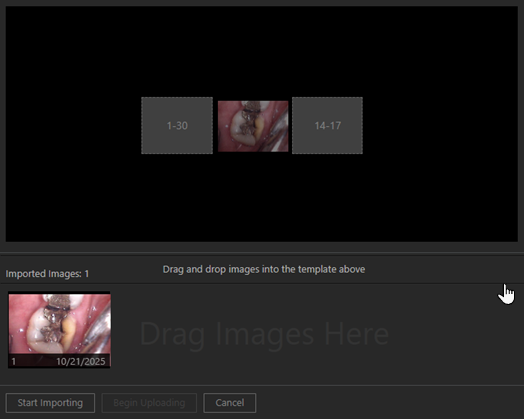
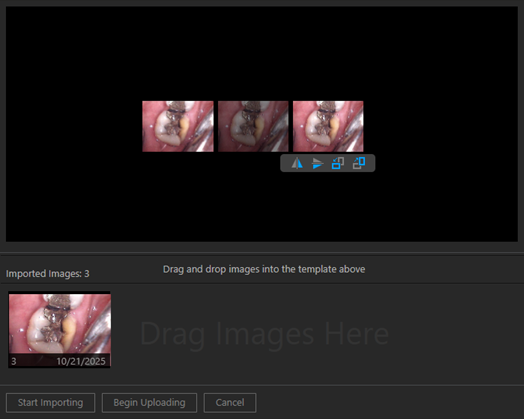
The image that you imported appears as a thumbnail image on the panel at the bottom of the Dentrix Ascend Imaging program.
-
Repeat steps a-b until you finish importing images for the set.
-
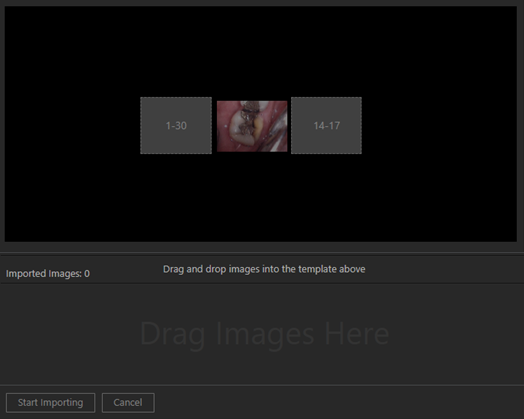
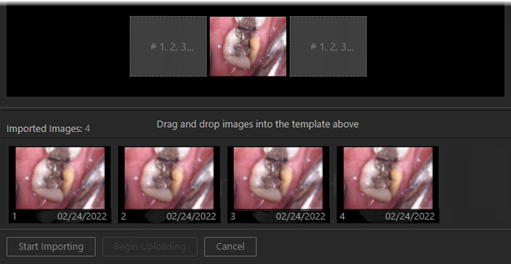
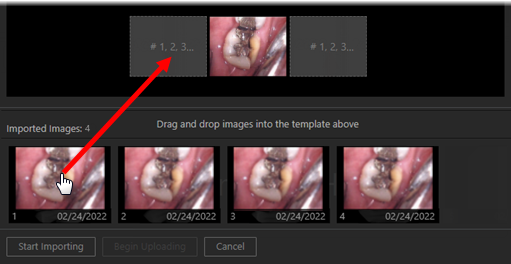
After all the images have been imported. One at a time, drag the thumbnail images from the panel to the correct boxes of the template.

-
As needed, do any of the following:
-
To stack multiple images in one template slot, drag either a thumbnail image from the panel at the bottom or an image from a template slot to a template slot that already has an image assigned. That image is put on the top of the image stack for that template slot (but you can choose a different image to be on top).
-
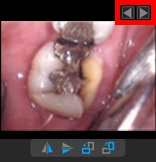
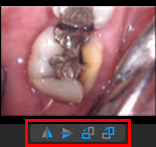
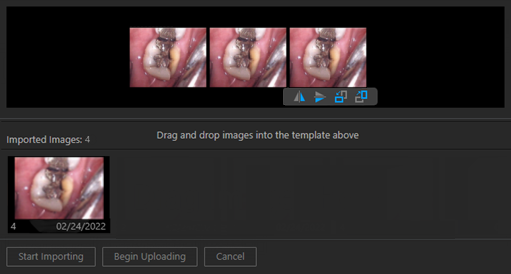
To choose the top image for a template slot with multiple images, navigate between the images in the stack by clicking (or tapping) the corresponding Next or Previous button as needed. The image that is visible in the stack when you click (or tap) Begin Uploading will be set as the top image of the stack.
-
To change the orientation of an image in the template, navigate to the desired image in the stack for a template slot (if multiple images are assigned to that template slot), select the image to view the toolbar, and then click (or tap) any of the available buttons as needed: Flip Horizontal, Flip Vertical, Rotate Counterclockwise (90 degrees), and/or Rotate Clockwise (90 degrees).
-
To remove an image from the template, navigate to the desired image in the stack for a template slot (if multiple images are assigned to that template slot), and then drag the image back to the panel at the bottom.
-
-
Click (or tap) Begin Uploading to save the mounted images to the patient's record.
-
If not all thumbnail images have been mounted to the template when you click (or tap) Begin Uploading or Cancel, a message appears, stating that unassigned images will not be saved to the patient's record.
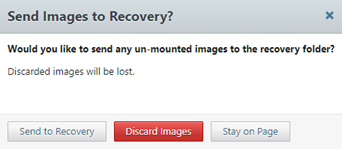
Click one of the following buttons:
-
Send to Recovery - To save the unassigned images. You can assign them to the patient later using the existing functionality for recovering images.
-
Discard Images - To delete the unassigned images permanently.
-
Stay on Page - To return to where you were so you can assign unassigned images or make other changes.
-
-
If any images fail to upload, a message appears and provides the option for you to recover the images. Click (or tap) Recover Images to begin the recovery process.
Set of images with a third-party program (TWAIN or bridge)
Do the following:
-
Use the options in the third-party TWAIN interface or imaging program that opens to get ready to acquire images.
-
Use the camera to capture images of the patient or the correct areas inside the patient's mouth.
-
Close the third-party TWAIN interface or imaging program.
The images that you acquired in the third-party imaging program appear as thumbnail images on the panel at the bottom of the Dentrix Ascend Imaging program.
-
One at a time, drag the thumbnail images from the panel to the correct boxes of the template.
-
As needed, do any of the following:
-
To stack multiple images in one template slot, drag either a thumbnail image from the panel at the bottom or an image from a template slot to a template slot that already has an image assigned. That image is put on the top of the image stack for that template slot (but you can choose a different image to be on top).
-
To choose the top image for a template slot with multiple images, navigate between the images in the stack by clicking (or tapping) the corresponding Next or Previous button as needed. The image that is visible in the stack when you click (or tap) Begin Uploading will be set as the top image of the stack.
-
To change the orientation of an image in the template, navigate to the desired image in the stack for a template slot (if multiple images are assigned to that template slot), select the image to view the toolbar, and then click (or tap) any of the available buttons as needed: Flip Horizontal, Flip Vertical, Rotate Counterclockwise (90 degrees), and/or Rotate Clockwise (90 degrees).
-
To remove an image from the template, navigate to the desired image in the stack for a template slot (if multiple images are assigned to that template slot), and then drag the image back to the panel at the bottom.
-
-
Click (or tap) Begin Uploading to save the mounted images to the patient's record.
-
If not all thumbnail images have been mounted to the template when you click (or tap) Begin Uploading or Cancel, a message appears, stating that unassigned images will not be saved to the patient's record.
Click one of the following buttons:
-
Send to Recovery - To save the unassigned images. You can assign them to the patient later using the existing functionality for recovering images.
-
Discard Images - To delete the unassigned images permanently.
-
Stay on Page - To return to where you were so you can assign unassigned images or make other changes.
-
-
If any images fail to upload, a message appears and provides the option for you to recover the images. Click (or tap) Recover Images to begin the recovery process.
-