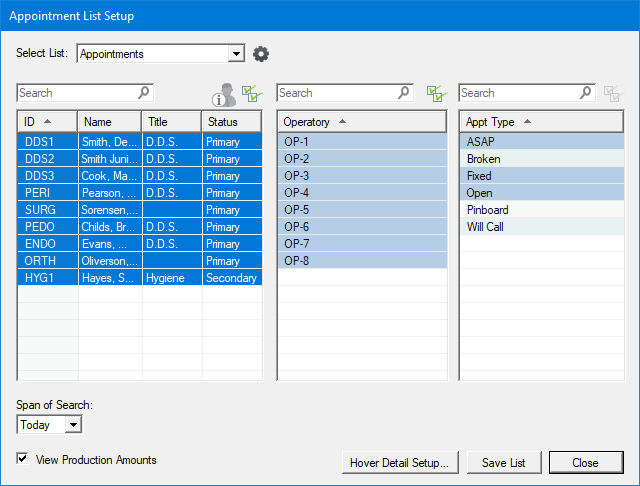
You can set up Appointment List views by a combination of provider, operatory, and appointment type. The default view includes all providers and operatories and the ASAP, Fixed, and Open appointment types. However, you can also set up custom Appointment List views by including all or selected appointment types and a combination of selected providers and operatories. You can then save these custom views.
To set up an Appointment List view
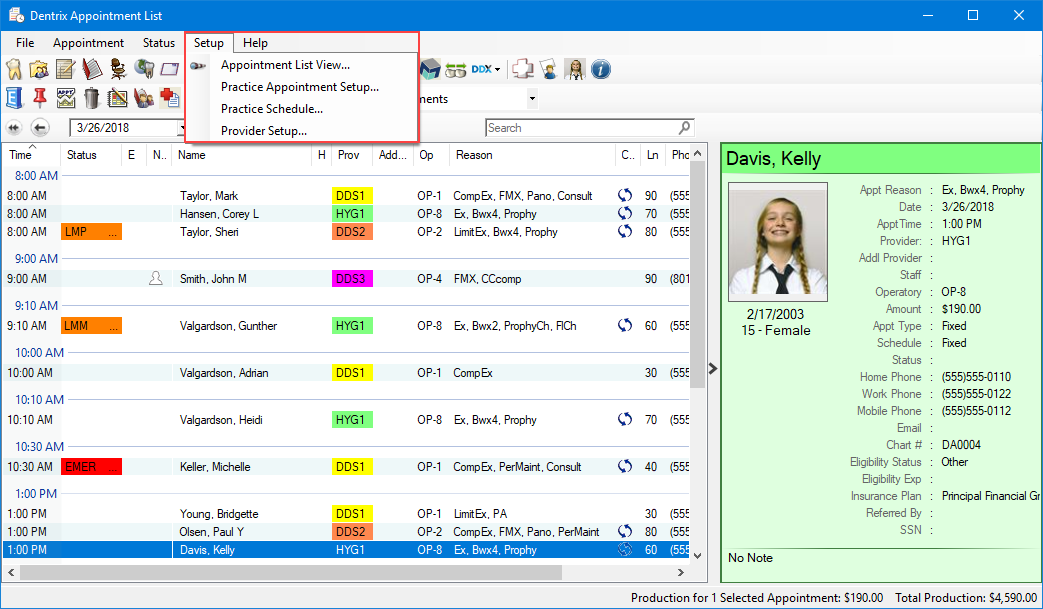
1. To open the Appointment List window, click Appt List.
The Appointment List window appears.

2. In the Appointment List window, click Setup, and then click Appointment List View.
The Appointment List Setup dialog box appears.

3. If necessary, change the Span of Search by clicking the Down arrow, and then select one of the following options:
Previous – Set the number of days, weeks, months, or years that you want to search previous to today's date.
Next – Set the number of days, weeks, months or years that you want to search following today's date.
Today – (Default) Searches for the appointments set for today's date that meet the criteria you specify (provider, operatory, and appointment type).
All Dates – Select this option only for Broken, Wait/Will Call, or Pinboard appointment types.
4. If necessary, clear the check mark from View Production Amounts.
5. To generate an appointment list, select one of the following options from Select List, and then click Close.
ASAP –
Pinboard –