

|
RoS tab
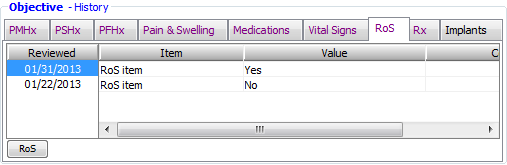
From the RoS tab in the Objective - History section of EHR, you can manage review of system (RoS) data for the case.
To add, edit, or view review of system data
1. With a case selected (in the Cases Section), on the RoS tab, click the RoS button.
The Review of System window appears.

2. In the RoS Summary section, do one of the following:
· To add a review, click New.
· To add a review from a template, select a Template, and then skip steps 3 - 4.
Note: If the template you want is not available in the list, the provider assigned to the case is not associated with a template. To view all the available templates, select the Remove Provider Filter check box.
· To edit the summary information for an existing review that is not locked, select a review, and then click Open.
Note: If the review is locked, when you select it, you can click View to view the summary information for the review.
The Edit RoS Summary dialog box appears with the creation date displayed at the top.
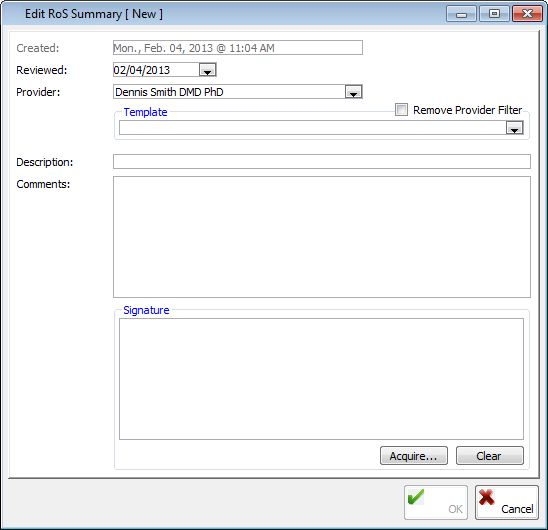
3. Enter the following information:
· Reviewed – Enter the date of the review. The current date is the default.
· Provider – Select the provider.
· Template – Select the template.
Note: If the template you want is not available in the list, the selected provider is not associated with a template. To view all the available templates, select the Remove Provider Filter check box.
· Description – Type a description for the review.
· Comments – Type any comments about the review.
· Signature – If a signature pad is installed, to acquire a digital signature from the patient, click Acquire.
4. Click OK. This button is available only if a provider and description have been entered.
5. Enter the review data:
a. For each item associated with the selected review template, under RoS Detail, under Values List, select the correct value.
b. Under RoS Detail, do any of the following:
· To add an item, click New to select and paste in an RoS field item, and then type a Value and Comments.
· To delete an item, select that item, and then click Delete.
c. To acquire a digital signature, click Acquire.
6. Click Exit.
7. On the message that appears and asks if you want to save the changes, click Yes.
To delete a review
1. From the Review of System window, in the RoS Summary section, select the review that you want to delete. You cannot delete a locked review.
2. Click Delete. This option is available only if a review is selected and the selected review is not locked.
A confirmation message appears.
3. Click Yes
Managing RoS templates
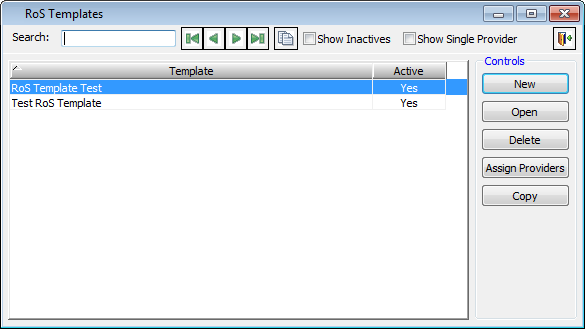
1. From the Review of System window, in the RoS Summary section, click Manage Templates.
The RoS Templates window appears.
Tips:
· To view active and inactive providers in the list, select the Show Inactive check box.
· To view the template for a specific provider, select the Show Single Provider check box, and then select and paste in a provider.
2. Do any of the following:
· To add a template, complete the following steps:
a. Click New.
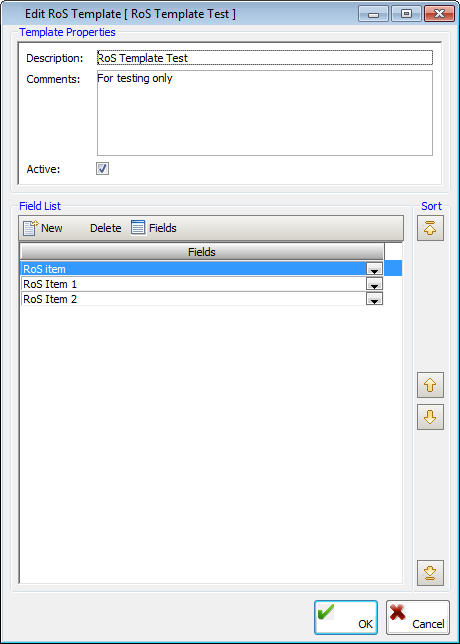
b. Type the Template Properties: a Description and Comments.
c. To add field items to the template, click New to add a line item, and then select an item from the Fields list.
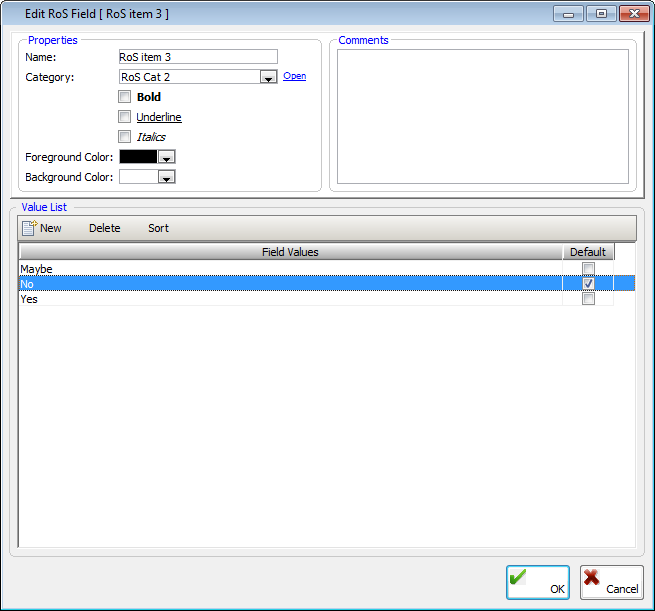
To open the master list of RoS fields (the fields available for all reviews), click Fields.
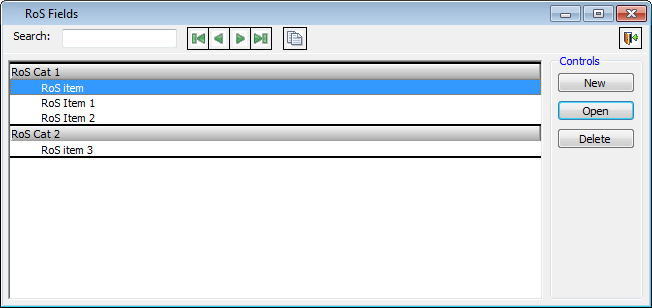
From the RoS Fields window, you can add, edit, and delete RoS fields as needed. Additionally, when adding or editing a field, in the Edit RoS Field dialog box, you assign the field a name, category (to define the categories, click the Open link), formatting, colors, and any number of possible values (sorted as desired and with the default value specified).
d. To delete a field item from the list box, select that field, and then click Delete.
e. To change the order of a field, select that field, and then click one of the Sort buttons.
f. Click OK.
· To edit an existing template, complete the following steps:
a. Select a template, and then click Edit.
b. Change the Description and Comments as needed. To make the template no longer available for selection when you add a review, clear the Active check box.
c. To add field items to the template, click New to add a line item, and then select an item from the Fields list.
To open the master list of RoS fields, click Fields. You can add, edit, and delete fields as needed.
d. To delete a field item from the list box, select that field, and then click Delete.
e. To change a field item, select a different field for that line item.
f. To change the order of a field, select that field, and then click one of the Sort buttons.
g. Click OK.
· To delete a template, select the template that you want to delete, and then click Delete. On the confirmation message that appears, click Yes. This does not affect reviews that were made using that template, but the template is no longer available for selection for adding reviews.
· To assign providers to a template (or remove assigned providers from a template), select a template, and then click Assign Providers. Assign and remove providers as needed.

· To create a template from a copy of another template, select the template that you want to make a copy of, and then click Copy. The options for the new template are the same as the selected template by default. Change the options as needed to customize the template, and then click OK.
Need more help?
You can visit our website, contact EndoVision Customer Support, or suggest a new feature or improvement on User Voice.