

|
Pain & Swelling tab
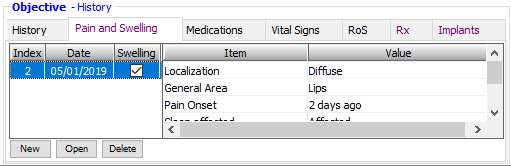
To add or edit pain and swelling
1. With a case selected (in the Cases section), in the Objective - History section of EHR, on the Pain & Swelling tab, do one of the following:
· To add an entry, click New.
· To edit an existing entry, select an entry, and then click Open.
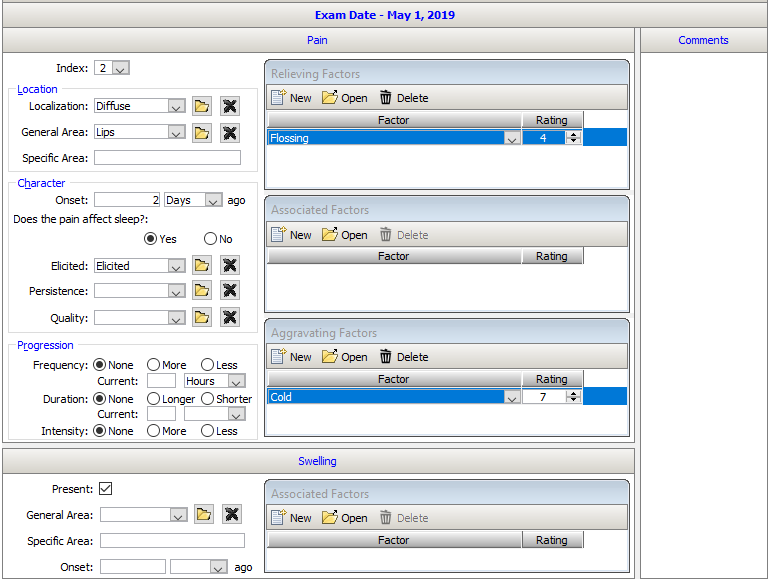
2. Select the pain Index as a value from 0 to 9.
3. If the pain index is greater than 0, set up the following Pain options:
· Location
· Localization - Select the localization of the pain. Click the Remove button  to clear any previous selection.
Tip: To specify which items you want to include in the list, click the Open link. Click the New button to add a new item. Clear a check box to delete the corresponding item (if you try to delete an item that is in use, a message appears and asks if you want to inactivate the item instead). Click Exit.
· General Area - Select the general area of the pain. Click the Remove button to clear any previous selection.
Tip: To specify which items you want to include in the list, click the Open link. Click the New button to add a new item. Clear a check box to delete the corresponding item (if you try to delete an item that is in use, a message appears and asks if you want to inactivate the item instead). Click Exit.
· Specific Area - Type the specific area of the pain (for example, the tooth number).
· Character
· Onset - Type a number, and select Days, Weeks, Months, or Years from the list to indicate how long ago the pain started.
· Does the pain affect sleep? - Select Yes or No.
· Elicited - Select how the pain is elicited. Click the Remove button to clear any previous selection.
Tip: To specify which items you want to include in the list, click the Open link. Click the New button to add a new item. Clear a check box to delete the corresponding item (if you try to delete an item that is in use, a message appears and asks if you want to inactivate the item instead). Click Exit.
· Persistence - Select the persistence quality of the pain. Click the Remove button to clear any previous selection.
Tip: To specify which items you want to include in the list, click the Open link. Click the New button to add a new item. Clear a check box to delete the corresponding item (if you try to delete an item that is in use, a message appears and asks if you want to inactivate the item instead). Click Exit.
· Quality - Select the quality that characterizes the pain. Click the Remove button to clear any previous selection.
Tip: To specify which items you want to include in the list, click the Open link. Click the New button to add a new item. Clear a check box to delete the corresponding item (if you try to delete an item that is in use, a message appears and asks if you want to inactivate the item instead). Click Exit.
· Progression - Select a description of the pain for the following options:
· Frequency - None, More, or Less.
· Current - Specify how long this frequency of pain has persisted.
· Duration - None, Longer, or Shorter.
· Current - Specify how long this duration of pain has persisted.
· Intensity - None, More, or Less.
· Relieving/Associated/Aggravating Factors
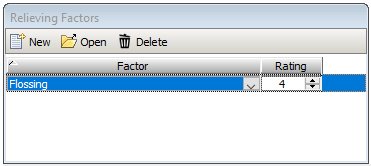
In the appropriate section, do any of the following:
· To add a factor to the list, click the New button, select a Factor from the list, and then type the rating.
· To delete a factor, select an item, and then click the Delete button (if you try to delete an item that is in use, a message appears and asks if you want to inactivate the item instead).
· To add and remove items on the Factor list, click Open Master List to open the master Edit Pain Factors dialog box. When you are finished, click Exit.
4. Under Swelling, select Present if the patient has any swelling.
5. If swelling is present, set up the following Swelling options:
· General Area - Select the general area of the swelling. Click the Remove button to clear any previous selection.
Tip: To specify which items you want to include in the list, click the Open link. Click the New button to add a new item. Clear a check box to delete the corresponding item (if you try to delete an item that is in use, a message appears and asks if you want to inactivate the item instead). Click Exit.
· Specific Area - Type the specific area of the swelling (for example, the tooth number).
· Onset - Type a number, and select Days, Weeks, Months, or Years from the list to specify how long ago the swelling started.
· Associated Factors - To add or delete factors associated with the swelling, click this button.
Do any of the following:
· To add an associated factor to the list, click the Add button, select a Factor from the list, and then type the rating.
· To delete an associated factor, select an item, and then click the Delete button (if you try to delete an item that is in use, a message appears and asks if you want to inactivate the item instead).
· To add and remove items on the Factor list, click Open Master List to open the master Edit Factors Associated with Swelling dialog box. When you are finished, click Exit.
6. Type any Comments regarding the pain and swelling.
7. Click OK.
To delete pain and swelling
1. With a case selected, in the Objective History section of EHR, on the Pain & Swelling tab, select the entry that you want to delete.
2. Click Delete.
A confirmation message appears.
3. Click Yes.
Need more help?
You can visit our website, contact EndoVision Customer Support, or suggest a new feature or improvement on User Voice.