

|
Adding shortcuts for completed and planned procedures
In order to add shortcuts for completed and planned procedures, you must be logged on to EndoVision as an administrator.
Tips:
· For a restorative procedure, create a treatment plan shortcut for that procedure, and then complete that procedure from the charting history list.
· For a given procedure, either you can create a shortcut that can be used for completing or treatment-planning that procedure, or you can create two separate shortcuts for that procedure -- one for completing and another for treatment planning that procedure.
To add a shortcut for completed or planned procedures
1. From the hard tissue chart, on the Task pane, click Add.
The Add New Items section appears.
Note: The first time you click Add on a computer, a message appears and prompts you to verify whether you want to load the default template. Click Yes if you want to load the default template (and associated shortcuts).
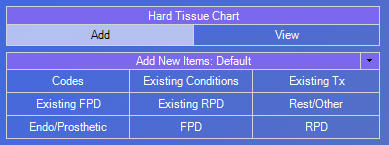
2. Click the Add New Items down arrow, and then click Shortcuts.
.png)
The Shortcut List dialog box appears.
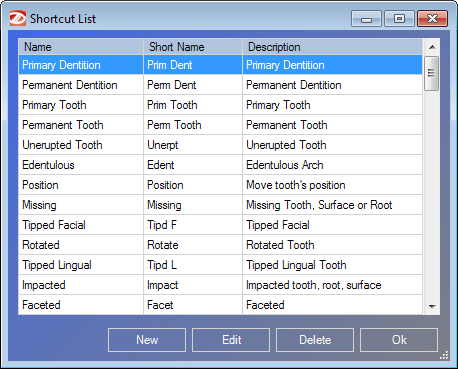
3. Click New.
The Shortcut Editor dialog box appears.
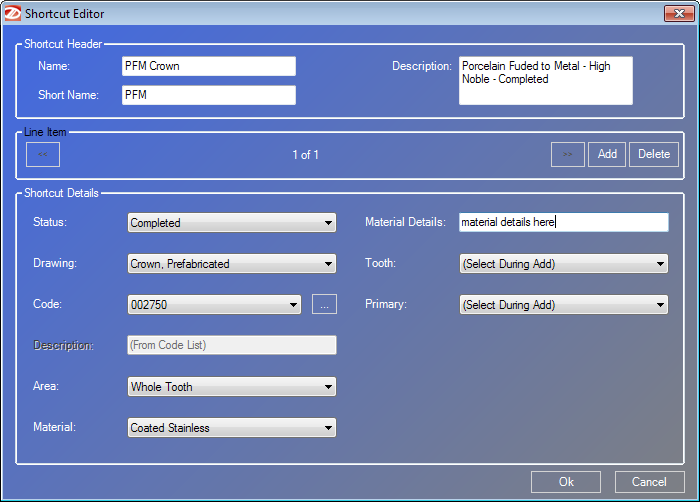
4. Type a shortcut Name. This field has a limit of 27 characters.
5. In the Short Name field, type the name of the shortcut as you want it to appear in the Task pane. This field has a limit of 10 characters.
6. Type a Description. Descriptions are used to remind staff of important settings when posting a shortcut. This field has a limit of 100 characters. To view a description when posting the shortcut, position the pointer over the shortcut; the description appears as a tooltip.
7. Status affects the options that are available for data entry (for example, if you select "Completed," only the fields required to post completed work are displayed). From the Status list, select "Completed," "Planned," or "Select During Add."
The options available in the Shortcut Editor dialog box change to reflect the selected status.
8. Drawing affects the options that are available for data entry (for example, if you select "Crown, Prefabricated," the options necessary to post a crown appear in the Shortcut Editor dialog box). From the Drawing list, select a graphical image for the shortcut.
Tip: If the shortcut requires a tooth or quadrant, select "Miscellaneous."
The options available in the Shortcut Editor dialog box change to reflect the selected drawing.
9. Set up the remaining options for the selected status and drawing options from steps 7 - 8.
10. If the shortcut contains multiple conditions or treatment, click the Add button and repeat step 7 - 9 for each condition or treatment.
11. Click OK.
Need more help?
You can visit our website, contact EndoVision Customer Support, or suggest a new feature or improvement on User Voice.