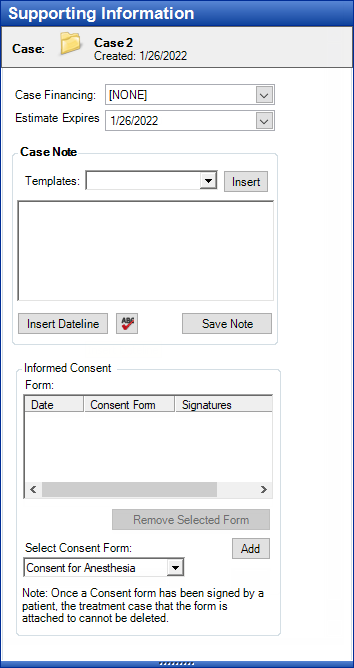
You can add notes and consent forms to a case as needed. You can also specify an expiration date for the case estimates as well as make a note of any case financing that may need to be set up.
Note: Changing the expiration dates of treatment plan cases requires the "Treatment Plan, Edit" security right.
To add supporting information to a case
In Treatment Planner, in the Treatment Plan Case Setup section on the Navigation panel, select the case to which you want to add supporting information.
Expand the Supporting Information section.

Note: The selected case appears at the top of the section for your reference.
Set up the following options:
Case Financing - By default, "[NONE]" is selected, but you can assign a financing option. Select one of the financing options.
Estimate Expires - By default, the default expiration date appears, but you can change the date. To specify a different expiration date, do one of the following:
To manually enter a date, do the following:
In the box, enter the correct date in a mm/dd/yyyy format.
Press Tab or Enter, or click outside the box.
If applicable, do one of the following:
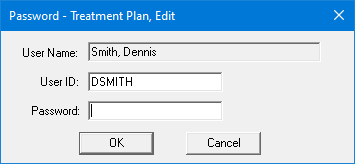
If the Password - Treatment Plan, Edit dialog box appears, user verification has been assigned to the "Treatment Plan, Edit" task. Do one of the following:
If your user account has been granted the "Treatment Plan, Edit" security right, enter your credentials in the User ID and Password boxes, and then click OK.
If your user account has not been granted the "Treatment Plan, Edit" security right, have a user with permission temporarily override this restriction so you can change the expiration date of a treatment plan case this one time. The overriding user enters his or her credentials in the User ID and Password boxes and then clicks OK.

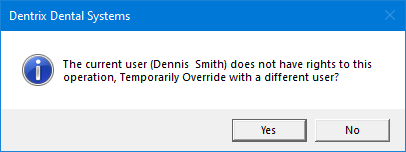
If a message appears, informing you that you do not have rights to this operation, your user account has not been granted the "Treatment Plan, Edit" security right. To have a user with permission temporarily override this restriction so you can change the expiration date of a treatment plan case this one time, do the following:
On the message, click Yes.

In the Password - Treatment Plan, Edit dialog box, the overriding user enters his or her credentials in the User ID and Password boxes and then clicks OK.

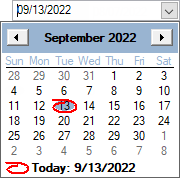
To select a date, do the following:
Click the down-pointing arrow to view a month calendar.

Navigate to the correct month using the left and right arrows.
Note: To quickly change the year and month, click the month-year at the top of the calendar, navigate to the correct year using the left and right arrows, and then click the correct month.
Click the correct day.
Press Tab or Enter, or click outside the box.
If applicable, do one of the following:
If the Password - Treatment Plan, Edit dialog box appears, user verification has been assigned to the "Treatment Plan, Edit" task. Do one of the following:
If your user account has been granted the "Treatment Plan, Edit" security right, enter your credentials in the User ID and Password boxes, and then click OK.
If your user account has not been granted the "Treatment Plan, Edit" security right, have a user with permission temporarily override this restriction so you can change the expiration date of a treatment plan case this one time. The overriding user enters his or her credentials in the User ID and Password boxes and then clicks OK.

If a message appears, informing you that you do not have rights to this operation, your user account has not been granted the "Treatment Plan, Edit" security right. To have a user with permission temporarily override this restriction so you can change the expiration date of a treatment plan case this one time, do the following:
On the message, click Yes.

In the Password - Treatment Plan, Edit dialog box, the overriding user enters his or her credentials in the User ID and Password boxes and then clicks OK.

Case Note - To add a case note, do the following:
Do one of the following:
To use a predefined case note template, select a template from the Templates list, click Insert, and then change the text as needed.
To enter a custom note, in the box, enter the text of the note.
Notes:
To check the spelling of the note text, click
the Check Spelling button  (this button is available only if a certain preference
setting has been enabled).
To insert a date stamp where the text cursor is located, click Insert Dateline.
Click Save Note.
Informed Consent - The consent forms that are attached to the case appear in the Form list. You can view, add, edit, sign, and remove consent forms in this section in a similar manner to how you can in the Treatment Plan Case Setup section.