The Treatment Case Report displays treatment-planned procedures for a specific treatment plan case. The report may also include other items, such as the patient's graphical chart and account information, case notes, and insurance information.
|
Why: |
To print a treatment case created for a patient |
When: |
As needed |
Note: Modifying the options for the Treatment Case Report requires the "Print Treatment Plans, Setup" security right. Printing the Treatment Case Report requires the "Print Treatment Plans" security right.
To print the Treatment Case Report
In Treatment Planner, in the Treatment Plan Case Setup section on the Navigation panel, select a case.
Do one of the following:
On the
Treatment Plan Case Setup section's
toolbar, click the Print button
![]() to view a menu, and then
click Print Treatment Case.
to view a menu, and then
click Print Treatment Case.
On the
Treatment Planner Module toolbar,
click the Print button ![]() to view a menu,
and then click Print Treatment Case.
to view a menu,
and then click Print Treatment Case.
On the File menu, point to Print, and then click Print Treatment Case.
If applicable, do one of the following:
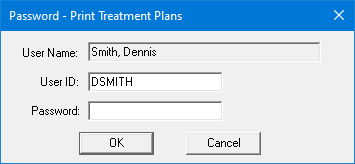
If the Password - Print Treatment Plans dialog box appears, user verification has been assigned to the "Print Treatment Plans" task. Do one of the following:
If your user account has been granted the "Print Treatment Plans" security right, enter your credentials in the User ID and Password boxes, and then click OK.
If your user account has not been granted the "Print Treatment Plans" security right, have a user with permission temporarily override this restriction so you can generate the Treatment Case Report this one time. The overriding user enters his or her credentials in the User ID and Password boxes and then clicks OK.
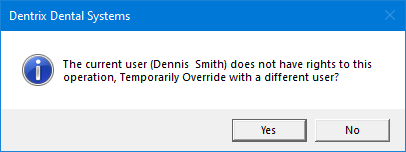
If a message appears, informing you that you do not have rights to this operation, your user account has not been granted the "Print Treatment Plans" security right. To have a user with permission temporarily override this restriction so you can generate the Treatment Case Report this one time, do the following:
On the message, click Yes.
In the Password - Print Treatment Plans dialog box, the overriding user enters his or her credentials in the User ID and Password boxes and then clicks OK.

The Print Treatment Case dialog box appears.
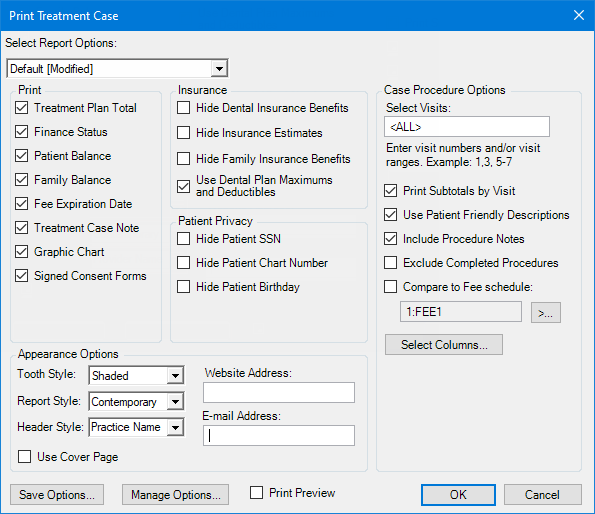
If you have a saved set of report options, you can load those options for running the report by selecting the desired set from the Select Report Options list; otherwise, leave "Default" selected.
Set up or change the following options to indicate which information to include on the report:
Note: These options are available only if your user account has been granted the "Print Treatment Plans, Setup" security right.
Print - Select or clear the following checkboxes as needed: Treatment Plan Total, Finance Status, Patient Balance, Family Balance, Fee Expiration Date, Treatment Case Note, Graphic Chart, and/or Signed Consent Forms.
Insurance - Select or clear the following checkboxes as needed: Hide Dental Insurance Benefits, Hide Insurance Estimates, Hide Family Insurance Benefits, and Use Dental Plan Maximums and Deductibles (to include the amount of any deductibles applied).
Patient Privacy - Select or clear the following checkboxes as needed: Hide Patient SSN, Hide Patient Chart Number, and Hide Patient Birthday.
Case Procedure Options:
In the Select Visits box, either enter a visit or range of visits (for example, 1, 3, 5-7) to include, or enter <ALL> to include all visits.
Select or clear the following checkboxes as needed: Print Subtotals by Visit, Use Patient Friendly Descriptions, Include Procedure Notes, and/or Exclude Completed Procedures.
Select or clear the Compare to Fee Schedule checkbox to specify whether to include a comparison of the current fee schedule to a selected fee schedule or not to include a comparison. With this checkbox selected, to select the fee schedule that you want to compare to the current fee schedule, do the following:
Click
the search button ![]() .
.
The Select Fee Schedule dialog box appears.
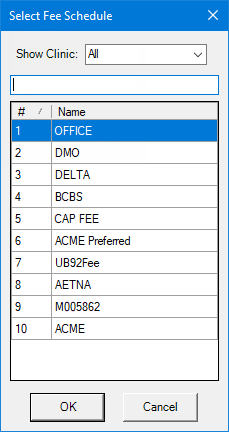
To filter the list by clinic, do one of the following:
To view only the fee schedules that are associated with a specific clinic, select the desired clinic from the Show Clinic list.
To view all fee schedules whether or not they are associated with any clinic, select All from the Show Clinic list.
To search for a fee schedule, begin entering the name of a fee schedule in the search box, and continue typing as needed to narrow down the list.
Select the correct fee schedule.
Click OK.
To specify which columns to display on the report (Date, Visit, Tooth, Surface, Procedure Code, Provider, Description, Fee, Patient Portion, Primary Insurance Portion, and/or Secondary Insurance Portion), do the following:
Click Select Columns.
The Select Columns dialog box appears.
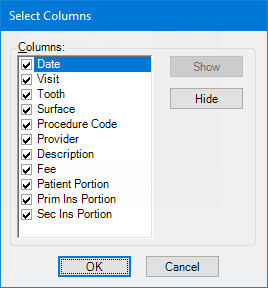
Do any of the following as needed:
To include a column, select it, and then click Show.
To include a column, select the corresponding checkbox.
To exclude a column, select it, and then click Hide.
To exclude a column, clear the corresponding checkbox.
Click OK.
Appearance Options - To specify what you want the report to look like, set up the following options:
Tooth Style - Select Shaded, Light Shaded, Shaded Gray, Outline, or Colored Outline.
Report Style - Select Simple, Classic, Contemporary, Elegant, Modern, or Retro.
Header Style - Select the name that you want to appear prominently on the report: Practice Name, Provider Name, or Patient Name.
Website Address - Enter the address of the practice's website.
E-mail Address - Enter the practice's email address.
Use Cover Page - Select or clear this checkbox to include or not to include a cover page.
To save the current state of the report options as a set, do the following:
Click Save Options.
Note: This button is available only if your user account has been granted the "Print Treatment Plans, Setup" security right.
The Save Options dialog box appears.
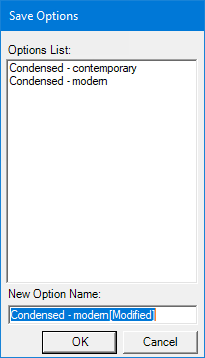
In the New Option Name box, enter a name for the set.
Click OK.
To rename or delete an existing set of report options, do the following:
Click Manage Options.
Note: This button is available only if your user account has been granted the "Print Treatment Plans, Setup" security right.
The Manage Saved Options dialog box appears.
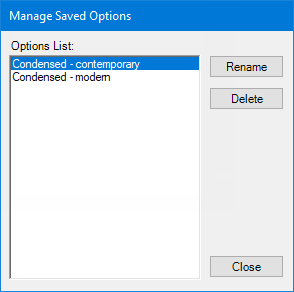
Do any of the following:
To rename a set, select it, click Rename to make the name editable, enter the new name, and then press Tab to apply the change or Enter to apply the change and close the dialog box.
To delete a set, select it, click Delete, and then click Yes on the confirmation message that appears.
If the dialog box is still open, to close it, click Close.
To preview the report before printing it, select the Print Preview checkbox.
Click OK to print or preview the report.
If you changed any of the report options, a message appears, prompting you to save the current state of the report options as a set. Do one of the following:
To save a set, click Yes. The Save Options dialog box appears. In the New Option Name box, enter a name for the set. Then, click OK.
To not save a set, click No.
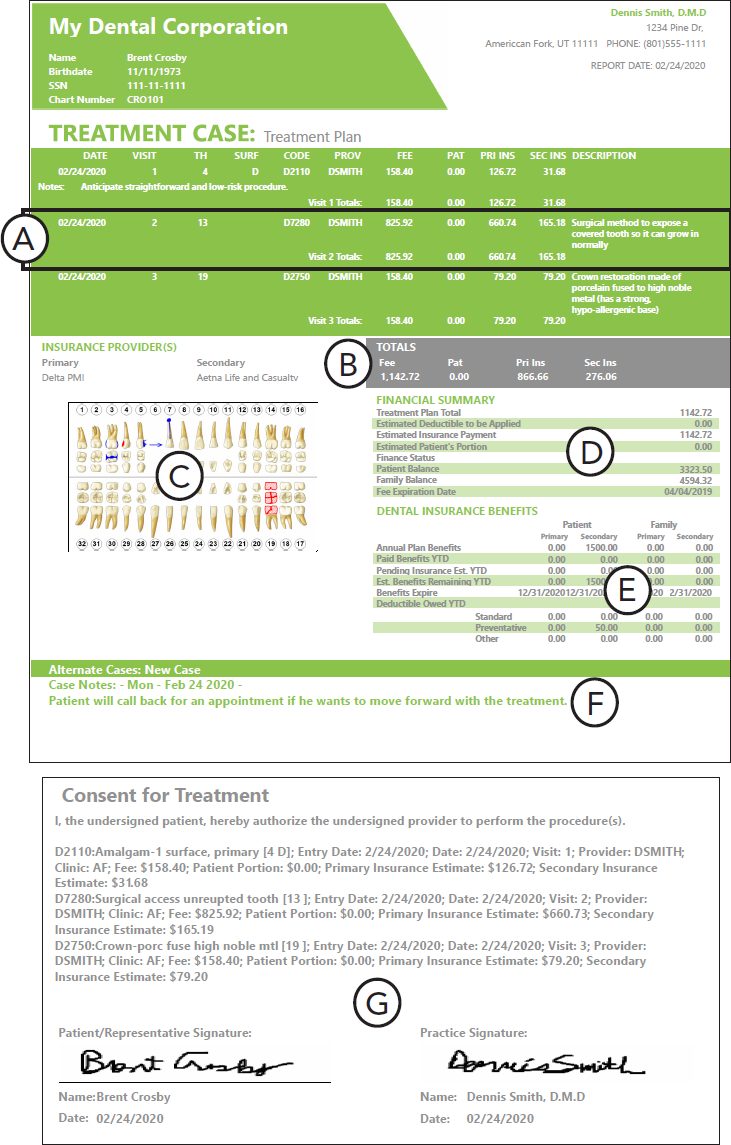
Important information this report provides
Treatment - The treatment-planned procedures are grouped by visit. A subtotal of fees, patient portions, and insurance estimates for each visit are given. If a treatment-planned procedure has notes entered, those notes appear after the treatment details of that procedure.
Insurance Estimates - The patient's insurance carriers are listed along with the fees, patient portions, and insurance estimates for the entire treatment plan.
Graphical Chart - The patient's graphical chart is shown with all applicable treatment and conditions that have a paint type.
Financial Summary - The treatment plan total, patient and insurance estimates, and account information are shown.
Insurance Benefits - Details of the current insurance plan maximums and deductibles for the patient and family are shown.
Treatment Case Note - Any linked cases are listed, and any notes attached to the case are shown.
Consent Forms - Any consent forms and corresponding signatures that are attached to the case are printed on separate pages.