When you are logged in to the Central clinic, you can make alterations to an entire RVU schedule, or specific segments of an RVU schedule, without having to manually enter each amount for a procedure.
Note: Updating RVU schedules requires the "RVU, Auto Changes" security right.
To make automatic RVU schedule changes
While logged in to the Central clinic, in Office Manager, expand the Maintenance menu, point to Practice Setup, and then click Auto RVU Schedule Changes.
Note: This option is available only if you are logged in to the Central clinic.
If applicable, do one of the following:
If the Password - RVU, Auto Changes dialog box appears, user verification has been assigned to the "RVU, Auto Changes" task. Do one of the following:
If your user account has been granted the "RVU, Auto Changes" security right, enter your credentials in the User ID and Password boxes, and then click OK.
If your user account has not been granted the "RVU, Auto Changes" security right, have a user with permission temporarily override this restriction so you can update RVU schedules this one time. The overriding user enters his or her credentials in the User ID and Password boxes and then clicks OK.

If a message appears, informing you that you do not have rights to this operation, your user account has not been granted the "RVU, Auto Changes" security right. To have a user with permission temporarily override this restriction so you can update RVU schedules this one time, do the following:
On the message, click Yes.

In the Password - RVU, Auto Changes dialog box, the overriding user enters his or her credentials in the User ID and Password boxes and then clicks OK.

The Automatic RVU Schedule Changes dialog box appears.

Click the Select RVU Schedule search button ![]() .
.
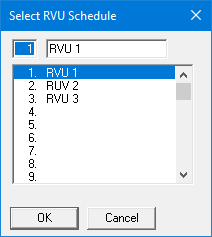
The Select RVU Schedule dialog box appears.

In the list, select an RVU schedule.
Click OK.
To specify which procedure codes you want to change the fees for, under Select Procedure Code, do one of the following:
To include all procedure codes, leave <ALL> entered for both From and To.
To include a specific range of procedure codes, enter or select the starting procedure code (alphabetically by ADA code) of the range for From and the ending procedure code of the range for To.
To include a specific procedure code, enter or select the same procedure code for both From and To.
To include an open-ended range of procedure codes, enter or select a procedure code for either From or To, and then type <ALL> for the other option.
To select a specific procedure code for From or To, do the following:
Click the corresponding search button  .
.
The Procedure Codes dialog appears.

In the Category list, select a category.
The corresponding procedure codes appear in the Procedure Code List to the right.
Select the correct procedure code.
Click OK.
Do one of the following:
To copy the RVU schedule's procedure codes and corresponding units to another fee schedule, do the following.
Under Select Operation, select the Copy RVU Schedule To option.
Click the corresponding search button ![]() .
.
The Select RVU Schedule dialog box appears.

In the list, select the RVU schedule that you want to overwrite.
Click OK.
Note: Overwriting an existing RVU schedule affects all providers and insurance carriers with that RVU schedule attached.
Click Copy.
To clear the RVU schedule (change all units to zeros), do the following:
Under Select Operation, select the Clear RVU Schedule option.
Click Clear.
To change the RVU schedule, do the following:
Under Select Operation, select the Change RVU Schedule option.
Select one of the following options:
Increase by [x.xx] % - To increase each unit by a percentage. With this option selected, enter a percentage in the corresponding box.
Increase by [x.xx] RVU - To increase each unit by an amount. With this option selected, enter a value in the corresponding box.
Decrease by [x.xx] % - To decrease each unit by a percentage. With this option selected, enter a percentage in the corresponding box.
Decrease by [x.xx] RVU - To decrease each unit by an amount. With this option selected, enter a value in the corresponding box.
Under Round To, select the option that corresponds to the nearest value that you want to round the new units to: Whole (whole number), 1/10, (tenth), or 1/100 (hundredth).
Note: The default selection for this list is determined by an organization setting.
In the Minimum Amount To Increase/Decrease box, enter the minimum value that a unit must be increased or decreased by.
Click Change.
The Automatic RVU Schedule Change Results dialog box appears and displays the new RVU schedule for you to review.

To change any units in the New RVU column, do any of the following:
Do one of the following:
Double-click a procedure's value in the New RVU column.
Select a procedure, and then click Edit.
A box that contains the value, which you can edit, appears. Either leave that value entered, or enter a different value.

Do one of the following:
To apply the RVU and advance to the next RVU schedule down (if there is one) in the list, press Tab, and then repeat step b-c.
To apply the RVU without advancing to the next RVU schedule, press Enter. Repeat steps a-c as needed.
Do one of the following:
To accept the RVU schedule changes, click Accept.
To reject the RVU schedule changes and return to the Automatic RVU Schedule Changes dialog box, click Reject.