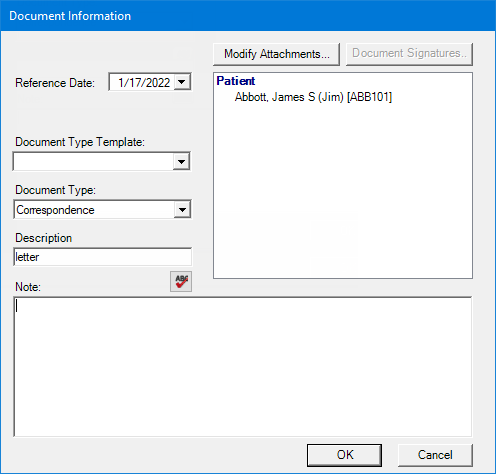
When you acquire a document (from a device, by scanning, by importing a file, by pasting from the Clipboard, or by printing) or attach an unfiled document, the Document Information dialog box appears so you can categorize, enter information about, and attach the document.

To enter the document information
If the applicable document type template has already been created, select it from the Document Type Template list to quickly assign the corresponding Document Type and Description to the document.
Note: If necessary, you can change the type and description after selecting a template.
Set up the following options:
Reference Date - This date is displayed for this document in the document tree and when it is printed. By default, the current date is entered, but you can change it. To change the date, do one of the following:
To enter the correct month, day, and/or year in the box (which uses a m/d/yyyy format), do any of the following as needed:
To change the month, click the first date segment to select the number, and then enter the number (from 1-12) of the correct month.
To change the day, click the second date segment to select the number, and then enter the correct day of the month.
To change the year, click the third date segment to select the number, and then enter the correct 4-digit year.
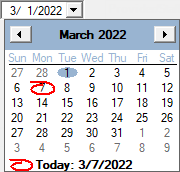
To use a date selector to select the correct date, click the downward-pointing arrow to view a calendar, navigate to the correct year and month, and then click the correct day.

Document Type - The document type that you want to assign to the document. If you did not select a template, or if you want to change the selection, select the applicable document type.
Description - The description that you want to use as the name for this document in the document tree and as the file name for this document when it is exported or attached to an email message. If you did not select a template, or if you want to change the text, enter a description (up to 40 characters in length) for the document.
Note - Enter a note (up to 1,000 characters in length) regarding the document. The note text is appended automatically to the text of an email message with this document attached, and you can view the note when previewing this document.
Note: To
check the spelling of the note text, click the Check
Spelling button ![]() (this
button is available only if a certain preference setting is enabled).
(this
button is available only if a certain preference setting is enabled).
Modify Attachments - By default, the entity that is currently selected in Document Center is already attached to the document (unless you are printing to Document Center). To attach the document to other entities (patient, provider, staff member, employer, referral, and/or insurance plan), click Modify Attachments. For information about adding and removing document attachments, see the topic about modifying document attachments.
Click OK.