
Dentrix Imaging supports acquiring intraoral images from the DEXIS Platinum intraoral x-ray sensor.
· You must install the drivers for the DEXIS Titanium sensor on each Windows client workstation that the DEXIS sensor will be connected to or plugged into.
· You must install calibration/correction files on each Windows client workstation that the DEXIS sensor will be connected to or plugged into.
Note: Before installing any imaging device, you must configure the acquisition agent application on each Windows client workstation that you will use to acquire images.
The minimum required versions include:
· Acquisition Agent – v1.2.6911.29786
· DTX Studio Bridge – v1.2.2.2
To set up the DEXIS Titanium sensor
1. Download DTX Studio and authorization code from the KaVo website.
2. Start the DTX Studio Bridge InstallShield Wizard.
Note: If a User Account Control dialog box appears, click Yes.

3. Click Install.
The Welcome screen appears.

4. Click Next.
The License Agreement screen appears.

5. Select I accept the terms in the license agreement, and then click Next.
The Destination Folder screen appears.
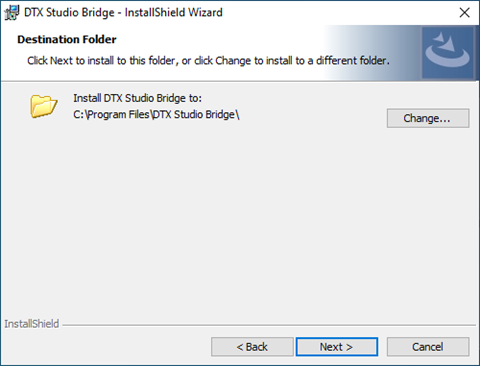
6. Click Next.
The Ready to Install the Program screen appears.

7. Click Install.
The InstallShield Wizard Completed screen appears.

8. Click Finish.
The Configuration Wizard appears.
You can enable or disable binning with the DEXIS Titanium sensor.
1. In the System Tray, click the DTX Studio Bridge icon.
The DTX Studio Bridge dialog box appears.
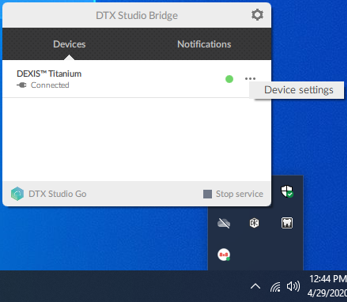
2. Click the three dots, and then click Device settings.
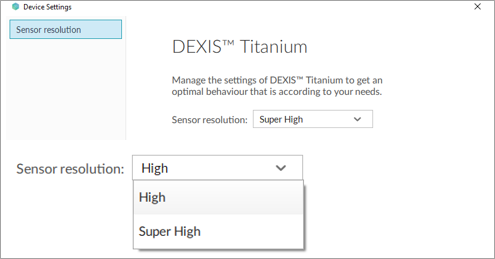
3. To change the binning mode setting, from the Sensor resolution list, click one of the following options:
· High – Binned
· Super High – Unbinned
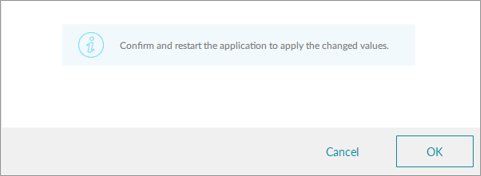
4. Click OK.
5. To enable the new setting, close, and then reopen the DTX Studio Bridge.
