
The acquisition agent is installed automatically with Dentrix Imaging. If you need to change the default settings of the acquisition agent after you install Dentrix Imaging, you can configure the acquisition agent's options as needed.
Notes:
· To the modify the quality factor for .jpg images that are acquired with Hamamatsu, Carina, and Carestream intraoral X-ray sensors, you can modify the AcquisitionAgent.ini file located in C:\Program Files (x86)\Acquisition Agent by default. If you have version 114 or later of the acquisition agent installed and have acquired an image using any intraoral X-ray sensor since that version was installed, a section titled [Jpeg Compression] appears in the .ini file. The following options are available:
· Hamamatsu = True - The default value is True, but you can change the value to False if you are certain that you will never use these sensors.
· CARINA = True - The default value is True, but you can change the value to False if you are certain that you will never use these sensors.
· CarestreamRvg = True - The default value is True, but you can change the value to False if you are certain that you will never use these sensors.
· GrayscaleJpegQuality = 96 - The default value is 96, but you can change the value to a number between 80 and 99.

To configure the acquisition agent
1. Click the Acquisition Agent icon in the notification area of the Windows task bar, and then click Preferences.

The Preferences dialog box appears.
2. Click the links to set up any of the options on the following tabs:
· General
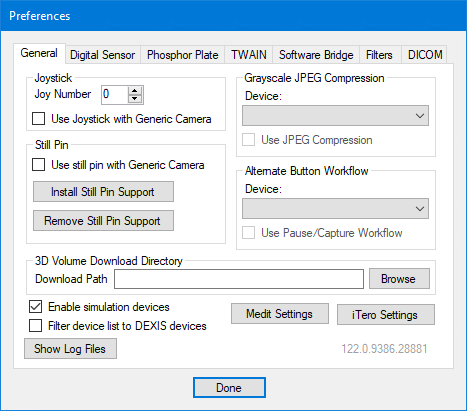


· TWAIN

· Filters

· DICOM

3. To close the Preferences dialog box, click Done.