Deposit slip
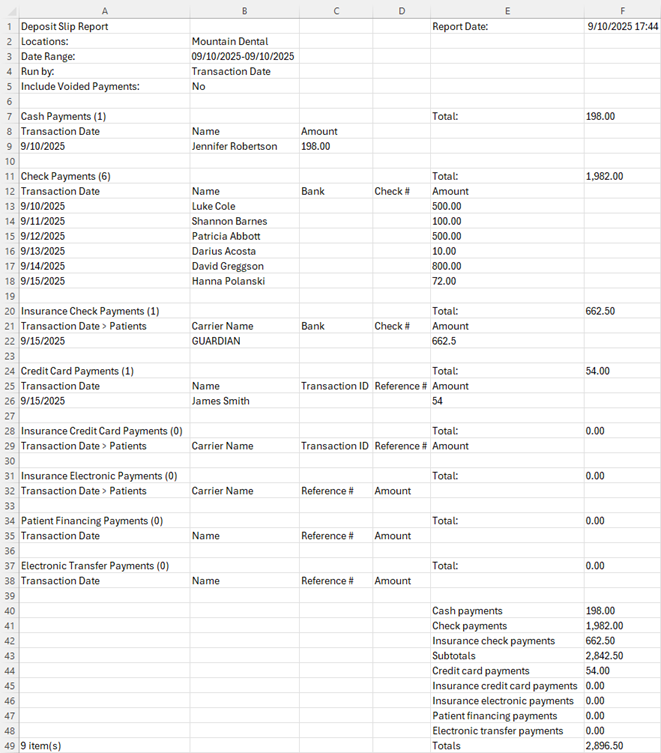
You can view and print a deposit slip for a specified date or date range. The deposit slip includes patient payments (cash, checks, credit cards, patient financing, and electronic transfers), bulk insurance payments (checks and electronic transfers), and individual insurance payments (checks and electronic transfers). The deposit slip also displays totals for each type of payment.
To print a deposit slip
-
On the Home menu, under Reports, click (or tap) Deposit Slip.
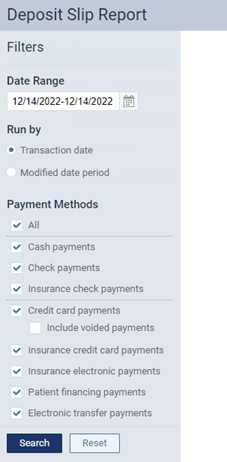
The Deposit Slip Report page opens.
-
Set up the following options:
-
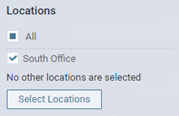
Locations - The transactions and totals for the selected locations. Do one of the following:
-
To include all locations, select the All checkbox.
-
To include only the location that you are currently logged in to, select the checkbox of the current location.
-
To include specific locations, click (or tap) Select Locations to open the Locations dialog box, select the checkbox of each desired location, and then click (or tap) Save.
Notes:
-
Only the locations that you have access to are available.
-
If multiple (or all) locations are selected, the payments and totals are grouped by location.
-
If multiple (or all) locations are selected, the Date Range must be one month or less.
-
-
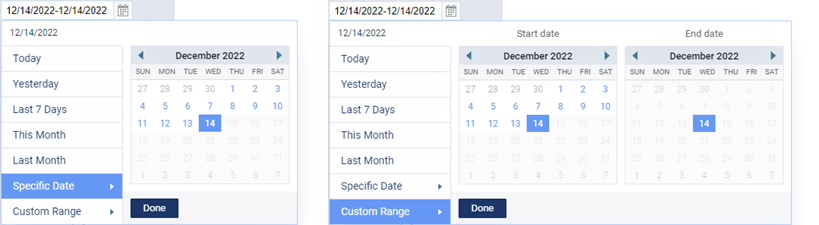
Date Range - The date of the deposit slip is today by default, but you can change the date. To change the date, click (or tap) in the box, and then select a date or date range.
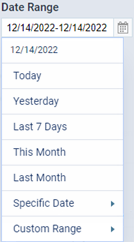
Note: You can create a deposit slip for one of the pre-defined dates or date ranges, for a Specific Date, or for a Custom Range.
-
Run by - Select whether you want to run the deposit slip by Transaction date or the Modified date period.
Note: The transaction date is different from the created/modified date in the following instances:
-
When posting a payment, you backdate it.
-
When editing a payment, you change the Transaction date, Amount, Check #, Reference #, Bank/branch #, Applied amounts, Tags, or Deductibles.
-
-
Payment Methods - The All checkbox is selected by default, so the deposit slip will include all forms of payments except voided payments. If you do not want to include all forms of payment, clear the checkbox of each form of payment that you want to exclude. If Credit card payments is selected, to include voided payments, select the Include voided payments checkbox.
-
Last Updated By - To filter by users who have entered or modified payments, do one of the following:
-
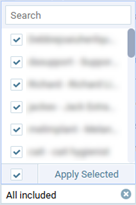
To include all users, select the checkbox at the bottom of the list, and then click Apply Selected.
-
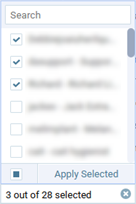
To include specific users (up to 2000), select the checkbox of each desired user on the list, and the click Apply Selected.
-
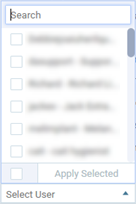
To remove the user filter if users are selected, clear the checkbox at the bottom of the list, and then close the list.
Notes:
-
To quickly locate a user in the list, when you expand the list, you can begin typing part of a username or a user’s first or last name in the search box at the top of the list.
-
If you are running the deposit slip by Transaction date:
-
If there are revisions for a given payment, the payment is included if one of the selected users made the most recent revision to that payment on a date that is within the specified Date Range.
-
If there are no revisions for a given payment, the payment is included if one of the selected users entered that payment on a date that is within the specified Date Range.
-
-
If you are running the deposit slip by Modified date period:
-
If there are revisions for a given payment, the payment is included if one of the selected users made a revision to that payment on a date that is within the specified Date Range.
-
If there are no revisions for a given payment, the payment is included if one of the selected users entered that payment on a date that is within the specified Date Range.
-
-
-
-
Click (or tap) Search.
Note: Depending on the date range of the report and the number of records that must be checked, it may take 1-5 minutes for the report to load. Please be patient. If you leave the page before the report loads, you will have to regenerate the report.
The report details appear. The report has two views: Report View and Grid View.
-
Report View - This is the standard view.
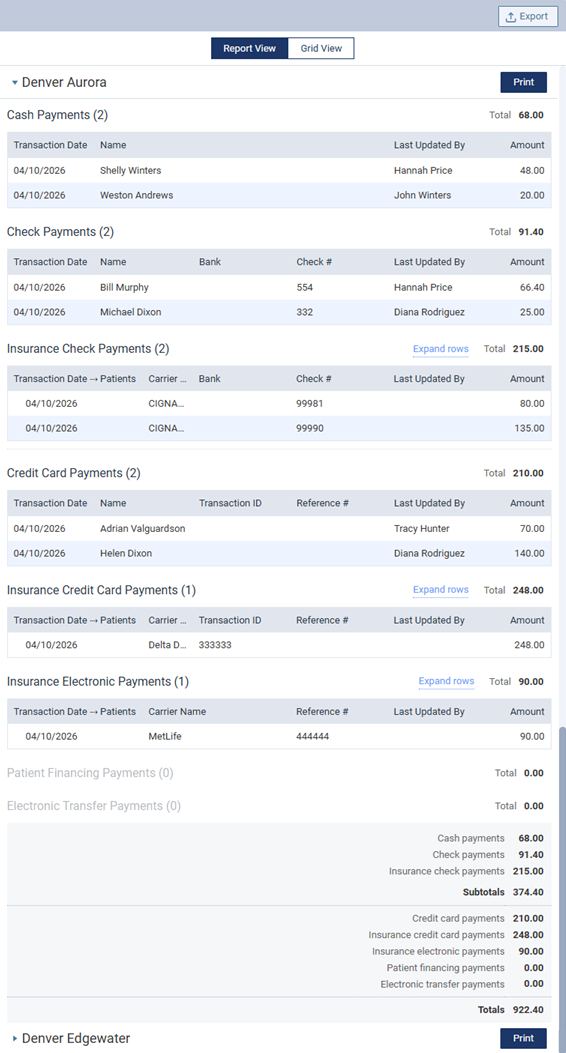
Each location on the deposit slip is a section that you can collapse and expand as needed.
If the Include voided payments checkbox was selected, voided payments appear in the Credit Card Payments section. For each voided payment, "Voided" appears in red text in the Status column (which is an additional column that appears only if the deposit slip includes voided payments).

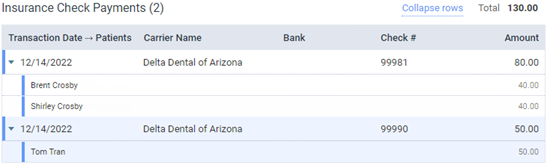
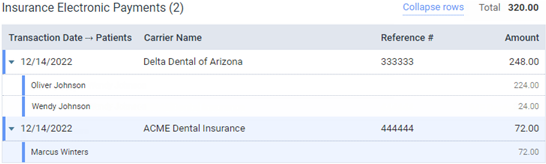
Under Insurance Check Payments, Insurance Credit Card Payments and Insurance Electronic Payments, to view the patient name that is associated with an individual insurance payment or the patient names and the corresponding portions that are associated with a bulk insurance payment, expand that payment's row. To expand or collapse all payment rows in a section, click (or tap) the Expand rows link or the Collapse rows link, respectively.

There is a Print button for each location so you can print the deposit slip for each location separately. To print the deposit slip for a location, click (or tap) the location's Print button. The .pdf file appears on a new browser tab so you can print or download a copy of the deposit slip.
-
Grid View - This view lists each payment by transaction date. You can sort the list by any of the available details (such as location or payment type). A total of all payments in the list appears at the bottom.
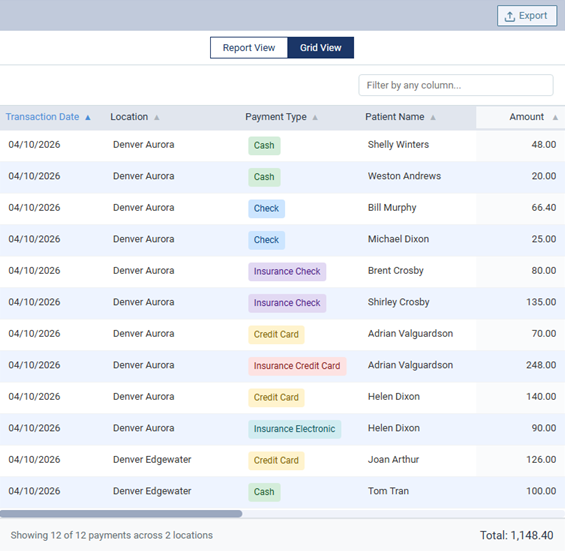
To filter the list to display only the payments that match specific text, in the Filter by any column box, begin typing part of a transaction/modified date, location, payment type, patient name, carrier name, bank, check number, transaction ID, reference number, or user's name. Continue typing as needed to narrow down the list further. To return to viewing the full list, delete the text from the Filter by any column box.
-
-
While using either the Report View or the Grid View, to export the report, click (or tap) Export. The report is downloaded as a .csv file. You can open the .csv file in a spreadsheet program.