Acteon Sopro SOPIX Gen. 2 Sensor Setup Guide
This guide describes the installation and setup of the Acteon Sopro SOPIX (Gen. 2) intraoral sensor for use with Dentrix Ascend Imaging.
Last updated: 10/29/2025
Overview
Dentrix Ascend Imaging supports the acquisition of intraoral images from SOPIX intraoral X-ray sensors on a computer running the Windows operating system. Drivers for the SOPIX sensor must be installed on each computer that the SOPIX sensor will be connected to.
Notes:
-
Prior to the installation of the SOPIX sensor, the acquisition agent application must be installed on each computer that will acquire images. Refer to Setting up the acquisition agent for instructions on downloading and installing the acquisition agent.
-
There is a separate setup guide for the SOPIX Gen. 1 sensor.
Installation
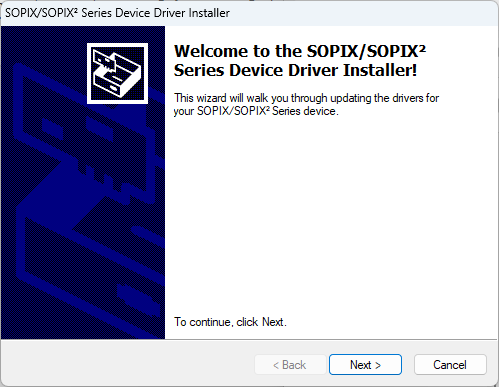
The drivers for the SOPIX sensor are provided by the manufacturer. The installer for the drivers is often provided on the CD that came with the sensor. To install the SOPIX sensor drivers, do the following:
-
As an administrator, double-click Drivers SOPIX-SOPIX2 Series.exe to start the installer.

Note: The installer is also available for download from the Sopro technical support website (https://www.soprotechnicalsupport.com/drivers/. On the Drivers tab, right-click the link of the applicable installer (such as "SOPIX Series including TWAIN (32 & 64 bit versions - Windows 10 compatible)"), and then select Copy link address. Paste the copied URL into the address box on a new browser tab or window, and then press Enter. The file is downloaded.
-
Follow the Installer's instructions to install the sensor drivers.
Configuration
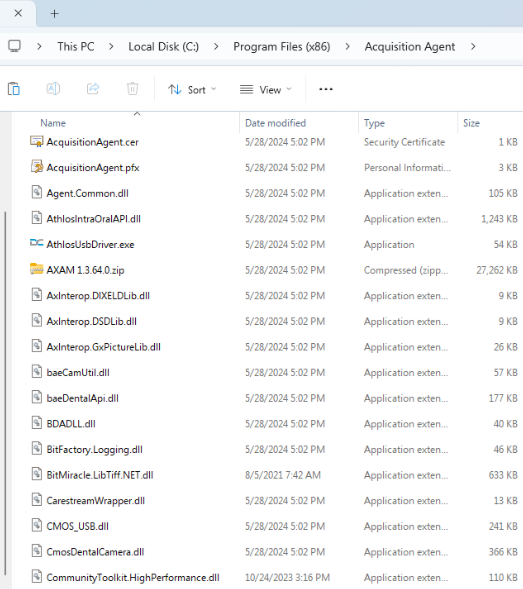
To extract the sensor files for use by the acquisition agent, do the following:
-
In File Explorer, browse to the folder where the acquisition agent program files are installed (the default location is C:\Program Files (x86)\Acquisition Agent).
-
Locate the AXAM 1.3.64.0.zip archive file, and copy it to the desktop.

Note: If the .zip file does not exist, check for updates for the acquisition agent, install the update, and then try again.
-
Right-click the .zip file on the desktop, and then select Extract All.
-
Open the folder that contains the extracted files, and copy all the items in that folder into the folder where the acquisition agent program files are installed (see step 1).
Testing
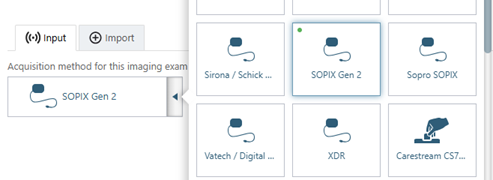
The SOPIX sensor is now functional in Dentrix Ascend Imaging. To acquire a test image, do the following:
-
Select the 1 Bitewing imaging procedure.

-
Select any teeth for the test.

-
On the Available Devices menu, select SOPIX Gen 2.
-
Click Start.

-
When you see the AXAM helper application, acquire an image using the SOPIX sensor.

Troubleshooting
Device Driver
To confirm that the sensor device driver is loaded and recognized by Windows, do the following:
-
Plug the sensor into a USB port.
-
Open Device Manager.
-
Expand the Imaging Devices category, and make sure that SOPIX/SOPIX
2 SERIES device is listed.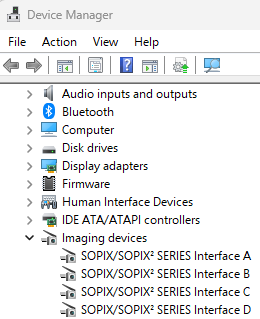
-
If your sensor is not being detected by Windows, or if it appears with an error message, double check the physical USB connection. If this does not resolve the issue, try uninstalling and re-installing the driver, and then check Device Manager again. If reinstalling the drivers does not resolve the issue, contact Acteon/Sopro customer service at 1-877-4ACTEON (1-877-422-8366).
"System cannot find the file specified" Error
If this error appears, the most likely cause is that the AXAM files were not extracted and copied to the folder where the acquisition agent program files are installed. See the "Configuration" section for instructions.
Rotation Issues
If you are having rotation issues with images from the SOPIX (Gen. 2) sensor, the most likely cause is that the helper application does not have the proper sensor orientation set.
The imaging application expects the sensor to be oriented as displayed in the AXAM helper application.
If the sensor orientation differs from what is expected, the acquired images will not be rotated correctly in Dentrix Ascend Imaging when they are received from the AXAM helper application.