

|
Adding and editing pre-registered patients
You can pre-register patients who are either new to your office or existing patients returning for new treatment. For new patients, when a referring doctor's office or the prospective patient calls, you can enter the patient's demographic information, details about his or her condition, his or her insurance information, and his or her Social Security number. You can add and edit pre-registered patients as needed.
To add or edit a pre-registered patient
1. From the File menu, click Pre-Registration.
The Pre-Registration Table window appears.

The dialog box provides the following information:
· The first and last names of patients, the date each was entered, their home and work phone numbers, and appointment dates.
· A New check mark indicates that the corresponding person is a new patient.
· The Web/HL7 column indicates that the corresponding patient has pre-registered over the Internet. A green box indicates that the patient's information has not been checked. The box will turn red when you have verified the patient's information.
2. Do one of the following:
· To add a pre-registered patient, click Add.
· To edit an existing pre-registered patient, select a pre-registered patient, and then click Edit.
The Edit Pre-Registration dialog box appears.
3. Set up the options on each tab:
Contact tab

Note: Any fields that are yellow or that have blue boxes around them require data to be entered in them to save the patient's pre-registration information. Also, the Date and time under Contact Information correspond to when the patient is pre-registered.
The Contact tab stores the demographic, referral, and clinical information for the pre-registered patient:
· Contact Information
· Source – Select the source of the call: Receptionist (Drs. Office), General Dentist, Patient, Spouse, Child, Parent, Secretary, Co-therapist, Employer/Co-worker, Friend, Physician, Hospital, School, Other, or (None).
· From – Select the location of the person when the new patient information was obtained: Home, Work, GP's Office, Car, Our Office, or Other.
· Patient Information
· Name – To verify that the patient is not already registered (in your database of existing patients), double-click in the field. The Patient Lookup dialog box appears. Search for the patient, and then do one of the following:
· If the patient exists in the database and is being seen for an existing treatment, do not pre-register the patient.
· If the patient exists in the database but is being seen for a new treatment, select and paste in the patient. The patient’s name and his or her existing demographic information is automatically carried over into the pre-registration record.
· If the patient does not exist in the database, close the Patient Lookup dialog box. Leave the New Pt check box selected (this is the default), and then type the patient's first name, middle initial (if applicable), and last name. Also, select the appropriate title or prefix. The first and last name fields have a limit of 20 characters and 30 characters, respectively.
Note: To clear the currently selected patient's information so that you can pre-register a different patient, clear New Pt. On the confirmation message that appears, click Yes to clear the patient information and open the Patient Lookup dialog box.
Note: You can also import DMAP 834 patient data for pre-registering the patient.
· DOB – Type the patient’s date of birth in a dd/mm/yyyy format.
· Gender - Select the patient's gender.
· Address – Type the patient's street address, city, state (in Canada, province), and ZIP Code (in Canada, postal code). Each street address field is limited to 50 characters. If you double-click in the ZIP Code (or postal code) field to select and paste in a ZIP Code (or postal code), the city and state (or province) fields will be populated automatically.
· Home – Type the patient’s home phone number.
· Work – Type the patient’s work phone number and extension (if applicable).
· Extended phone list - To add, edit,
or delete additional contact numbers for the patient, click the Extended
Phone List button  .
.
· Fax - Type the patient’s fax number (if applicable).
· E-mail – Type the patient’s email address. This field has a limit of 50 characters.
· Comments – Type any comments regarding the pre-registered patient. The comments are included in the Comments field of the Edit Appointment dialog box of the pre-registered patient’s appointment (if one is scheduled) and will carry over to the patient’s record during the registration process.
· If insurance has not been entered already, the dot next to Insurance Entered is dark green. Once insurance is entered, the green dot will light up. Similarly, the red dot next to Scheduled lights up when the patient has an appointment scheduled.
· Referral Information
· Gen. Dent – Attach the referring general dentist:
a. Double-click in the Gen. Dent field to select and paste in the general dentist.
Note: The name of the general dentist and the contact phone number are included in the Comments field of the Edit Appointment dialog box of the pre-registered patient’s appointment (if one is scheduled) and will carry over to the patient’s record during the registration process.
If a general dentist selection is available and required (according to the preference settings), but there is no general dentist, paste in the "NONE" option, and skip steps b - c.
b. Select when the general dentist should be called: Pre Eval, Pre Tx, and/or Post Tx.
c. Select the general dentist’s Office.
Note: The selected location will carry over to the patient’s record during the registration process.
· Referrer – Attach the referral source:
a. Double-click in the Referrer field to select and paste in the referral source.
If there is no referral source, paste in the "NONE" option.
b. Select the referrer’s Office.
Note: The selected location will carry over to the patient’s record during the registration process.
· Clinical Information
· CC – Select the level of discomfort for the chief complaint (Severe, Moderate-Severe, Moderate, Slight-Moderate, Slight, or None) if the patient is being seen for an emergency, or leave the list blank.
· For - If a discomfort level for the chief complaint is selected, enter the number of days, weeks, months, or years the patient has had the chief complaint.
· Trtmnt Area - Select the tooth or area of the chief complaint.(Upper-right, Upper-left, Lower Right, Lower Left, Upper Anterior, or Lower Anterior), or type the appropriate tooth numbers.
Note: The selected chief complaint, duration, and tooth or area are included in the Comments field of the Edit Appointment dialog box of the pre-registered patient’s appointment (if one is scheduled) and will carry over to the patient’s record during the registration process.
· Premedicate – Select this check box if the patient needs to be medicated before treatment, and then select a reason: Cardiac, Prosthesis, Immunocompromised, Diabetic, or Other.
Note: The pre-medication requirements are included in the Comments field of the Edit Appointment dialog box of the pre-registered patient’s appointment (if one is scheduled), appear on call slips, and will carry over to the patient’s record during the registration process.
· Latex Allergy – Select this check box if the patient has an allergy to latex.
Note: The allergy indicator appears on call slips and will carry over to the patient’s record during the registration process.
· Tx Needed – Double-click in the field to select and paste in the treatment or appointment service, or type the appointment service.
· Re-Tx – Select this check box if the procedure is a re-treatment.
· Comments – Type any comments that should be noted about the patient’s condition.
Note: The comments are included in the Comments field of the Edit Appointment dialog box of the pre-registered patient’s appointment (if one is scheduled) and will carry over to the patient’s record during the registration process.
· Registration Information
· Office – Select the location where the patient will be registered. The default location is determined by a preference setting.
· Requested Dr – Select a provider
if the patient requests a specific doctor. You can click the Remove
button  to clear any previous
selection. If a referrer requests that a specific provider not be assigned
to one of his or her patients, and an exception has been set up for the
referrer, the unapproved provider's name will be highlighted in red to
warn you not to select that provider.
to clear any previous
selection. If a referrer requests that a specific provider not be assigned
to one of his or her patients, and an exception has been set up for the
referrer, the unapproved provider's name will be highlighted in red to
warn you not to select that provider.
· Hygienist - Select the patient's
hygienist. You can click the Remove
button to clear any previous
selection.
· Needs to be seen – Select a time if the patient needs to be seen at a specific time: Today, ASAP, This Week, Next Week, Anytime, or Unknown.
· X-rays – Select when or how the X-rays will be delivered to the office or that an action is required: Bringing, Sent, Needs, Call GP, Not Needed, blank, or Have.
Method of Payment / Insurance tab
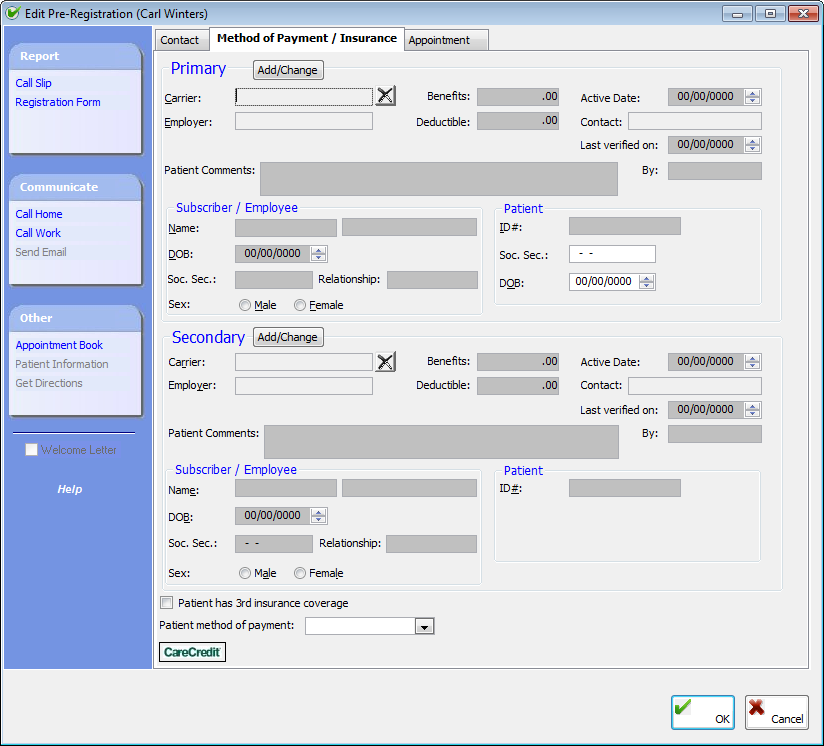
The Method of Payment / Insurance tab stores the insurance and payment information for the pre-registered patient:
· Primary and Secondary – Click Add/Change to select and paste in the primary and secondary insurance (if applicable) profiles. Then, add or update the insurance information:
· Benefits - Type the amount of the benefits that are left for the patient.
· Deductible - Type the amount of the deductible that has been met.
· Active Date - Type the date the insurance coverage became active for the patient using a mm/dd/yyyy format. This date is transferred to the patient's record during the registration process.
· Last verified on - Enter the date the patient's eligibility was last checked. The date can be updated automatically when checking the patient in through the In-Office Status for window.
· By - Type the name or initials of the person who confirmed the patient's eligibility. This field has a limit of 30 characters. Also, the name can be updated automatically when checking the patient in through the In-Office Status for window.
· Patient Comments - Type any comments about the insurance profile. This field is limited to 150 characters. These comments carry over to the patient's record during the registration process.
· Subscriber/Employee
· Name - Type the first and last name of the subscriber.
· DOB - Type the subscriber's date of birth in a mm/dd/yyyy format.
· Soc. Sec. # - Type the subscriber's Social Security number.
· Relation to Subscriber - Select the relationship of the patient to the subscriber.
· Gender - Select Male or Female to specify the subscriber's gender.
· Patient - If you are pre-registering an existing patient, the name and date of birth will be entered automatically, but you can add or edit the following information:
· ID# - Type the patient's ID number.
· Soc. Sec. # - Type the patient's Social Security number.
· DOB - Type the patient's date of birth in a mm/dd/yyyy format.
You can click the Remove
button next to a Carrier
field to clear any previous selection.
Note: You can wait to attach insurance until you register the patient or when the patient checks in—when you can verify that the insurance information is correct. Any insurance information you enter will carry over to the patient’s record during the registration process.
· Tertiary insurance and payment method
· Patient has 3rd insurance coverage – Select this check box if the patient has tertiary insurance.
· Patient method of payment – Select the method of payment that will be used for paying any patient balances.
· CareCredit - Click this button to use CareCredit for patient payments. You will be required to log on to CareCredit with your Merchant ID and Password.
Appointment tab
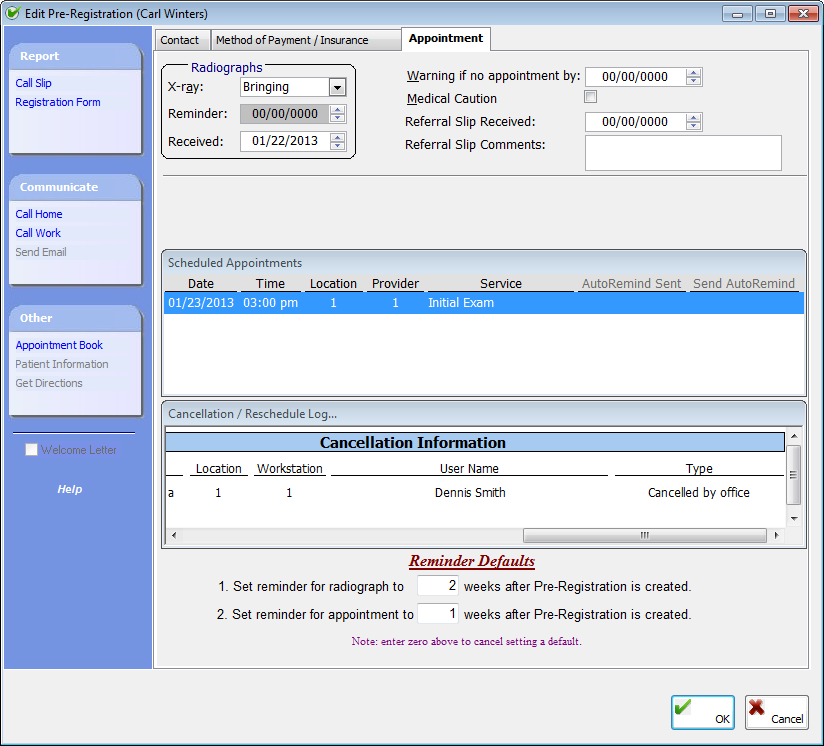
The Appointment tab stores the appointment information for the pre-registered patient:
· Radiographs
· X-ray - The selection carries over from the Contact tab, but you can select a different status from the list. The selected status is included in the Comments field of the Edit Appointment dialog box (if one is scheduled) and carries over to the patient's record during the registration process.
· Reminder – Enter the date, in a mm/dd/yyyy format, when the patient will appear on the Pre-registration Report if the X-rays have not been received by the specified date.
· Received – Type the date, in a mm/dd/yyyy format, you received the X-rays. The specified date is included in the Comments field of the Edit Appointment dialog box of the pre-registered patient’s appointment (if one is scheduled) and will carry over to the patient’s record during the registration process.
· Warnings and referral slips
· Warning if no appointment by – Enter the date, in a mm/dd/yyyy format, when the patient will appear on the Pre-registration Report if the patient does not make an appointment by the specified date.
· Medical Caution – Select this check box if the patient needs a medical exam prior to treatment. The caution is included in the Comments field of the Edit Appointment dialog box of the pre-registered patient’s appointment (if one is scheduled) and will carry over to the patient’s record during the registration process.
· Referral Received – Enter a date if a referral slip was received from the referring dental office in a mm/dd/yyyy format.
· Referral Slip Comments – Type any comments regarding the patient that you want to have appear on call slips. The comments are included in the Comments field of the Edit Appointment dialog box of the pre-registered patient’s appointment (if one is scheduled) and will carry over to the patient’s record during the registration process.
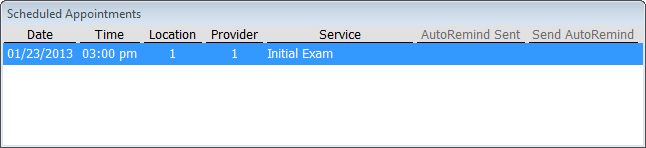
· Scheduled Appointments – Review the details of the patient’s future appointments (if any are scheduled).
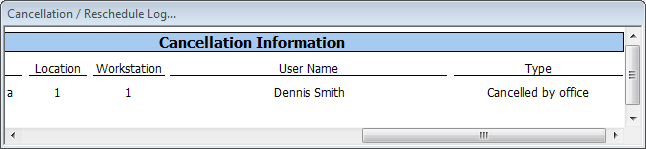
· Cancellation/Reschedule Log – Review the details of any of the patient’s canceled appointments.
· Listed under the yellow Original Appointment Information header are the date, time, provider, column, service, location, date, and time an appointment was created and whether or not it was confirmed. This information is automatically put in the cancellation log when an appointment is cancelled.
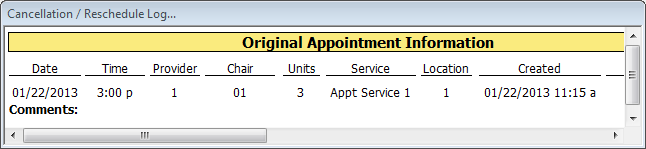
· Scroll to the right to the see the blue Cancellation Information header, under which are the date and time of the cancellation, the location and workstation where the cancellation was done, the user name of the person who cancelled the appointment, and the type of cancellation (Failed, Patient Cancellation, or Office Cancellation).
· Reminder defaults – Set up the following defaults for radiographs and appointments to have daily reminders created automatically on the dates you specify:
· Set reminder for radiograph to [number of] weeks after Pre-Registration is created – Type the number of weeks after the pre-registration record is created to create a daily reminder for radiographs. A value of 0 cancels out the setting.
· Set reminder for appointment to [number of] weeks after Pre-Registration is created – Type the number of weeks after the pre-registration record is created to create a daily reminder for an appointment. A value of 0 cancels out the setting.
4. If a welcome letter has been set up in the preferences, the Welcome Letter check box is available. If you are adding a pre-registered patient, and all required fields are filled in, the check box is selected by default. If the pre-registered patient (new or existing) should not receive a welcome letter, clear this check box.
5. Click OK.
Need more help?
You can visit our website, contact OMSVision Customer Support, or suggest a new feature or improvement on User Voice.