

|
Label sets
You can print a set of labels.
To print labels
1. In a patient’s Patient Information Center, on the Control Panel, under Actions, from the Print/View menu, click Label Sets.
The Create Label Set dialog box appears.
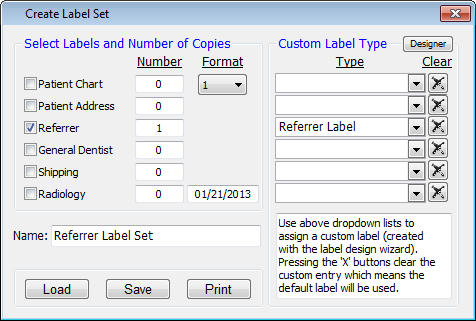
2. Select the options that correspond to the types of labels that you want to print: Patient Chart, Patient Address, Referrer, General Dentist, Shipping, and/or Radiology.
3. Type the number of labels in the fields next to each label type.
4. From the Format list, select the number of labels per sheet: 1, 2, 3, 4, or 5.
5. By default, the current date is entered, but you can enter a different date in a mm/dd/yyyy format.
6. Type the Name for the label set.
7. If any custom labels have been set up, from a Type list, you can select a custom label. You can select up to six types. You can click the trash can button next to any custom label type to clear the previous selection. Also, you can click Designer to use the Label Designer Wizard to create a custom label.
8. Click Save to save the label set so that you can load the label set the next time you want to print that set.
9. To load an existing label set, click Load. From the Label Sets dialog box, select the desired label set, and then click Paste.
10. Click Print.
Need more help?
You can visit our website, contact OMSVision Customer Support, or suggest a new feature or improvement on User Voice.