Using the Week List View
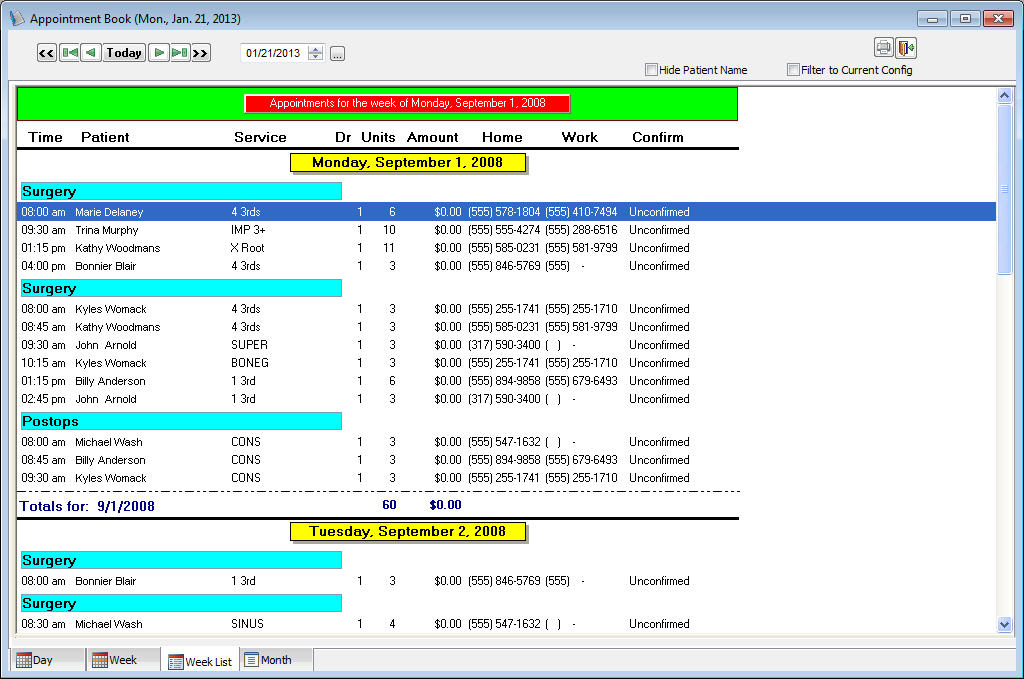
In the Appointment Book, click the Week List tab to view a list format of the appointments for each day of a given week.

Changing the date
To change the date in the week list view of the Appointment Book, use any of the following options:
Date buttons:

Click the double left arrow button to go back one year from the week you are currently viewing.
Click the left arrow with a line button to go back one month from the week you are currently viewing.
Click the left arrow button to go back one week from the week you are currently viewing.
Click the Today button to view appointments for the current week.
Click the right arrow button to go ahead one week from the week you are currently viewing.
Click the right arrow with a line button to go ahead one month from the week you are currently viewing.
Click the double right arrow button to go ahead one year from the week you are currently viewing.
If you hold down a number key on your keyboard while clicking any of the above arrows, the amount of the date button you click is multiplied by the number you are pressing (for example, pressing 2 on your keyboard and clicking the right arrow button will take you two weeks ahead from week you are currently viewing: 2 x 1 week = 2 weeks).
Date box – Enter a date in the week that you want to view; and then press Enter, or click the Go To button to the right of the box to go to the week of the date you entered. Also, you can double-click the date box to open a six month calendar that you can select and paste in a date from.

If you are viewing a date in the past, the background of the date box is yellow.

Hiding patient names
To hide patient names on appointments, select the Hide Patient Name check box. With this check box selected, the words "HIPAA Privacy" appear instead of the patient's name in the Appointment Book and on the printed schedule; however, the patient's name still appears on the tooltip that appears when you position your pointer over the appointment (if the preference to allow this is enabled) and still appears in the Edit Appointment dialog box.


Viewing by configuration
To view only the appointments for the configuration that you are currently viewing, select the Filter to Current Config check box. With this check box clear, the list shows all patients in all configurations.

Editing appointments
The scheduled appointments are listed in chronological order by the day of the week. To edit an appointment, double-click an appointment to go back to that appointment on the Day tab.
Printing the Week List View
To print the Week View as it appears on your display, click the printer button.
Need more help?
You can visit our website or contact OMSVision Customer Support.
