

|
Setting up ePrescribe for a user
1. Do one of the following:
· From the Practice Locations Table window, click e-Rx Admin. The Administration- ePrescribe window opens to the Locations screen. Select a location, and then click Users.
· From the Edit Practice Location dialog box, click e-Rx Admin. The Administration- ePrescribe window opens to the Location Details screen for the selected location. Click Users.
Important: If a selected location has not been assigned to a group yet, the Clinic Grouping dialog box appears when you click e-Rx Admin from the Edit Practice Location dialog box. A location must be enabled for ePrescribe before you can add users to that location.
The Users screen appears.
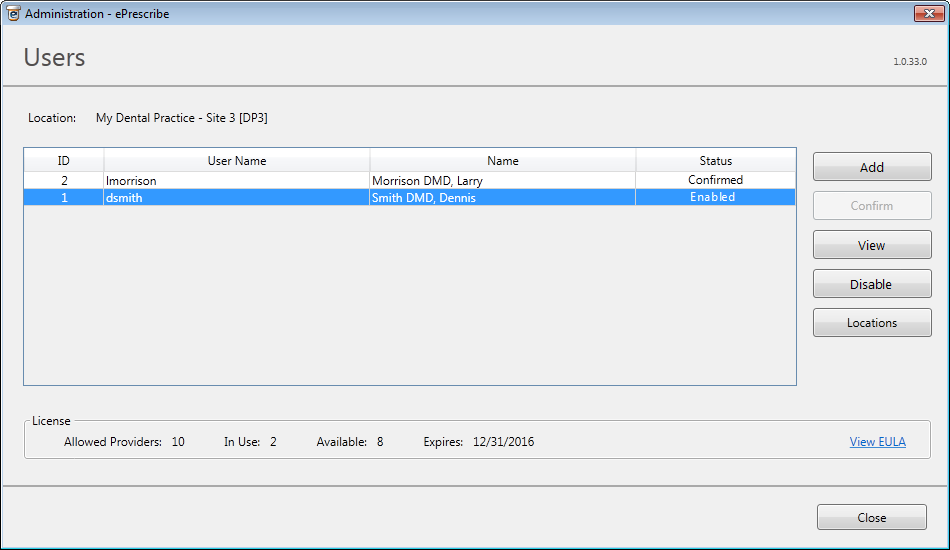
2. Do one of the following:
· Add - To add and enable a new user, click Add. The User Details screen appears.

Do the following:
a. Set up the following user details:
· Logon
User - Click the search button  to select the EndoVision
user you want to link to an ePrescribe user account. This option is available
only if you are adding a new user.
to select the EndoVision
user you want to link to an ePrescribe user account. This option is available
only if you are adding a new user.
· User Type - Select the role of the user for ePrescribe: Doctor, Mid-Level No Supervision, Mid-Level with Supervision, Prescribe On Behalf, or Staff. If a provider has not been registered already for this stand-alone location or for group of locations, Doctor is selected automatically and cannot be changed (see step c for an explanation).
· Provider
- Click the search button to select the provider for
the ePrescribe user account.
· Administrator - Select this check box if the user needs full access to ePrescribe.
· Email - Type the user's e-mail address.
· Errors
- You must correct any errors before you can save the user's details.
So, if any field has an error icon ![]() next to it, click Cancel, correct the error, and then return to
this screen.
next to it, click Cancel, correct the error, and then return to
this screen.
b. Click Register to upload the user information to AllScripts and enable the user account.
If this is not the first user that has been enabled to use ePrescribe for the group this location belongs to, ignore steps c - d.
c. AllScripts requires that the first user created for a group be a credentialed provider and that the user register by filling out a three-part, online form. The appropriate Web page will open automatically. Click Register Electronically.
Tip: During the registration process, AllScripts requires that at least one specialty be selected. However, it does not matter what is selected because the selection will be overwritten with "Unspecified."
d. After the user receives a confirmation e-mail message that states his or her user has been confirmed by AllScripts, on the Users screen, select that user, and then click Confirm.
· Enable - To enable a user that has been disabled previously, select that user, and then click View. The User Details screen appears. Click Enable.
· Disable - To disable a user that is enabled, select that user, and then click Disable. The Status changes to "Disabled."
· View - To view or edit an enabled user's details, select that user, and then click View. The User Details screen appears.

Do either of the following:
· As needed, change the User Type, Administrator status, and/or Email address of the user; and then click Save to upload the user information to AllScripts and update the user account.
· To disable the user, click Disable.
Need more help?
You can visit our website, contact EndoVision Customer Support, or suggest a new feature or improvement on User Voice.