

|
Adding and editing providers
A provider is a person in your office for whom you want to track production, collections, and adjustments. Providers normally represents the doctors and hygienists in your practice, but assistants can be providers so that you can track their production for procedures, such as taking X-rays. You can also set up assistants as providers if you will be assigning doctor and staff time when scheduling appointments.
Additionally, every install of the program includes a “House Doctor,” which serves as a generic provider for situations when you want to credit a provider with production and receivables for services rendered regardless of which providers perform the procedures.
You can add and edit providers for your practice as needed.
To add or edit a provider
1. From the File menu, point to Providers, and then click Provider Table.
The Provider Table window appears.
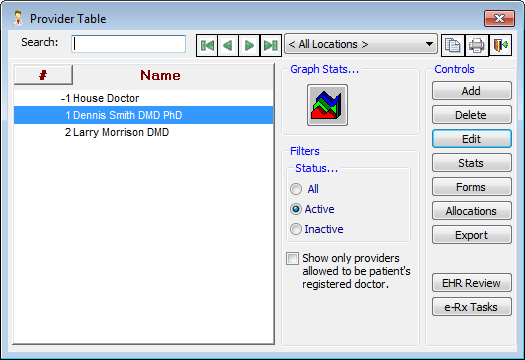
2. Do one of the following:
· To add a provider, click Add.
· To edit an existing provider, select a provider, and then click Edit.
The Edit Provider dialog box appears.
Note: You can access ePrescribe from the Edit Provider dialog box. Click e-Rx Tasks. ePrescribe will open for the user currently logged on to EndoVision not the selected provider unless the logged on user is linked to that provider. Also, ePrescribe will open in "task mode," which allows you to run reports about your electronic prescriptions, to access tools and resources to help you with electronic prescriptions, to manage your ePrescribe account settings and preferences, and to review your electronic prescriptions.
3. Set up the options on each tab:
General tab (selected by default when you open the Edit Provider dialog box)

The General tab stores general information about the provider:
· Provider # – Enter a unique provider number. You can use a number between 1 and 999,999, inclusive. This box is outlined in blue, which indicates that a value is required.
· Active Provider - Select this check box if the provider should have an active status in the office. This check box is selected by default.
· Name – Type the provider’s name. Type the provider’s first name and middle initial in the First field and the provider’s last name in the Last field. The First and Last names have a limit of 20 and 30 characters, respectively. After you type the name and press the Tab key, the next two fields are automatically populated, but you can edit the text.
· Send Check To – Type the location or name that you want to have appear on billing statements that are generated for this provider’s patients to indicate who to make checks payable to. The name has a limit of 50 characters.
· Name on Forms – Type the name that you want to have appear at the top of treatment plans, receipts, and billing statements that are generated for this provider’s patients. This can be a name other than the provider’s, such as a corporation or practice name. This field has a limit of 101 characters.
· Degree – Select the provider’s degree.
· Specialty – Select the provider’s specialty.
· Phone – Type the telephone number for the provider. This phone number will appear on claim forms.
· Location – Select the location where the provider works. If the provider works in more than one location, select the primary location where the provider works.
Tip: In the Provider Table window, from the Locations list, select a specific location to filter the list to display only the providers who work at that practice location.
· Fee Schedule – Select the fee schedule to use for billing services performed by this provider.
· Rx Category – Select the prescription category for the provider.
· Allow this provider to be a registered doctor – Select this check box if the provider is active or registered (sees patients).
Tip: In the Provider Table window, select the Show only providers allowed to be patient’s registered doctor check box to filter the list to display only the providers that see patients.
· E-Mail – Type an email address for this provider. The email address is required for this provider to use ePrescribe.
· Financial Snapshot - If you are editing a provider, the Financial Snapshot options are available. To view financial figures for charges, collections, adjustments, and A/R changes associated with the provider, enter a date range, and then click Refresh.
· Fingerprint - If you have purchased the Biometrics add-on, the Fingerprint options are available. Select Scan to allow the provider or Don’t Scan not to allow the provider to use a fingerprint scanner to log on.
License/Claims tab

The License/Claims tab stores the provider’s important identification numbers and other information:
· License and ID Numbers
· License # – Type the provider’s state license number. Also, enter the state or province and expiration date of that license. The ID number, licensing state/province, and expiration date are required for this provider to use ePrescribe.
· Tax ID – Type the provider’s federal tax ID number. This field has a limit of 11 characters. Also,select whether this ID is a SSN or EIN. Only the last four digits of the Social Security number are visible until you click in the field.
· DEA # – Type the federal Drug Enforcement Agency number assigned to this provider for use on prescriptions. This field has a limit of 10 characters. If this field is left blank, there will not be a DEA number on prescriptions printed for patients. Also, enter the expiration date of that ID number. The ID number and expiration date are required for this provider to use ePrescribe.
· Schedule – Select the classes of medication the provider can prescribe. At least one schedule item must be selected for this provider to use ePrescribe.
· Medicare # - Type the provider's Medicare number. This field has a limit of 15 characters.
· Medicaid # - Type the provider's Medicaid number. This field has a limit of 15 characters.
· UPIN - Type the provider's Unique Physician Identification Number. This field has a limit of 12 characters.
· NPI - Type the provider's National Provider Identification number. This field has a limit of 10 characters.
· Delta # - Type the provider's Delta Dental number. This field has a limit of 15 characters.
· Blue Cross # - Type the provider's Blue Cross number. This field has a limit of 15 characters.
· Taxonomy - Leave this field blank because the program automatically enters the appropriate Taxonomy number for the provider on claim forms.
· Champus - Type the provider's Champus number. This field has a limit of 15 characters.
· E-Claims – Type the provider Name that you want to have attached to electronic claims that are submitted for procedures performed by the provider. The first name field has a limit of 10 characters. The last name field has a limit of 15 characters.
Scheduling tab

The Scheduling tab stores scheduling options for the provider:
· Appt Color – Click Change to choose a color for the provider’s appointments in the Appointment Book. If the preference setting for units by staff is turned on, staff time color indicators show in the A or B column of the Appointment Book along with the corresponding provider number.
· Appt Services Category – Click Change to select and paste in a category of appointment services for the provider.
· Routing Slip – Click Change to select and paste in a particular routing slip for the provider.
· Time Units – Select the time units you want to use when scheduling appointments for the provider. The time unit selected is used for statistical reports.
· Provider Works – Type the average number of hours per week that the provider sees patients. Do not include the time the provider spends in the office performing administrative tasks. The amount of time entered is used for statistical reports.
Revenue Allocation tab
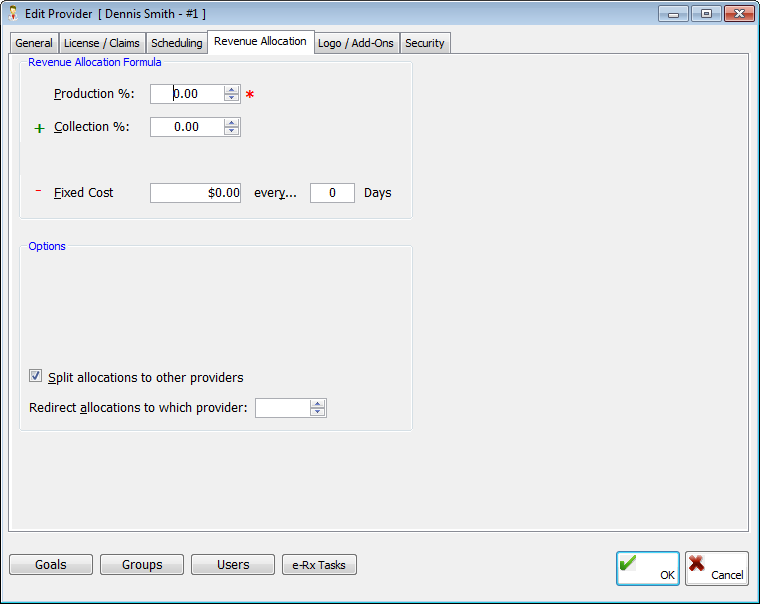
The Revenue Allocation tab stores revenue options for the provider:
· Revenue Allocation Formula – Set up the formula by which the provider is paid:
· Production % – The percent of production billed for the provider.
· + Collection % – The percent of money collected for the provider.
· - Fixed Cost – The amount of money to be removed from the provider’s earnings on a regular basis. This usually represents how much the practice charges the doctor to work in the office. Along with the fixed costs entered, type the interval at which a fixed cost should be removed from the provider’s earnings in the every [number of] Days field.
Note: Leaving any of the options blank will leave that variable out of the formula.
· Split allocations to other providers – Select this check box if monies paid on a patient’s account and posted to the provider should be allocated (credited) to a different provider.
· Redirect allocations to which provider – Enter the ID number of the provider who will receive allocations, or leave this blank if you are not splitting or redirecting allocations.
Logo/Add-Ons tab
![]()
The Logo/Add-Ons tab stores a logo for the provider and settings for third-party tools (if they have been enabled in the system/demo mode setup).
· Logo on Reports - To add a logo that will appear at the top of patient receipts and statements (instead of the practice name, address, and phone number), complete the following steps:
a. Click Change.
b. Locate and select to an image file. Graphics with .jpg, .bmp, and .wmf file extensions are supported.
c. Click Open.
The logo appears in the field below the path to the graphic file.
Notes:
· The logo should be a JPG/JPEG format, be 1.7 inches (Height) by 6 inches (Width), and include the practice name and information (such as doctors' names, addresses, phone numbers, and email addresses).
· You
can click the Remove button  to clear any previous logo selection.
· 3rd Party Tools
· Rover - Select Activated to allow synchronization with a handheld device via Rover.
· PBHS Collaborator - Type the provider's user name and password for PBHS Collaborator. The name and password have a limit of 30 and 10 characters, respectively.

The Security tab stores reusable digital signatures for the provider to use to sign EHR narratives:
· Digital Signature - Click Acquire. From the Signature Capture Tool dialog box, the provider uses a signing device (Topaz signature pad or tablet PC stylus) to create a signature, or you click Get File to locate and select a previously created graphic of the provider's signature. The following graphic file types are supported: JPG, GIF, BMP, TIF, and PNG. Click Save and Exit. Then, select Signature Only, Name Only, or Both to have the signature and/or provider's name merged into EHR narratives that include a digital signature field and to have the signature.
Notes:
· To set up a digital signature, the digital signature capture tool feature must first be enabled. For help with this, contact Customer Support at (800) 323-3370 option 1.
· To set up a digital signature, the appropriate preference setting must be enabled on a computer that has the digital signature capture tool feature enabled. While logged on at a computer used for acquiring digital signatures, from the Utilities menu, click Preferences. On the Operation tab, under Digital Signatures, select the Enable digital signatures on this workstation check box. Then, click OK.
· Electronic Signature - Click in the field to insert a text cursor. Type the message you want to use for the electronic signature, and then press Tab. Then, select Message Only, Name Only, or Both to have the message and/or provider's name merged into EHR narratives that include an electronic signature field and to have the message.
· Narrative Review Password - To require a password be entered when attempting to set an EHR narrative complete (whether the reviewing provider chooses to lock it or not), type the desired password in the Password and Verify Password fields. Press Tab to move from the first password field to the second.
4. Click OK.
Need more help?
You can visit our website, contact EndoVision Customer Support, or suggest a new feature or improvement on User Voice.