You can upgrade the workstation features of Dentrix Enterprise on Citrix or terminal servers and fat clients from a previous version to the new version.
Note: For a new Dentrix Enterprise workstation installation, refer to the instructions for installing workstation features.
Upgrade overview:
Upgrading from version 11.0.20:
(Optional) If the Dentrix Enterprise client program files are installed, and you want to continue to access Dentrix Enterprise on the workstation, you may want to uninstall the 11.0.20 client program files on the computer. You can install the 11.0.48 client program files later.
Extract the contents of the workstation installation package.
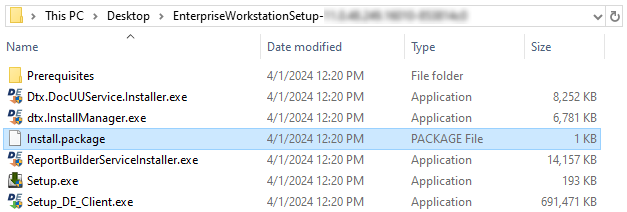
In the extracted workstation installation package, open the file Install.package to specify a value for UpdateServerName.
In the extracted workstation installation package, launch Setup.exe to install Install Manager.
When Install Manager opens, install the Client Application.
Install/reinstall services as needed: Report Scheduling Service and/or Document Unfiled Utility Service.
Close Install Manager.
Upgrading from version 11.0.40/.43/.44/.45/.46:
Extract the contents of the workstation installation package.
In the extracted workstation installation package, open the file Install.package to specify a value for UpdateServerName.
In the extracted workstation installation package, launch Setup.exe to install Install Manager.
When Install Manager opens, install services under Not Installed as needed: Report Scheduling Service and/or Document Unfiled Utility Service.
Close Install Manager.
In the extracted workstation installation package, launch the client application setup (Setup_DE_Client.exe) to upgrade the client application.
To upgrade services from a previous version, in the extracted workstation installation package, launch service setups as needed: Recurring Payments Service (Dtx.RecurringPaymentsService.Installer.exe) and/or Document Unfiled Utility Service (Dtx.DocUUService.Installer.exe).
To upgrade the Dentrix Enterprise workstation features
(If you are upgrading from 11.0.20 only) If the Dentrix Enterprise client program files are installed, and you want to continue to access Dentrix Enterprise on the workstation, you may want to uninstall the 11.0.20 client program files on the computer before upgrading to 11.0.48 (to avoid duplicate "Dentrix Enterprise Client" entries in Apps & features of Windows Settings). You can install the 11.0.48 client program files later. To uninstall the client program files, do the following:
In Apps & features of Windows Settings, select Dentrix Enterprise Client 11.0.20, click Uninstall, and then click Uninstall on the pop-up message.
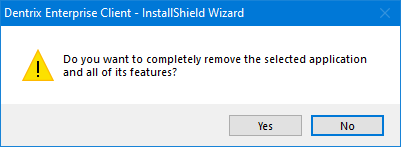
Click Yes on the confirmation message that appears.
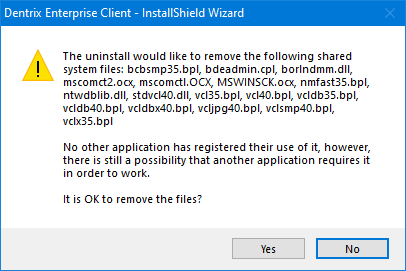
If a confirmation message regarding removing a shared system file appears, do one of the following:
Click Yes to delete the files.
Click No to keep the files.
When the uninstallation of the program is complete, the InstallShield Wizard Completed screen appears.
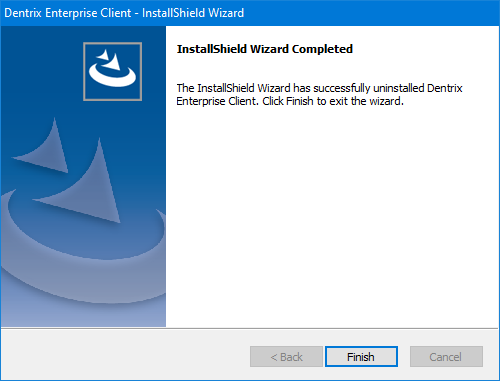
Click Finish.
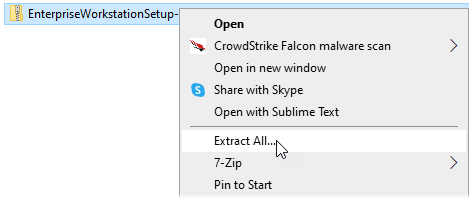
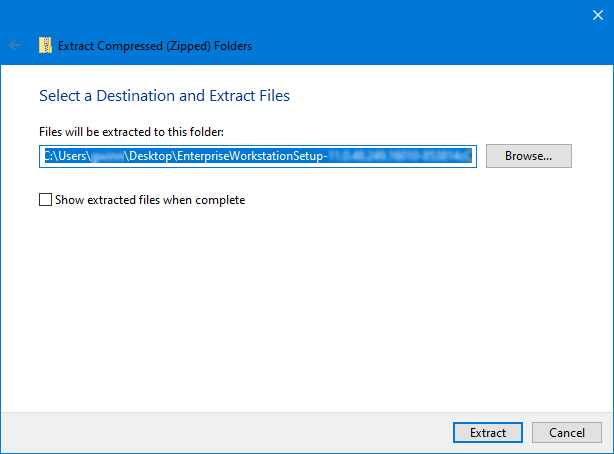
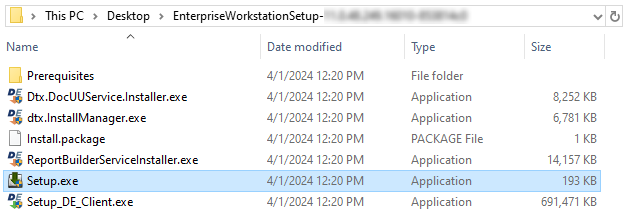
Extract the contents of the Dentrix Enterprise workstation installation package (EnterpriseWorkstationSetup-xx.xx.xx.xxx.zip; where "xx.xx.xx.xxx" represents the version number). Right-click the file, select Extract All..., select where to extract the contents, and then click Extract.
In the extracted workstation installation package, double-click Install.package.
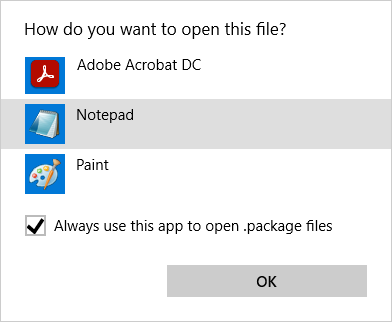
If a pop-up message appears regarding how you want to open the file, select the desired text editing program, such as Notepad, and then click OK.
The text editing program opens.
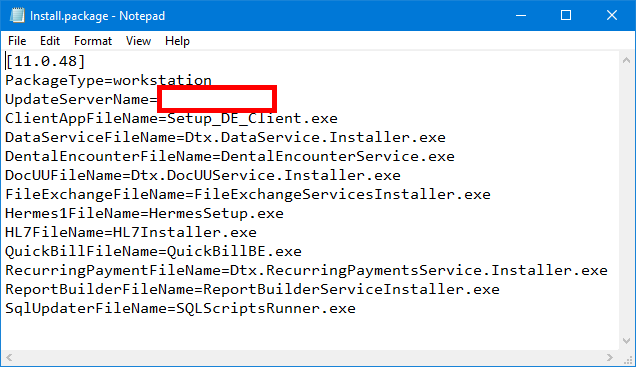
After UpdateServerName=, enter the name of the server (do not include backslashes), and then save the changes.
Close the text editing program.
In the extracted workstation installation package, double-click Setup.exe.
On the message that appears regarding installing Install Manager, click Yes.
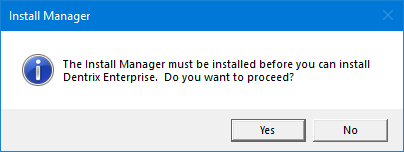
Setup installs the Install Manager program.
Then, Install Manager opens.
(If you are upgrading from 11.0.20 only) Install Manager displays the components that can be installed (or reinstalled).

(If you are upgrading from 11.0.4x only) Install Manager displays the components that are currently installed and those that are not.

Do one of the following for Client Application:
Uninstall the Client Application - (If you are upgrading from 11.0.4x only) If the Dentrix Enterprise client program files are installed, but you do not want to access Dentrix Enterprise on the workstation, to uninstall the client program files, do the following:
Under Installed on the left, leave Client Application selected. The Setup options appear on the right.
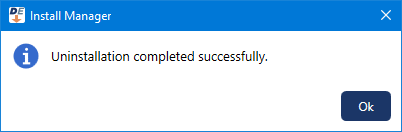
Click Uninstall.
The Dentrix Enterprise client program and third-party programs are uninstalled.
On the message that appears when the uninstallation is complete, click Ok.
Upgrade the Client Application - Do one of the following:
(If you are upgrading from 11.0.20 only) If the Dentrix Enterprise client program files are installed (you did not uninstall them in step 1), and you want to continue to access Dentrix Enterprise on the workstation, follow the instructions on how to "Install the Client Application" later on.
(If you are upgrading from 11.0.4x only) If the Dentrix Enterprise client program files are installed, and you want to continue to access Dentrix Enterprise on the workstation, you cannot upgrade the client program files from Install Manager, so skip this step. You will upgrade the client program files later (see step 12).
Install the Client Application - (If you are upgrading from any previous version) If the Dentrix Enterprise client program files are not installed, and you want to access Dentrix Enterprise on the server, to install (or reinstall) the client program files on the workstation, do the following:
Under Not Installed on the left, leave Client Application selected. The Setup options appear on the right.
For Destination Location, verify that the Install path is correct.

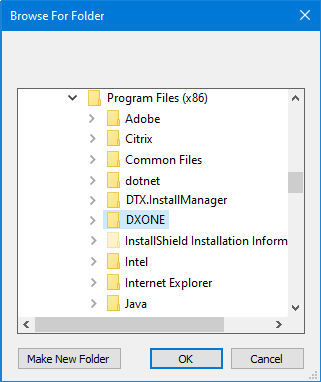
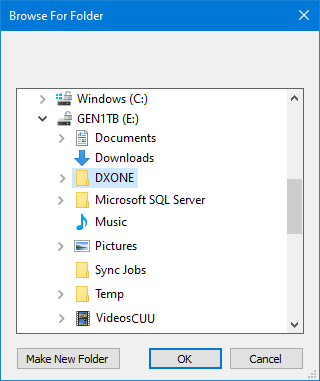
If you want to change where the program files are installed, click Browse, select the correct location on the computer, and then click OK.
For Writable Folder location, verify that the Folder path is correct.

Important:
The Windows operating system does not allow programs to make changes to files in the "Program Files" or "Program Files(x86)" folder. So, it is recommended that you choose a folder that allows access for writing and updating files. The selected file path will be used for the "Docs," "Eclaims," and "Data" folders.
All Windows users on the computer must have full access (read and write) to the "DXONE" folder or whichever folder you select. If this folder has not already been shared with the required permissions, you can do it after installing Dentrix Enterprise for the Administrator account in Windows.
If you want to change the location of the writable folder, click Browse, select the correct location on the computer, and then click OK.
Enter the Clinic ID of the organization's central clinic (typically this is CENTRAL).
Note: Users can specify their default clinic IDs when they log in to Dentrix Enterprise.

If applicable, in the Custom Code box, enter your code to install custom features; otherwise, leave the box empty.

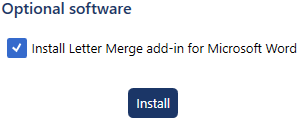
Under Optional Software, to install the Word add-in for letters that are created from Dentrix Enterprise on this computer, select the Install Letter Merge add-in for Microsoft Word checkbox.
Note: Microsoft Word must already be installed.
Click Install.
The Dentrix Enterprise client program, third-party programs, and letter merge add-in (if applicable) are installed.
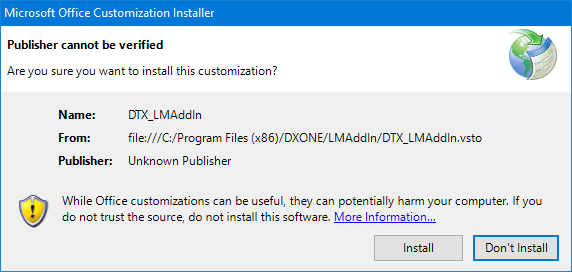
If the Microsoft Office Customization Installer message for the letter merge add-in appears, click Install.
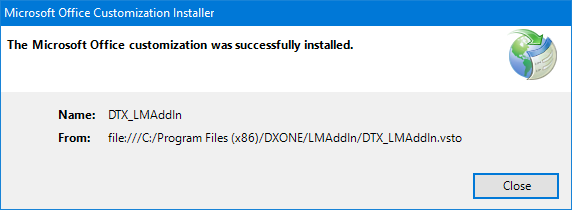
When the add-in installation is complete, click Close on the message that appears.
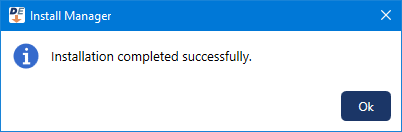
On the message that appears when the installation is complete, click Ok.
Install (or reinstall) any of the following services that appear under Not Installed:
Report Scheduling Service - The service for handling report jobs that have been scheduled from this or other computers. See the topic "Installing the report scheduling service on a workstation."
Notes:
This service needs to be installed on only one computer but may be installed on multiple computers.
This service can also be installed on a different computer as part of a Dentrix Enterprise workstation or server installation.
Document Unfiled Utility Service - (For military facilities only.) The service for automatically inserting unfiled documents into Document Center. See the topic "Installing the document unfiled utility service on a workstation."
Note: This service requires the installation of the Dentrix Enterprise client program on this computer or a different computer as part of a Dentrix Enterprise workstation or server installation.
Close Install Manager.
(If you are upgrading from 11.0.4x only) If the Dentrix Enterprise client program files are installed, and you want to continue to access Dentrix Enterprise on the workstation, to upgrade the client application from a previous version, do the following:
In the extracted workstation installation package, double-click Setup_DE_Client.exe.
A confirmation message appears.
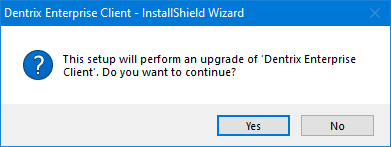
Click Yes.
The Welcome screen appears.
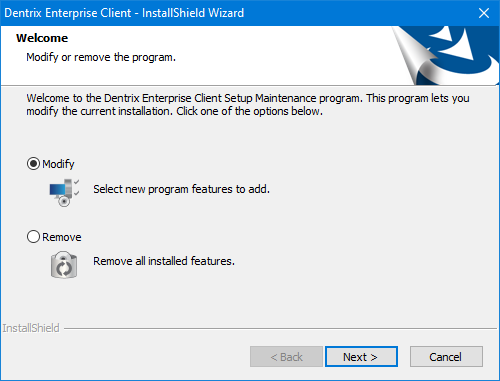
Leave the Modify option selected.
Click Next.
The Default Logon Clinic ID screen appears.
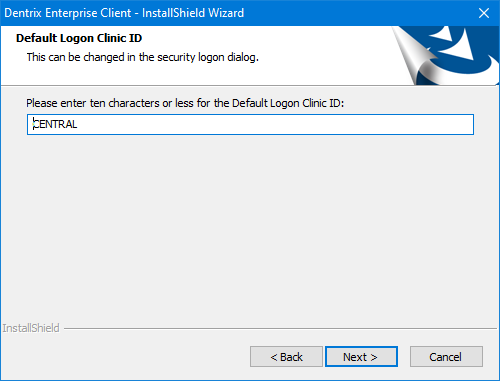
Enter the ID of the organization's central clinic (typically this is CENTRAL).
Note: Users can specify their default clinic IDs when they log in to Dentrix Enterprise.
Click Next.
The Enter Custom Code screen appears.
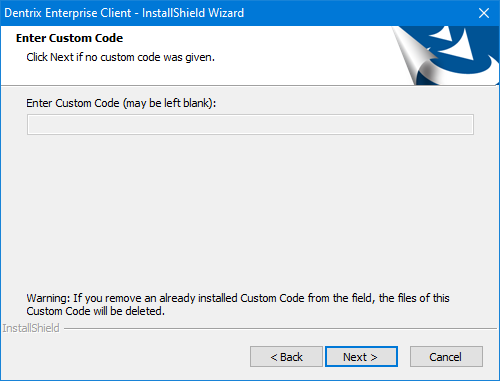
You cannot modify or add custom codes on this screen. Click Next.
Click Next..
The Ready to Modify the Program screen appears.
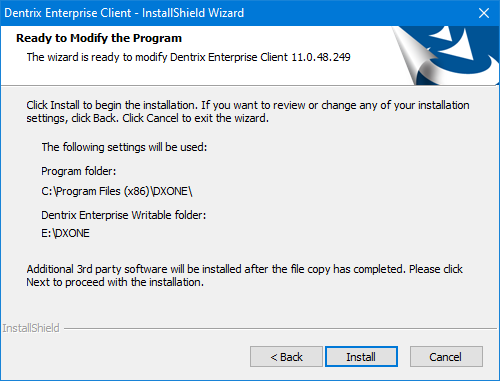
Review the specified options, and then click Install.
The required program files are upgraded.
Then, the Install Manager - InstallShield Wizard starts and displays the Welcome screen.
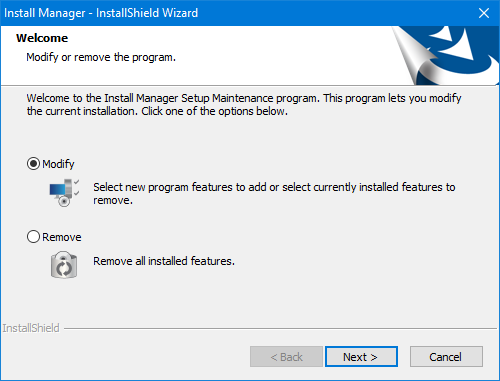
Leave the Modify option selected, and click Next.
On the message that appears regarding Install Manager already being installed, click OK.
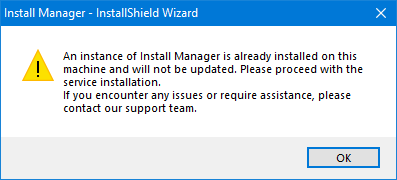
The Setup Process Aborted screen appears.
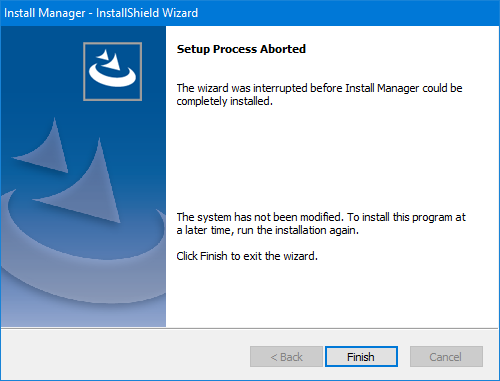
Click Finish.
The required third-party programs are installed or upgraded.
The InstallShield Wizard Completed screen appears.
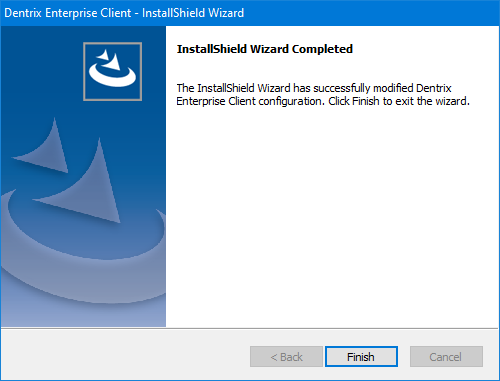
Click Finish.
(If you are upgrading from 11.0.4x only) To upgrade services from a previous version, in the extracted workstation installation package, launch any of the following service setups:
Report Scheduling Service (ReportBuilderServiceInstaller.exe). See the topic "Upgrading the report scheduling service on a workstation."
Document Unfiled Utility Service (Dtx.DocUUService.Installer.exe). See the topic "Upgrading the document unfiled utility service on a workstation."