After you enable a provider's user account to use ePrescribe, if the provider has been signed up with ePrescribe previously and already has an active Electronic Prescribing of Controlled Substances (EPCS) account through Zentry (formerly Verizon) or ID.me, that provider must link his or her EPCS account to ePrescribe. The provider will need his or her Veradigm (formerly Allscripts) security account credentials, which are the login ID and password associated with the provider's ePrescribe user account.
To link an ePrescribe account
Log in to Dentrix Enterprise with a user account that has been enabled to use ePrescribe. Then, in Office Manager, click the ePrescribe Task Mode button  on the toolbar to open ePrescribe.
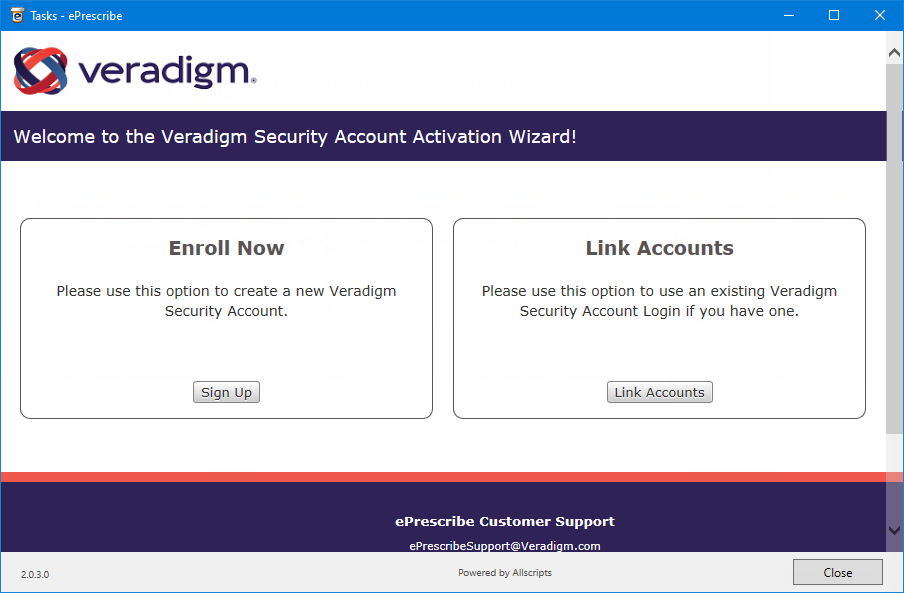
If you have not used ePrescribe yet, the Welcome to the Veradigm Security Account Activation Wizard! page appears.

Click Link Accounts.
The Veradigm Security Account: Link to Existing Account page appears.

Enter the correct credentials in the Security Account Name and Password boxes.
Click Link Account.
A confirmation message that contains some basic account information appears.

Click Next.
One of the following occurs:
If you are logged in as a prescriber, the Welcome to Veradigm - ePrescribe page appears. Proceed to step 6.

If you are logged in as a non-prescriber (staff or prescribe-on-behalf user), the End User License Agreement page appears. Skip to step 19.

Read the instructions for verifying your identity.
Important: To verify your identity through ID.me, you must have the following:
A smartphone or tablet with iOS 10.3 or later, or Android 6 or later. The smart device must also have a camera and Web browser and be able to receive text messages.
The ID.me Authenticator app (which is used for two-factor authentication) installed on the smart device. You can download this app from the Apple Store or Google Play.
Veradigm (formerly Allscripts) security account credentials. These credentials are the login ID and password that are associated with the provider's ePrescribe user account.
A personal or a private email address. A group or shared email is not allowed.
A valid driver's license, a state ID, a passport, or a passport card. Alternatively, you can answer questions about your credit history.
A Social Security Number.
Close ePrescribe.
Using the Google Chrome or Microsoft Edge browser, go to eprescribe.allscripts.com.

Use your ePrescribe user name and password (linked in steps 1-4) to log in to the Veradigm website.
The Welcome to Veradigm - ePrescribe page appears.

Make sure you have the ID.me Authenticator app installed on your smart phone or tablet and have the proper identification, and then click Continue.
The Security Account Login page of the Veradigm website opens in a new browser tab.

Enter your ePrescribe user name and password (linked in steps 1-4), and then click Log In.
The Sign in to ID.me page appears.

Do one of the following:
If you already have an ID.me account, sign in:
Enter your Email address and Password.
Click Sign in.
The Complete Your Sign In page appears.

Confirm that the code in the Enter the 6-digit code box matches what appears in the ID.me Authenticator app on your smart device. If the codes do not match, enter the correct code.
Click (or tap) Continue.
Skip to step 19.
If you do not have an ID.me account, you must create one. Proceed to step 13.
Click the Create an ID.me account link.
The Create an ID.me account page opens.

Enter your email address in the Email box, enter a password in the Password and Confirm Password boxes, and select the I accept the ID.me Terms of Service and Privacy Policy checkbox.
Click Create an ID.me account.
The Confirm Your Email Address page opens.

Locate the Welcome to ID.me email message in your email program's inbox, and then click Confirm your email.

The Secure Your Account page opens and displays the multi-factor authentication options.

Set up multi-factor authentication:
Click the Code Generator Application link.
The Download an Authenticator app page appears.

Click the Scan QR Code box.
A QR code appears.

Open the ID.me Authenticator app on your smart device.

Tap the plus sign (+) in the upper-right corner.
The options to add an account appear.

Tap Scan QR Code.
An access message appears.

Tap OK or Allow to allow ID.me Authenticator to have access to your device's camera.
Point your device's camera at the QR code being displayed on the Veradigm website.

When the device captures the QR code, a six-digit code appears in the ID.me Authenticator app.

On the Veradigm website, click Continue.
The Confirm your device page appears.

Confirm that the code in the Enter the 6-digit code box matches what appears in the ID.me Authenticator app on your smart device. If the codes do not match, enter the correct code.
Optionally, enter a name for your smart device in the Name your device box.
Click Continue.
The Your Account Is Now Secure page appears.

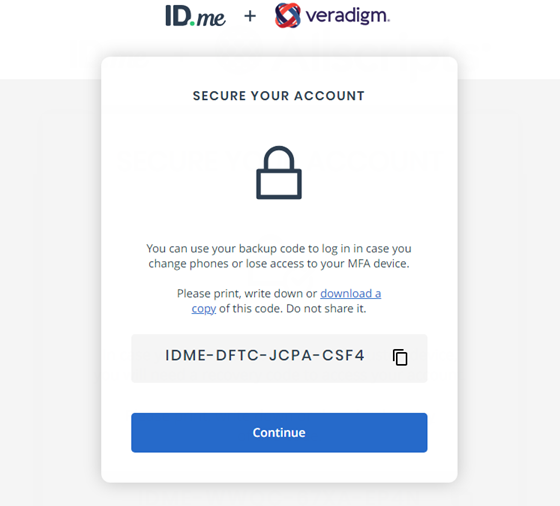
Click Generate recovery code.
The generated recovery code appears.

Click the download a copy link to save the recovery code as .pdf file on your computer. Store the file in a safe, private location.
Note: This recovery code is a one-time use code that allows you to access your account in the event that you change or lose your smart device. A recovery code is required any time you change your multi-factor authentication. A new recovery code will be generated automatically after the previous code is used. You must download and save the new recovery code each time.
Click Continue.
The Choose a verification method page appears.

Complete the identity proofing steps:
Click the option that corresponds to how you want to verify your identity. Only the uploading of license photos will be explained, but the following methods are available:
Upload photos of your license or state ID
Upload a photo of your passport
Upload photos of your passport card
If the Biometric Information Privacy Statement appears, read the policy, select the I acknowledge that I have received, read, and agreed to those terms checkbox, and then click (or tap) Continue.

The Take photos of your identity document page appears.

In the Mobile Phone Number box, enter your mobile phone number. The number must be registered to you under your full legal name, and the phone must be able to receive text messages.
Click Continue.
You receive a text message from ID.me with a link to take photos of your license.

On your smart device, tap the link in the text message.
The device's browser opens and displays the You Are Verifying for Veradigm page.

If the email address that is displayed is correct, tap Yes.
The Prepare Your Document page appears.

Tap Start document upload.
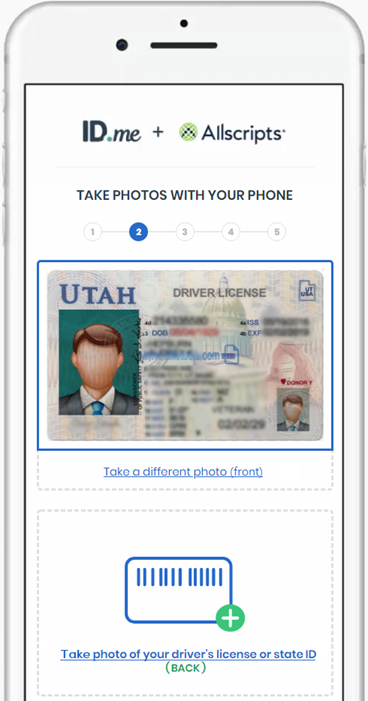
The Take Photos With Your Phone page appears.

Tap the Take photo of your driver's license or state ID (FRONT) box (the upper box) to take a photo of the front of your license.
The option to take a photo appears.

Tap Take photo.
Use your device's camera to take a picture of the front of your license.

The resulting photo appears.

Tap Continue.
The upper box now displays the photo of the front of the license.

Tap the Take photo of your driver's license or state ID (BACK) box (the lower box) to take a photo of the back of your license.
The option to take a photo appears.

Tap Take photo.
Use your device's camera to take a picture of the back of your license.

The resulting photo appears.

Tap Continue.
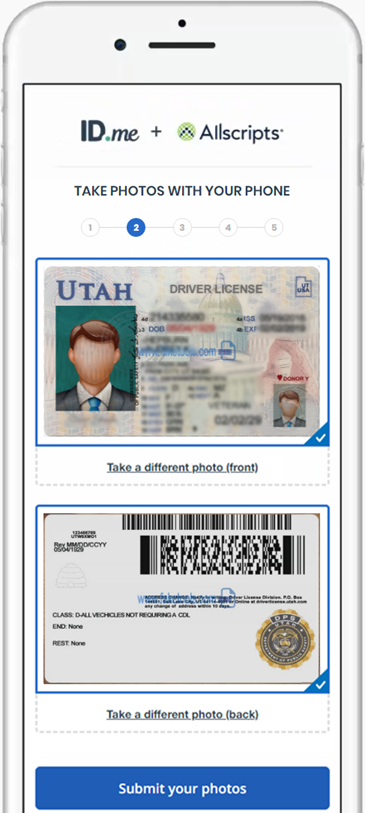
The lower box now displays the photo of the back of the license.

If the photos of your license are clearly displayed on your smart device, tap Submit your photos to upload the photos.
The You Are Verifying for Veradigm page appears and displays a message about allowing access to your camera.

Tap the X to close the message, and then tap Continue.
The option to take a selfie appears.

Tap the Take a Selfie link.
Use your device's camera to take a picture of yourself.
Tap Continue.
A new tab opens in the device's browser and displays a message that the images were submitted.

Return to the previous browser tab.
The Enter Your Social Security Number page is open.

Enter your Social Security Number, and then click Continue.
The Is your information displayed correctly? page appears.

Confirm that your information is correct, and then select the The information I've provided is correct, and I accept the use of Fair Credit Reporting Act data to verify my identity checkbox.
Tap Yes.
The Confirming Your Phone page appears, and you receive a text message from ID.me with a link to confirm your email address.

Tap the link in the text message.
A new browser tab opens and displays the You Are Verifying for Veradigm page.

If the email address that is displayed is correct, tap Yes.
A message to return to the previous browser tab appears.

Return to the previous browser tab.
The Authorize Veradigm page is open.

Click Allow.
Your ID.me account is now linked to your Veradigm (formerly Allscripts) security account, and you are logged out of the Veradigm website automatically.

Important: If ID.me was not able to complete the identity proofing process, you will need to follow an alternate verification process, which involves completing a video conference with an ID.me representative (Trusted Referee) to confirm your identity.
Reopen ePrescribe.
The Home Address page appears.

Enter your home street address, and then click Submit.
The NPI Verification page appears.

Verify that your name and NPI are correct, and then click Submit.
The Congratulations! page appears.

Click Next.
The End User License Agreement page appears.

Review the agreement, and then click I Agree.
If the Password Setup page appears, proceed to the next step; otherwise, skip to step 21.

If you need to set up users to prescribe controlled substances electronically, or if you need to prescribe controlled substances electronically, enter a password in the Password and Confirm Password boxes, and then click Setup Password.
If you have multiple sites (clinics) set up in ePrescribe (as explained in the topic about adding sites in ePrescribe), the site selection page appears.

Select a site.
Select any of the following checkboxes as needed:
Keep me logged into the selected site until the end of the day - When you click Select, for the rest of the day, ePrescribe will not prompt you to select a site.
Make this my default site (do not ask me again) - When you click Select, ePrescribe will always log you in to the selected site and will never again prompt you to select a site.
Note: With neither checkbox selected, ePrescribe will prompt you to select a site each time you open that module from Dentrix Enterprise.
Click Select.
The Admin grants EPCS privileges to the provider. For more information, see "Step 1 - To turn on EPCS (Admin)" (for multiple providers) or "Step 1 - To turn on EPCS" (for a one provider).
The Admin sets up the provider as an Approver. For more information, see "Step 3 (Admin) - To set up the Approver" (for multiple providers) or "Step 3 - To set up approval" (for one provider). If there are already two Approvers, you can skip this step.
An Approver approves the EPCS signing privilege for the provider. For more information, see "Step 4 (Approver) - To approve Providers" (for multiple providers) or "Step 4 - To approve" (for one provider).