A provider can digitally sign a clinical note to indicate his or her approval of the note. Signing a clinical locks it to prevent changes from being made to the text and to prevent the note from being deleted.
Notes:
Depending upon a certain global setting, you may not be permitted to sign clinical notes.
Depending upon certain global settings, clinical notes can also become locked automatically after a specified length of time, when saved, or during the month-end process; or they may never lock automatically.
A certain global setting (for educational institutions only) makes it so that a student and then an instructor must sign clinical notes to lock them.
A signed or locked note can be appended.
You can sign multiple clinical notes at the same time in the Signature Manager.
Signing clinical notes requires the "Clinical Notes, Modify" (to access Clinical Notes) and "Clinical Notes, Approve" security rights.
To sign a clinical note
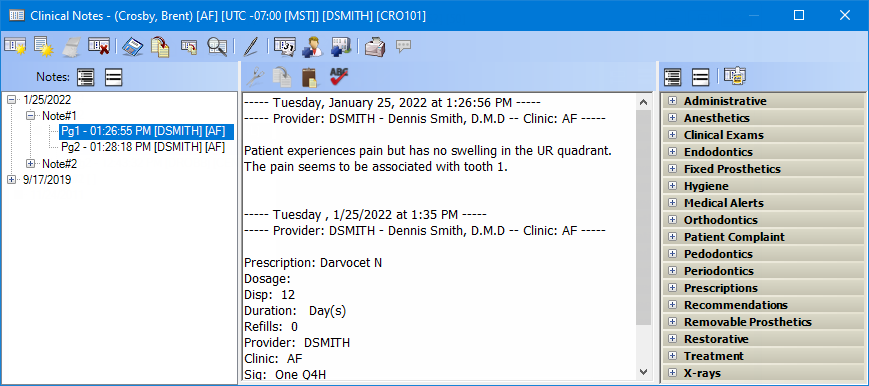
In Clinical Notes, expand a date in the left pane, expand the note that you want to sign, and then select the first page of that clinical note.

Click the Sign
Clinical Note button ![]() on the toolbar.
on the toolbar.
Do one of the following:
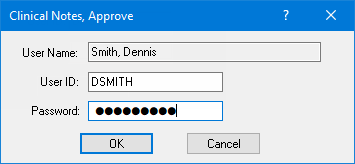
If the Clinical Notes, Approve dialog box appears, your user account has been granted the "Clinical Notes, Approve" security right. Enter your credentials in the User ID and Password boxes, and then click OK.

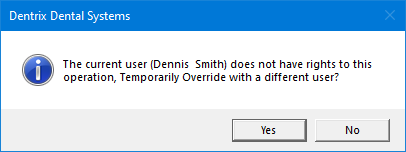
If a message appears, informing you that you do not have rights to this operation, your user account has not been granted the "Clinical Notes, Approve" security right. To have a user with permission temporarily override this restriction so you can sign a clinical note this one time, do the following:
On the message, click Yes.

In the Clinical Notes, Approve dialog box, the overriding user enters his or her credentials in the User ID and Password boxes and then clicks OK.

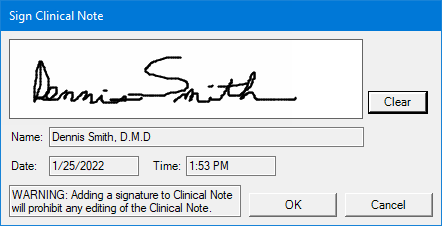
The Sign Clinical Note dialog box appears.

Note: The Name of the user whose credentials were entered in the Clinical Notes, Approve dialog box appears for your reference. The current system Date and Time also appear for your reference.
In the signature box, sign your name.
If you need to clear the signature to re-sign, click Clear.
Click OK.
Notes:
When a signature has been added to the clinical note, a "Signed on [date]" stamp is added to the end of the clinical note.
If
you select a clinical note page that has been signed, the Sign
Clinical Note button ![]() changes to the Signature button
changes to the Signature button ![]() .
To view the corresponding signature, click the Signature
button.
.
To view the corresponding signature, click the Signature
button.
For each subsequent page of the clinical note that you want to sign, do the following:
Select the page.
Repeat steps 2-6.