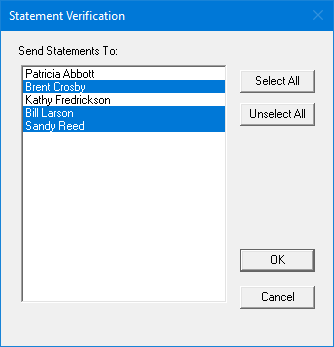
When you print statements directly from the Batch Processor or send them electronically using QuickBill, if the option to verify billing statements has been enabled, before any statements are printed/sent, you can preview them and select which ones to print/send.
Note: The last statement date is updated for only the selected accounts.
To verify billing statements to send
In the Dentrix Print window for Billing Statements, do one of the following:
To preview each statement and decide which guarantors should and should not receive statements, do the following:
A preview of the statement for the guarantor who is selected in the Sent Statement To list appears. Do one of the following:
If the guarantor should receive a statement, leave the Send Statement To checkbox selected.

If the guarantor should not receive a statement, clear the checkbox.

If
you are not viewing the last statement in the preview session, to navigate
to the next statement, click the Next
Page button  on
the toolbar.
Note: You can also navigate between statements by selecting a guarantor from the Send Statement To list.
Repeat steps 1-2 as needed to verify the remaining statements.
To review your choices and make changes as needed, do the following:
Click Verify.
The Statement Verification dialog box appears.

Select the guarantors who should receive a statement. Deselect the guarantors who should not receive a statement.
Note: To quickly select all guarantors, click Select All. To quickly deselect all guarantors, click Unselect All.
Click OK.
You are returned to the Dentrix Print window.
Click OK.
To view a list of guarantors and decide which ones should and should not receive statements, do the following:
Click Verify.
The Statement Verification dialog box appears.

Select the guarantors who should receive a statement. Deselect the guarantors who should not receive a statement.
Note: To quickly select all guarantors, click Select All. To quickly deselect all guarantors, click Unselect All.
Click OK.
You are returned to the Dentrix Print window.
Click OK.