Messenger is an instant messaging system for Dentrix Enterprise. You can turn on Messenger for all clinics, configure it, and specify which users can use it. You must be logged in to the Central clinic to set up Messenger.
To set up Messenger
In Office Manager, open the Central clinic's Clinic Resource Setup dialog box, and then click Messenger Setup.
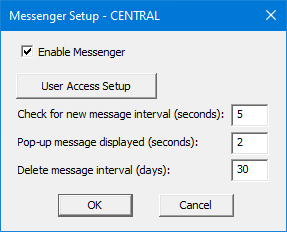
The Messenger Setup dialog box appears.

Set up any of the following options:
Enable Messenger - To enable Messenger, select this checkbox.
User Access Setup - To specify which Dentrix Enterprise users are allowed to use Messenger, click this button.

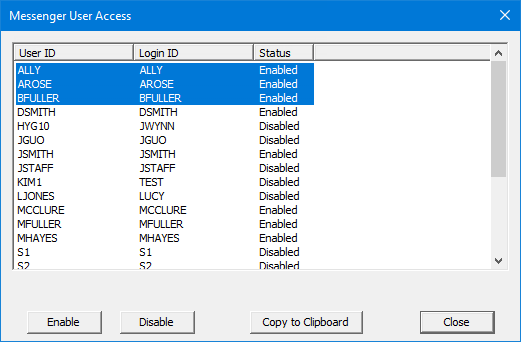
In the Messenger User Access dialog box, do any of the following:
To grant access to users with the status Disabled, select the users who you want to have access to Messenger. To select multiple, non-contiguous users, while holding down the Ctrl key, click the users. To select a range of contiguous users, click the first user, and then while holding down the Shift key, click the last user. Then, click Enable.
To revoke access from users with the status Enabled, select the users who you do not want to have access to Messenger. Then, click Disable.
To copy the list of users and their statuses to the Windows Clipboard, click Copy to Clipboard.
When you are finished setting up users for Messenger, click Close to return to the Messenger Setup dialog box.
Check for new message interval (seconds) - Enter the frequency, in seconds, with which Messenger checks for new messages. Five seconds is the default.
Pop-up message displayed (seconds) - Enter how long, in seconds, a notification that a user has received a new message appears. Two seconds is the default.
Delete message interval (days) - Enter the number of days after which messages are deleted. One day is the default.
Click OK.