You can post a credit card payment through Dentrix Enterprise Pay. When a patient makes a payment, you can credit the payment to individual patient charges or to the entire family balance (oldest balance first). Also, you can post pre-payments and suspended payments that are not immediately allocated to a charge.
Notes:
Even if you apply a payment to charges for a family member other than the guarantor, all patient payments are classified as guarantor payments. Guarantor payments always appear in the Ledger view, so you can easily see when the last time a payment was made to the account.
Dentrix Enterprise has a feature that allows you to quickly view linked charges and credits.
Posting patient payments requires the "Guarantor Payment, Enter" security right.
To post a patient payment
With a patient selected in Ledger, do one of the following:
Click
the Enter Payment button  on the toolbar.
On the Transaction menu, click Enter Payment.
If applicable, do one of the following:
If the Password - Guarantor Payment, Enter dialog box appears, user verification has been assigned to the "Guarantor Payment, Enter" task. Do one of the following:
If your user account has been granted the "Guarantor Payment, Enter" security right, enter your credentials in the User ID and Password boxes, and then click OK.
If your user account has not been granted the "Guarantor Payment, Enter" security right, have a user with permission temporarily override this restriction so you can enter a patient payment this one time. The overriding user enters his or her credentials in the User ID and Password boxes and then clicks OK.
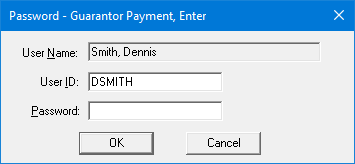
If a message appears, informing you that you do not have rights to this operation, your user account has not been granted the "Guarantor Payment, Enter" security right. To have a user with permission temporarily override this restriction so you can enter a patient payment this one time, do the following:
On the message, click Yes.

In the Password - Guarantor Payment, Enter dialog box, the overriding user enters his or her credentials in the User ID and Password boxes and then clicks OK.

The Enter Payment dialog box appears.
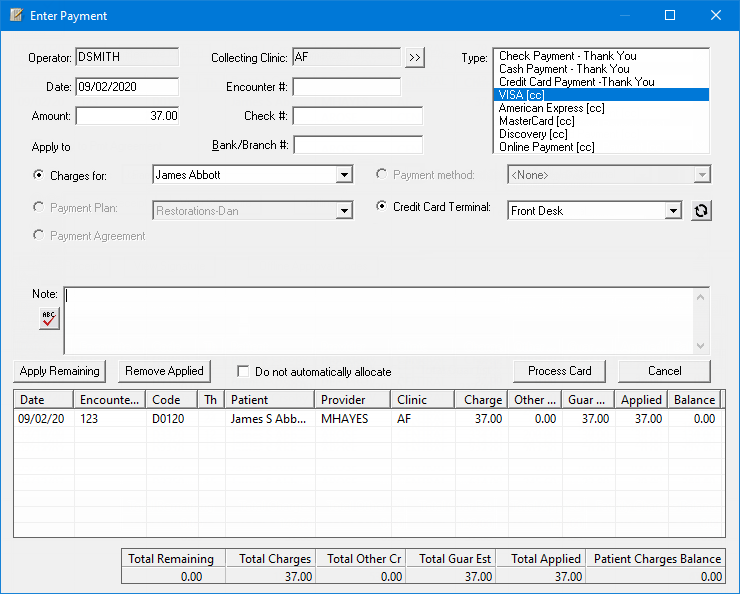
Set up the following options:
Date - The date that the payment was collected. By default, today's date is entered. If the payment was collected on a previous date, enter that date (in a mm/dd/yyyy format) in the box.
Notes:
Dentrix Enterprise automatically adds slashes to dates when you enter six or eight numbers (mmddyy or mmddyyyy) and then press the Tab key.
Backdating a patient payment to a date in a month that has been closed requires the "Ledger, Backdate to Closed Month" security right.
Amount - The dollar amount of the payment.
Note: For a whole dollar amount, you can enter a number without adding the decimal point and two zeros. For example, if you type 36 and then press Tab, Dentrix Enterprise will change the amount to 36.00.
Collecting Clinic - The clinic where the payment was collected. By default, the clinic that you are currently logged in to is entered automatically, but you can specify a different clinic. To change the clinic, do the following:
Click the search button ![]() .
.
If applicable, do one of the following:
If the Password - Clinic ID Change dialog box appears, user verification has been assigned to the "Clinic ID Change" task. Do one of the following:
If your user account has been granted the "Clinic ID Change" security right, enter your credentials in the User ID and Password boxes, and then click OK.
If your user account has not been granted the "Clinic ID Change" security right, have a user with permission temporarily override this restriction so you can select a clinic this one time. The overriding user enters his or her credentials in the User ID and Password boxes and then clicks OK.
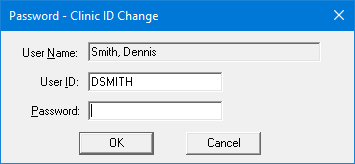
If a message appears, informing you that you do not have rights to this operation, your user account has not been granted the "Clinic ID Change" security right. To have a user with permission temporarily override this restriction so you can select a clinic this one time, do the following:
On the message, click Yes.

In the Password - Clinic ID Change dialog box, the overriding user enters his or her credentials in the User ID and Password boxes and then clicks OK.

The Select Clinic dialog box appears.
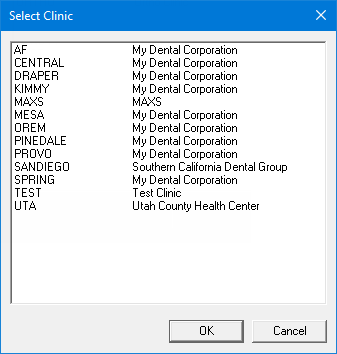
Note: If your user account has been granted the "View All Patients" security right for the Central clinic, the ID and name of all clinics appear in the list; otherwise, the ID and name of each clinic for which your user account has been granted the "My Clinics, View" security right (in the "Practice/Clinic Setup" category) appear in the list; however, if your user account has not been granted that right to any clinic, only the ID and name of the clinic that you are currently logged in to appear in the list.
In the list, select the correct clinic.
Click OK.
Encounter # - If a certain global setting has been enabled, this option is available. To specify the encounter number, do one of the following:
Enter an encounter number (numeric or alphanumeric, depending on a certain global setting).
Select an encounter number (if the applicable global setting is enabled).
Note: Depending on a certain global setting, the number may have to be unique for each patient, for each day, or for each patient per day.
Type - The type of payment. To use Dentrix Enterprise Pay to process a credit card payment, the selected payment type must have a "[cc]" at the end of the name.
Note: You can define or modify payment types in the Practice Definitions.
Apply to - Select one of the following options:
Charges for - To apply the payment to charges. According to a preference setting, by default, the payment will be applied to charges for either the patient who is currently selected in Ledger or that patient's family. From the list, either select <Family> to view charges for the entire family and each family member, or select a name to view charges only for that family member.
Payment Plan - To apply the payment to charges on a payment plan. If a payment plan has been set up for the patient or account, this option is available. With this option selected, from the list, select a payment plan to view the corresponding charges.
Payment Agreement - To apply the payment to the outstanding balance on the account's payment agreement. If a payment agreement has been set up for the account, this option is available.
Credit Card Terminal - To use a credit card terminal (with or without a card present), select this option. With this option selected, select the credit card terminal that you want to use (the default selection is saved per user) from the list.
Note: If
the terminal that you want to use is not available, click the Refresh
button  .
.
Note - Details regarding unusual
circumstances surrounding the payment. To check the spelling of the note
text, click the Check Spelling
button ![]() (this button is available only if
a certain preference
setting has been enabled).
(this button is available only if
a certain preference
setting has been enabled).
When you enter an amount, Dentrix Enterprise automatically allocates the payment to the oldest provider balances, according to the charges listed. The amount of the payment that is applied to each charge appears the Applied column. Do any of the following as needed:
To apply a remaining amount, select the desired charges, and then click Apply Remaining. The amount in the Total Remaining box is applied to the selected charges.
Note: To select multiple charges, click a charge, and then, while pressing the Ctrl key, click the other desired charges.
If the amount exceeds the guarantor estimate, a dialog box appears. Select either the Do not apply the remaining amount option (to only apply an amount equal to the guarantor estimate) or the Apply the remaining amount to the balances option (to apply the remaining amount up to the Total Charges; this will probably result in an insurance overpayment), and then click OK.
To remove all the applied amounts, click Remove Applied.
To edit
an applied amount, double-click the desired charge to allow editing of
the applied amount, enter the correct amount to be applied, and then click
the check mark  . The
applied amount cannot exceed the amount in the Charge
column.
If the applied amount exceeds the amount in the Guar Est column (the guarantor estimate), a message appears, explaining that the remaining amount is less than what insurance is expected to pay (this will probably result in an insurance overpayment). Click Yes to continue or No to edit the applied amount.
If a credit results from how you have applied or unapplied amounts, to have the credit not be applied automatically to any listed charge when anyone attempts to apply suspended credits to the account, select the Do Not Automatically Allocate checkbox.
Click Process Card.
If all or a portion of the payment has not been applied to any charges, a message appears, informing you that the unapplied amount will be suspended, but the suspended credit can be applied to a charge later. Do one of the following:
If the payment is being applied to charges for the family (under Apply to, <Family> is selected from the Charges for list), click Yes.
If the payment is being applied to charges for a specific patient (under Apply to, a family member is selected from the Charges for list), select either the Assign the payment to the Family option (to allow the suspended credit to be applied to any family member's charges) or the Assign the payment to the Patient option (to allow the suspended credit to be applied only to the specified family member's charges), and then click OK.
If you have backdated the payment to a date in a month that has been closed, and if applicable, do one of the following:
If the Password - Ledger, Backdate to Closed Month dialog box appears, user verification has been assigned to the "Ledger, Backdate to Closed Month" task. Do one of the following:
If your user account has been granted the "Ledger, Backdate to Closed Month" security right, enter your credentials in the User ID and Password boxes, and then click OK.
If your user account has not been granted the "Ledger, Backdate to Closed Month" security right, have a user with permission temporarily override this restriction so you can save a payment with a date in a closed month this one time. The overriding user enters his or her credentials in the User ID and Password boxes and then clicks OK.
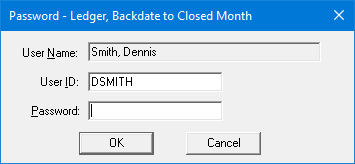
If a message appears, informing you that you do not have rights to this operation, your user account has not been granted the "Ledger, Backdate to Closed Month" security right. To have a user with permission temporarily override this restriction so you can save a payment with a date in a closed month this one time, do the following:
On the message, click Yes.

In the Password - Ledger, Backdate to Closed Month dialog box, the overriding user enters his or her credentials in the User ID and Password boxes and then clicks OK.

A message appears and indicates that the device is ready for input (such as inserting, swiping, or tapping the card).
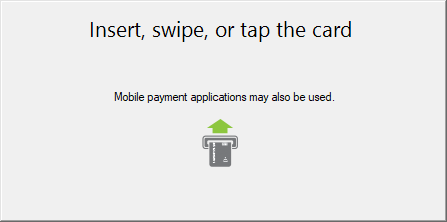
The cardholder follows the prompts on the payment device to insert, swipe, or tap using a card or a mobile payment application on a smartphone.
If the payment device prompts the cardholder to do so, he or she selects Debit or Credit on the device and then confirms the amount displayed.
The card is processed through Worldpay.
If the transaction is approved, and if a signature is required by the credit card issuer, the cardholder signs on the ePad or payment device as directed by the device.
Note: Digital signatures are possible only if signing with a signature pad has been enabled for the current clinic and if either an ePad has been set up or the payment device being used has built-in signature capability (such as the Verifone MX 915).
If the cardholder signed with an ePad, in the Dentrix Signature Capture dialog box, click OK to save the signature.
Once the transaction has been processed, the Dentrix Enterprise Pay dialog box appears, indicating whether the card was approved or declined.
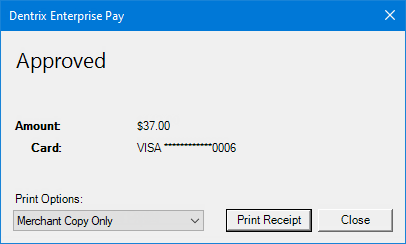
Do one of the following:
To print a receipt for the payment, do the following:
From the Print Options list, select one of the following options:
Merchant Copy Only - To print only a merchant receipt.
Cardholder Copy Only - To print only a cardholder receipt.
Merchant and Cardholder Copy - To print merchant and cardholder receipts.
Note: The default selection is determined by the current clinic's Dentrix Enterprise Pay settings.
Click Print Receipt.
The receipts are sent to the printer that was specified for the current clinic's Dentrix Enterprise Pay settings.
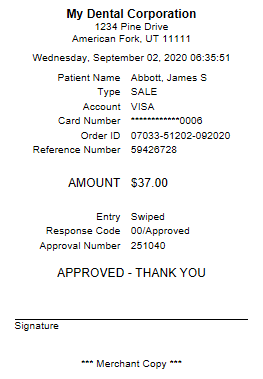
You can have the patient sign the merchant copy of the receipt for your records and/or give an unsigned cardholder copy to the patient for his or her records.
To not print a receipt, click Close.
Note: If needed, you can print a receipt later.