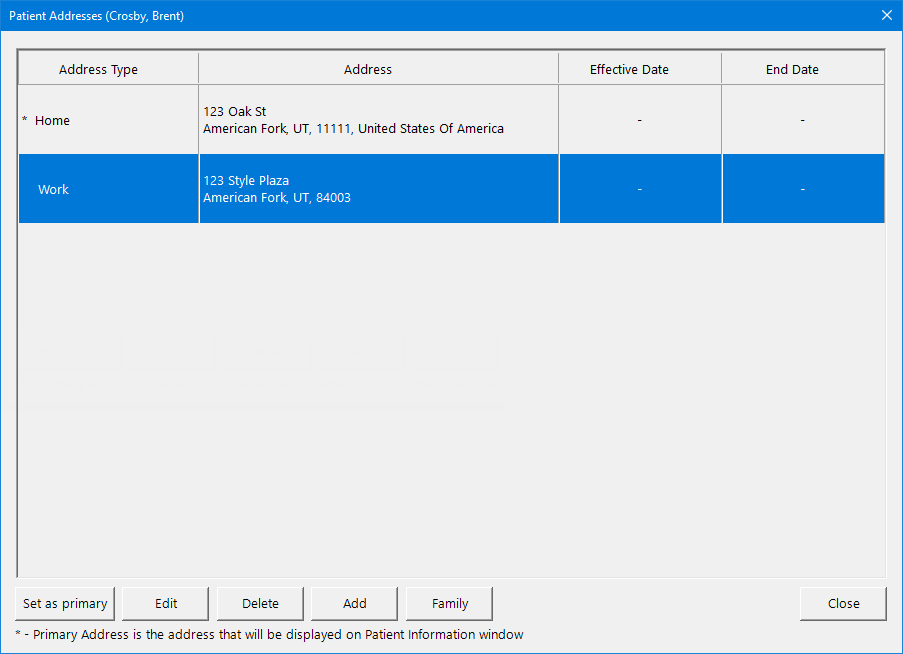
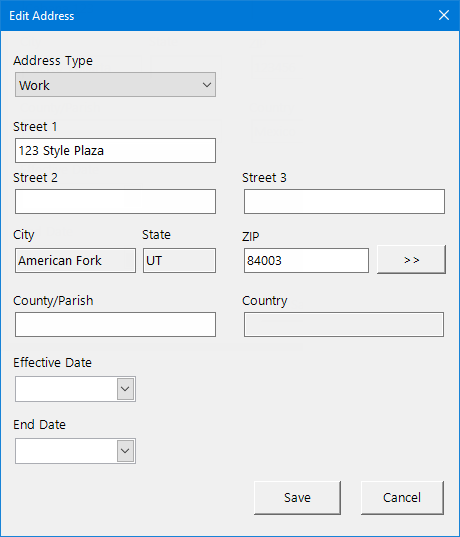
You can change the address of a family member as needed, such as if the patient has a different address than his or her head of household. If you change an address that is used for more than one family member, Dentrix Enterprise allows you to apply the change to all family members who shared the original address or to add the address as a new family address, which can be selected for any family member later.
To change an address
When you are adding a family, adding a family member, or updating a patient's information, click the Address search button  .
.
The Patient Addresses dialog box appears.

The addresses currently associated with the patient appear.
Select an address.
Click Edit.
The Edit Address dialog box appears.

Change any of the following options as needed:
Address Type - The type of address. Select one of the following options: Home, Pharmacy, Postal, Temporary, or Work.
Street 1 - The first line of the street address (for example, 1234 Orange Street).
Note: Dentrix Enterprise automatically capitalizes the first letter of street names.
Street 2 - The second line of the street address (for example, Suite 100).
ZIP - The ZIP Code that is associated with the address. According to the organization setting to require "Zip Code," the ZIP Code may be required.
Note: Dentrix Enterprise stores each ZIP Code and its corresponding city, state, and country as a set. If you enter a ZIP Code that does not exist in your database, Dentrix Enterprise prompts you to also specify a city, state, and country. The next time that ZIP Code is entered, Dentrix Enterprise fills in the corresponding city, state, and country automatically. As you add addresses, you will have to enter the city, state, and country less often.
To change the ZIP Code, do the following:
In the box, enter a ZIP Code (up to 9 digits, in an xxxxx or xxxxx-xxxx format for example), and then press Tab.
If the ZIP Code does not exist in your database, the New Zip Code dialog box appears.

Set up the following options:
City - The city that the ZIP Code pertains to.
Note: Dentrix Enterprise automatically capitalizes the first letter of city names.
State - The state where the specified city is located. If a state is not applicable for this ZIP Code, leave the box empty, and then select the Country without a state checkbox.
Zip - The ZIP Code (up to 9 digits, in an xxxxx or xxxxx-xxxx format for example) that you entered in step a.
Country - The country where the specified state or, if the country does not have states, where the specified city is located. Select a country from the list.
Click OK.
In the City, State, and Country boxes of the Edit Address dialog box, the corresponding city, state, and country appear.
Note: You can search for a ZIP Code by clicking the ZIP search button  .
.
County/Parish - The county or parish that is associated with the address.
Effective Date - The date that this address went into effect or will go into effect for the patient. If the date is known, do one of the following:
In the box, enter a date (in a m/d/yyyy format).
To select a date, do the following:
Click the box's down-pointing arrow to view a month calendar.

Navigate to the correct month using the left and right arrows.
Note: To quickly change the year and month, click the month-year at the top of the calendar, navigate to the correct year using the left and right arrows, and then click the correct month.
Click the correct day.
End Date - The date that this address will no longer be valid or became invalid for the patient. If the date is known, do one of the following:
In the box, enter a date (in a m/d/yyyy format).
To select a date, do the following:
Click the box's down-pointing arrow to view a month calendar.

Navigate to the correct month using the left and right arrows.
Note: To quickly change the year and month, click the month-year at the top of the calendar, navigate to the correct year using the left and right arrows, and then click the correct month.
Click the correct day.
Click Save.