

|

Enabling and setting up Dentrix Pay
Dentrix Pay is credit card transaction processing native to Dentrix that you use to process charges and credits by inserting, swiping, or tapping a credit card. Dentrix Pay uses an Ingenico iPP320 payment device that supports EMV-chip technology in payment cards and mobile payment applications that use NFC (Near Field Communication).
Important: You must first set up a Moneris account and register for payment processing before you can enable and set up Dentrix Pay. For details about how to set up a Moneris account, contact eServices at (800) 734-5561.
To enable and set up Dentrix Pay
1. In the Office Manager, click Maintenance, point to Practice Setup and Dentrix Pay, and click Enable Dentrix Pay.
The Dentrix Pay Setup dialog box appears.
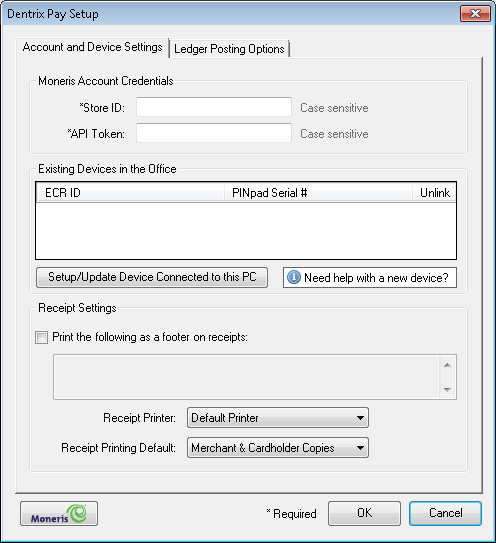
2. In the Store ID text box, type your store ID.
3. In the API Token text box, type or paste your API Token.
Tips:
· We recommend that you copy the API token that you received from Moneris to the API Token text box to avoid making typing errors.
· If you type the API token, as you type, the text is masked. However, to help you verify that your entry is correct when you click in the text box to type or modify the text, the text you entered appears temporarily above the text box. Once you click Save, the API token is masked.
4. Set up your Igenico iPP320 PINpad device by completing the following:
a. Connect your Ingenico iPP320 to the computer you will process credit card payments from and wait for the iPP320 screen to display one of the following messages:
· INIT REQUIRED
· LOGON REQUIRED
· WELCOME
b. Click Manage Device Connected to this PC.
The following message box appears.

c. Click OK.
The Setup or Update Device Connected to this PC dialog box appears.

Note: The COMPort and PINpad Serial # fields are auto-detected from the device connected to the computer.
d. Enter the Associated ECR ID that you received in the welcome letter from eServices.
Important: Each workstation that you use with Dentrix Pay requires a unique ECR ID.
e. Click Setup/Update Device.
Your device starts updating with the latest configuration for your Moneris account. This process can take several minutes. When the update is complete, you can process transactions.
5. In the Dentrix Pay Setup dialog box, set up the following options:
· Sign with ePad – If you have an Interlink ePad device, you can use it to sign receipts after payments are processed.
· Print the following as footer information on receipts? – Select to print a note or message at the bottom of each receipt. You can type whatever message you want to appear in the footer.
· Receipt Printer – Select the printer you want to print receipts. By default, this is the Microsoft Windows default printer.
· Receipt Printing Default – Select the printer you want to print receipts. By default, this is the Microsoft Windows default printer.
· Moneris – Click to open the Moneris Gateway Merchant Resource Center website. After logging in to the website, you can view payment processing reports and manage your account.
6. Click the Ledger Posting Options tab.
The Dentrix Pay Setup dialog box appears.

7. Select the payment types that you want to associate with processing credit card payments, and then click OK.