
You can use the Post-Dated Cheque feature to enter cheques today but not post them to the Ledger until they come due. You can enter a single cheque or a series of cheques.
To enter a post-dated cheque
1. With a patient selected in the Ledger, click Transaction, and then click Post-Dated Cheques.
The Post-Dated Cheques dialog box appears.
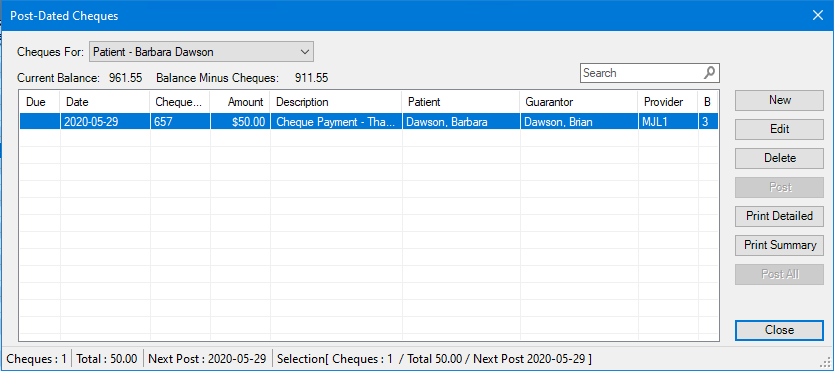
2. Click New.
The New Cheque dialog box appears.
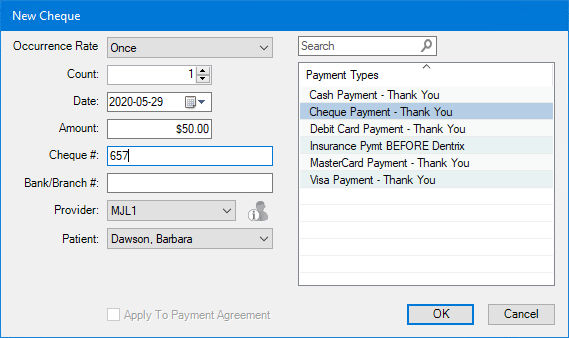
3. Do the following:
Occurrence Rate – Select one of the following options based on how often the selected patient will pay with a post-dated cheque:
Once (Default) – Payment is one time.
Weekly – Payment is every week.
Bi-Weekly – Payment is every two weeks.
Semi-Monthly – Payment is twice a month.
Monthly – Payment is once a month.
Count – Set the number of times you will receive a post-dated cheque based on the Occurrence Rate.
Date – Refers to the cheque's date, or the start date if the patient will be submitting several post-dated cheques. The default is the current system date, but you can change the date as necessary.
Amount – Type the amount of the cheque.
Cheque # – Type the cheque number.
Bank/Branch # – Type the bank or branch number.
Provider – Select Split By Provider (default) to split any payments among providers, or select a provider from the list.
Patient – Select a family member from the list, or select Split By Family Members to split the payment among family members.
Split Method – Select one of the following from the list:
Guarantor Estimate – (Default) Applies the payment to providers who have balances as guarantor estimates and ignores provider balances that Dentrix estimates insurance will pay the remainder of.
Percentage Payments – Divides the payment among the providers according to the provider’s percentage of the total amount owed.
FIFO (First In First Out) – Applies the payment toward the oldest completed procedures first.
Equal Payments – Splits payment amounts equally among all providers with debit balances.
4. Select a payment type from the list.
5. To apply the cheque to a payment agreement, select Apply to Payment Agreement.
6. To save the post-dated cheque, click OK.
The post-dated cheque entries for a series are generated automatically. Once you have generated these entries, you can edit them as needed (for example, if a cheque number is out of sequence or if the amounts on all the cheques in the series are not the same).