Viewing completed patient forms
Dentrix Ascend automatically saves each completed patient form in the corresponding patient's document manager. You can view that form from various areas of Dentrix Ascend.
Notes:
-
When a completed form is saved in Dentrix Ascend, some information in the patient's record (such as on the Basic Info tab of the Patient Information page) might be updated automatically; however, you must make any additional updates manually.
-
For a patient form completed prior to 08/2025 (using the legacy system), a "Last Received" date does not appear in Dentrix Ascend. You must submit that form using the new system for Dentrix Ascend to recognize the "Last Received" date. To edit the form's due date, select the red "Due now" link, and then select the applicable due date.
To view a completed patient form
-
Do one of the following:
-
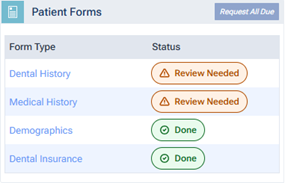
While viewing a patient's Overview page, in the Patient Forms box, click (or tap) a completed form.
Do the following:
-
If the correct patient is not already selected, use the Patient Search box to access the patient's record.

-
If the patient's Overview page is not already open, do one of the following:
-
Click (or tap) the Patient menu.
-
On the Patient menu, under General, select Overview.
The patient's Overview page opens.
-
-
The Patient Forms box displays the published patient forms that are applicable for the patient. If a form has a "Done" or "Review Needed" Status, click (or tap) the form's name in the Form Type column or the form's status icon in the Status column.
-
-
While viewing the Patient Forms section of a patient's Patient Information page, click (or tap) a completed form.
Do the following:
-
If the correct patient is not already selected, use the Patient Search box to access the patient's record.
-
Do one of the following:
-
If the patient's Overview page is not already open, on the Patient menu, under General, select Overview. The patient's Overview page opens. Click (or tap) the title bar (at the top) of the Patient Forms box.
The patient's Patient Information page opens with Patient Forms selected on the navigation panel (on the left).
-
On the Patient menu, under General, select Patient Information. The patient's Patient Information page opens. Select Patient Forms on the navigation panel (on the left).
-
-
The patient forms that are associated with the patient's record appear. Do one of the following:
-
For a form with a "Done" or "Review Needed" Status, click (or tap) the View icon
 in the Actions column.
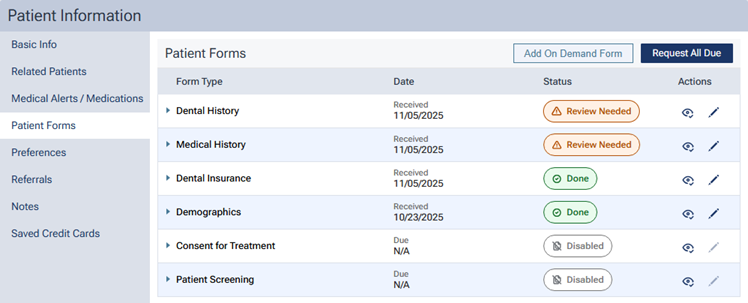
-
Expand the section that corresponds to a Form Type that has completed forms, and then click (or tap) the link for a completed form (the text of which consists of the form's name; also, its received date appears for your reference).
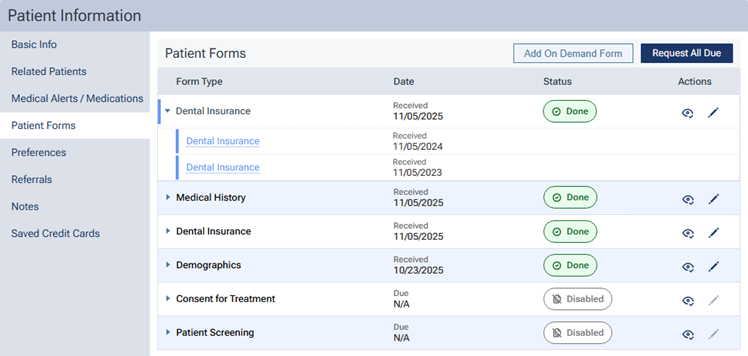
Note: A form type has a corresponding expandable section only if the patient has completed at least one form of that type.
-
-
-
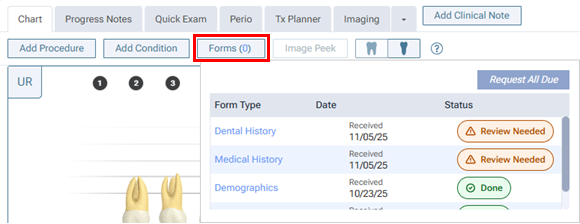
While viewing the Chart tab of a patient's clinical record, click (or tap) Forms and then a completed form.
Do the following:
-
If the correct patient is not already selected, use the Patient Search box to access the patient's record.
On the Patient menu, under Clinical, select Chart.
The patient's clinical record opens with the Chart tab selected.
-
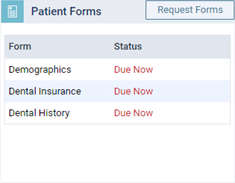
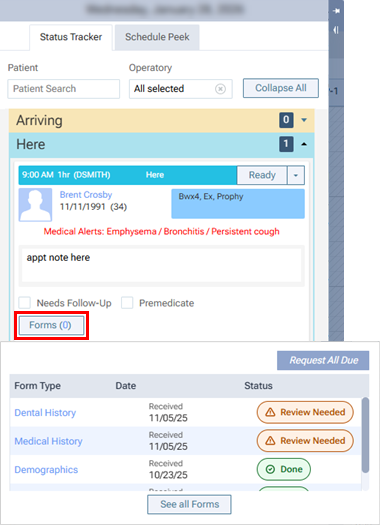
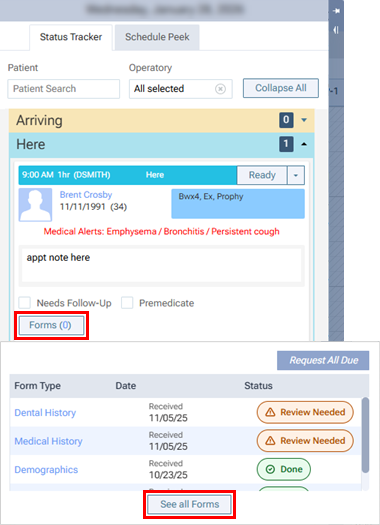
Click (or tap) Forms to view a pop-up box that displays the published patient forms that are applicable for the patient.
-
If a form has a "Done" or "Review Needed" Status, click (or tap) the form's name in the Form Type column or the form's status icon in the Status column.
-
-
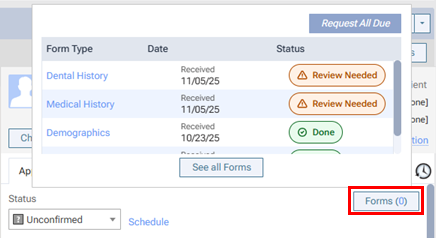
While viewing a patient's appointment, click (or tap) Forms, and then click (or tap) a completed form or See all Forms.
Do the following:
-
Do one of the following:
-
Click (or tap) the Schedule menu.
-
On the Schedule menu, select Calendar.
The Calendar page opens.
-
Click (or tap) an appointment.
The Appointment Information panel opens.
-
Click (or tap) Forms to view a pop-up box that displays the published patient forms that are applicable for the patient.
-
Do one of the following:
-
If a form has a "Done" or "Review Needed" Status, click (or tap) the form's name in the Form Type column or the form's status icon in the Status column.
-
Click (or tap) See all Forms to open the patient's Document Manager page.
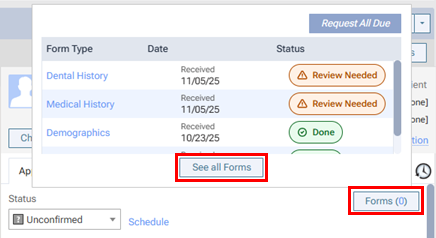
Then, click (or tap) a document that has a "Forms" tag.
-
-
-
While viewing a patient's appointment card on the routing panel, click (or tap) Forms, and then click (or tap) a completed form or See all Forms.
Do the following:
-
Locate the patient's appointment card.
-
Click (or tap) Forms to view a pop-up box that displays the published patient forms that are applicable for the patient.
-
Do one of the following:
-
If a form has a "Done" or "Review Needed" Status, click (or tap) the form's name in the Form Type column or the form's status icon in the Status column.
-
Click (or tap) See all Forms to open the patient's Document Manager page.
Then, click (or tap) a document that has a "Forms" tag.
-
-
-
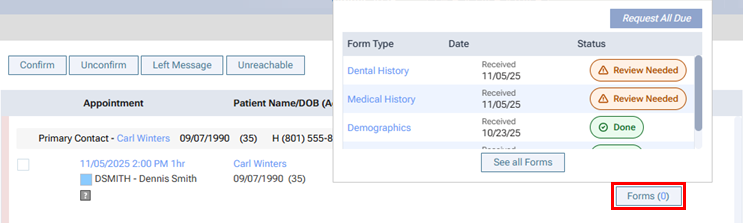
While confirming a patient's appointment, click (or tap) Forms, and then click (or tap) a completed form or See all Forms.
Do the following:
-
On the Schedule menu, select Unconfirmed Appointments.
The Unconfirmed Appts page opens.
-
Click (or tap) Forms to view a pop-up box that displays the published patient forms that are applicable for the patient.
-
Do one of the following:
-
If a form has a "Done" or "Review Needed" Status, click (or tap) the form's name in the Form Type column or the form's status icon in the Status column.
-
Click (or tap) See all Forms to open the patient's Document Manager page.
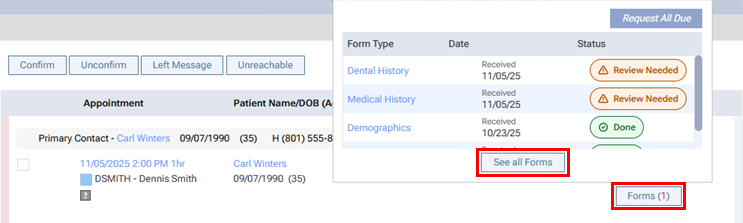
Then, click (or tap) a document that has a "Forms" tag.
-
-
-
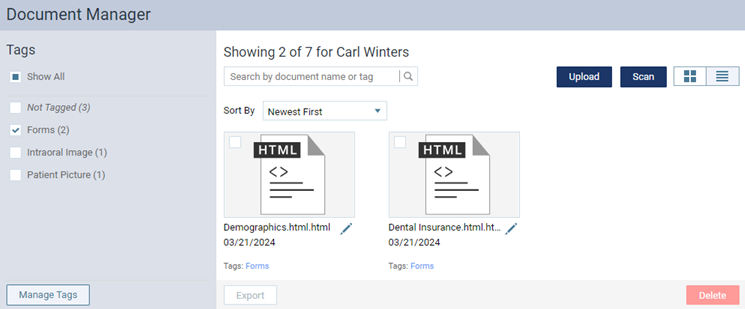
While viewing a patient's Document Manager page, click (or tap) a completed form.
Do the following:
-
If the correct patient is not already selected, use the Patient Search box to access the patient's record.
-
On the Patient menu, under General, select Document Manager.
The patient's Document Manager page opens.
-
Click (or tap) a document that has a "Forms" tag.
-
One of the following occurs:
-
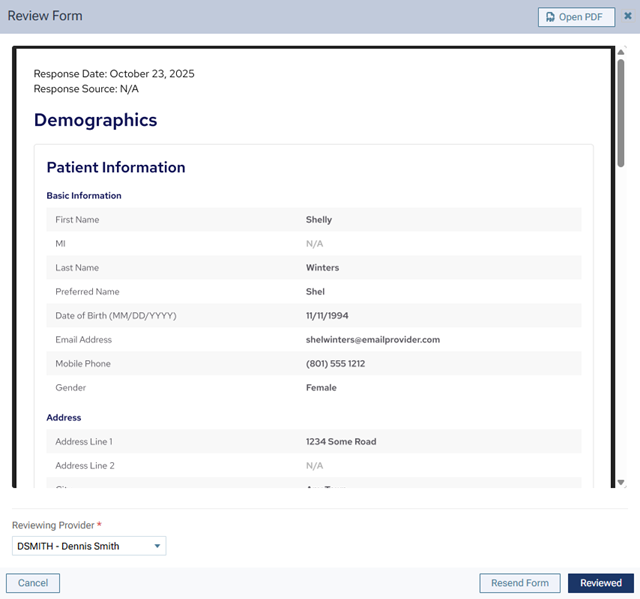
The completed form appears in the Review Form dialog box.
-
The completed form appears on a new tab of your Web browser.

-
-
Use the information on the form to update or verify information in the patient's record. You can print the information so you have a hard copy to reference as you navigate the patient's record.