Vatech Software Bridge Setup Guide
This guide describes the installation and setup of the Vatech Clever One/EzDent-i software bridge for use with Dentrix Ascend Imaging.
Last updated: 9/21/2026
Overview
Dentrix Ascend Imaging supports the acquisition of intraoral, extraoral, and CBCT images from the Vatech Clever One or EzDent-i software on a computer running the Windows operating system. The Vatech software must be installed on each computer that the software bridge will be used.
Notes:
-
It is recommended that all acquisition devices are configured in the Vatech software on each computer that will acquire images using the Vatech Clever One or EzDent-i software bridge.
-
Prior to the installation of any imaging devices or setting up the Vatech software, the acquisition agent application must be installed on each computer that will acquire images using the software bridge. Refer to Setting up the acquisition agent for instructions on downloading and installing the acquisition agent.
-
If both Clever One and EzDent-i and are installed on the same computer, Clever One will be used for the software bridge integration.
Recommended Versions
-
Clever One:
-
Clever One v1.0.6 or later
-
EzServer v6.2.3 or later
-
-
EzDent-i:
-
EzDent-i v3.4.5 or later
-
Ez3D-i v5.4.8 or later
-
EzServer v5.3.3 or later
-
Configuration for 3D Volumes
To configure the recommended 3D volume settings, do the following:
-
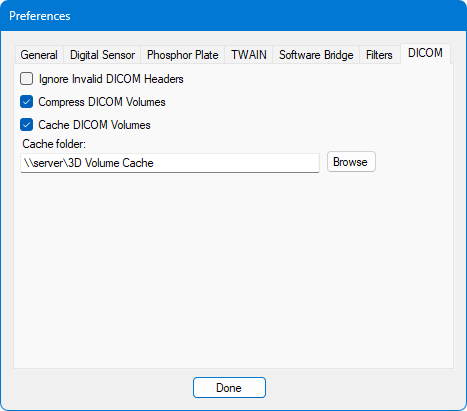
Open the acquisition agent preferences. On the DICOM tab, if applicable for your needs, select the Compress DICOM Volumes and Cache DICOM Volumes checkboxes. Specify the Cache folder to be a shared folder with plenty of storage space so each computer can use the same cache for efficiency.
Testing
The Vatech Clever One/EzDent-i software bridge is now functional in Dentrix Ascend Imaging. To acquire a test intraoral image, do the following:
-
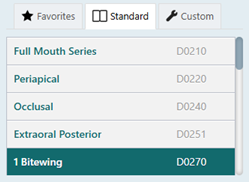
Select the 1 Bitewing imaging procedure.
-
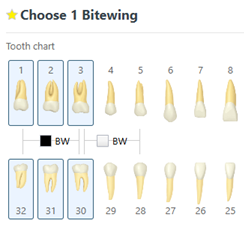
Select any teeth for the test.
-
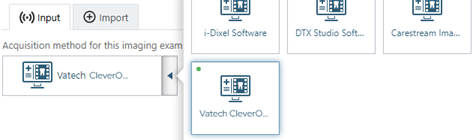
On the Available Devices menu, select Vatech CleverOne/EzDent-i Software.
Notes:
-
If you are acquiring for a 3D exam, the Acquire volume snapshot only checkbox must be selected so a 2D image of the volume instead of the full volume will be transferred. The 2D image is linked to the full volume in the Vatech EzDent-i software.
-
When you use the "Open in App" feature on any 3D image, EzDent-i opens and then Ez3D-i opens, showing the image.
-
-
Click Start.

-
Clever One or EzDent-i opens automatically and selects the patient. Start the acquisition in that imaging software.
-
Acquire an image in the Vatech software.
-
Click Save (in Clever One) or Save to DB (in EzDent-i) to save the image to the Vatech database so the images will also appear in Dentrix Ascend Imaging.
-
In Clever One

-
In EzDent-i
-
Troubleshooting
If there is an issue with 3D volume acquisition, you can enable an option in the acquisition agent to retain the last 3D volume for testing purposes. To enable this option, do the following:
-
Close the acquisition agent.
-
Browse to the acquisition agent running directory (the default location is C:\Program Files (x86)\Acquisition Agent).
-
Open the Acquisition Agent.ini file in a text editor, such as Notepad.
-
Under the [Debug] section, set the following parameter: RetainLastVolume = True.
-
Save the file, and then close the text editor.
-
Double-click Acquisition Agent.exe, which is in the same folder as the .ini file.
-
Acquire a test volume.
-
Browse to the temp folder location to get the volume for testing: C:\Users\(username)\AppData\Local\Temp.
-
You can now try to manually import the test volume instead of using the software bridge. If it fails with the import method, the issue is likely the volume itself. Otherwise, it is likely an issue with the software bridge configuration or possibly anti-virus software.
-
Make sure that you reset the parameter in the .ini file (see step 4): RetainLastVolume = False.