TWAIN with Carestream RVG Sensor Setup Guide
This guide describes the installation and setup of the Kodak/Carestream RVG intraoral sensor for use with Dentrix Ascend Imaging via a TWAIN driver.
Last updated: 11/1/2025
Overview
Dentrix Ascend Imaging supports the acquisition of intraoral images from Kodak/Carestream intraoral X-ray sensors via the Kodak/Carestream RVG TWAIN Source driver on a computer running the Windows operating system. The Kodak/Carestream RVG TWAIN Source driver supports most Kodak/Carestream RVG intraoral X-ray sensors: RVG5000, 5100, 5200, 6000, 6100, 6200, and so forth.
The Kodak/Carestream RVG TWAIN Source driver must be installed on each computer that will acquire images from an RVG sensor.
Note: Prior to the installation of the Kodak/Carestream RVG TWAIN Source driver, the acquisition agent application must be installed on each computer that will acquire images. Refer to Setting up the acquisition agent for instructions on downloading and installing the acquisition agent.
Installation
Note: It is possible that the Kodak/Carestream RVG TWAIN Source driver has already been installed and configured on the computer if the RVG sensor was working in the office prior to the office using Dentrix Ascend Imaging. To verify if the TWAIN driver is already installed, once the acquisition agent has been installed, open Dentrix Ascend Imaging, start an acquisition, and expand the acquisition device menu to see if RVG TWAIN appears; if so, skip to the "Testing" section.
To install the TWAIN driver, do the following:
-
Launch the installer (SetupRVG.exe, which is located in the Carestream RVG TWAIN folder) as an administrator.
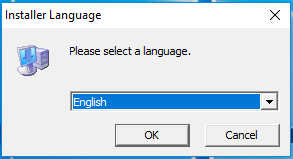
The Installer Language dialog box appears.
-
Select a language, and then click OK.
The RVG Setup Wizard starts and displays the Welcome screen.
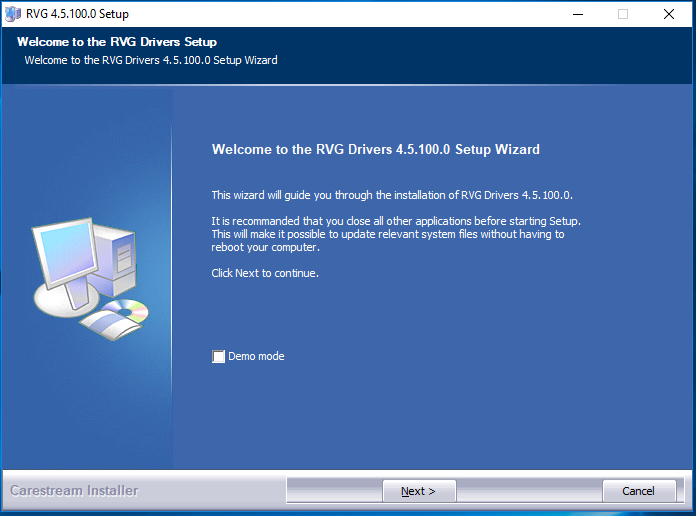
Note: Select the Demo mode checkbox if you want to use the Kodak RVG TWAIN Source in demo mode (no RVG hardware is required).
-
Click Next.
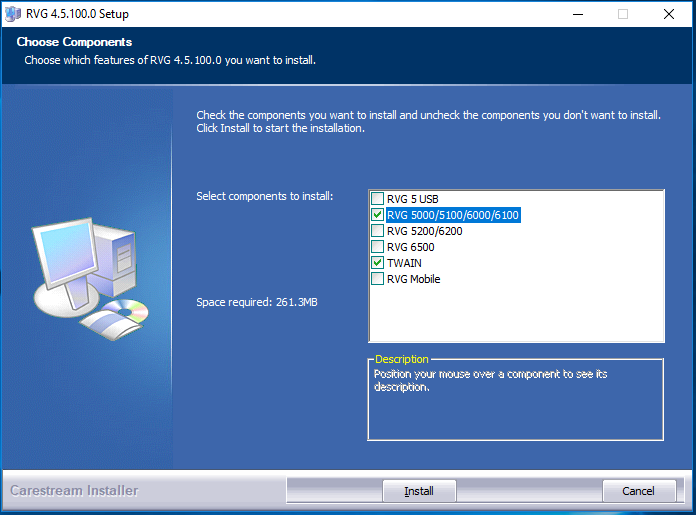
The Choose Components screen appears.
-
Select the checkbox of each applicable device driver for your Kodak RVG hardware, and select the TWAIN checkbox. Then, click Install.
-
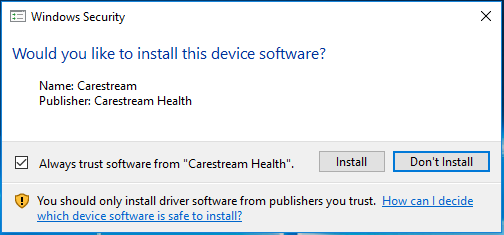
Click Install on all Windows Security dialog boxes that appear.
-
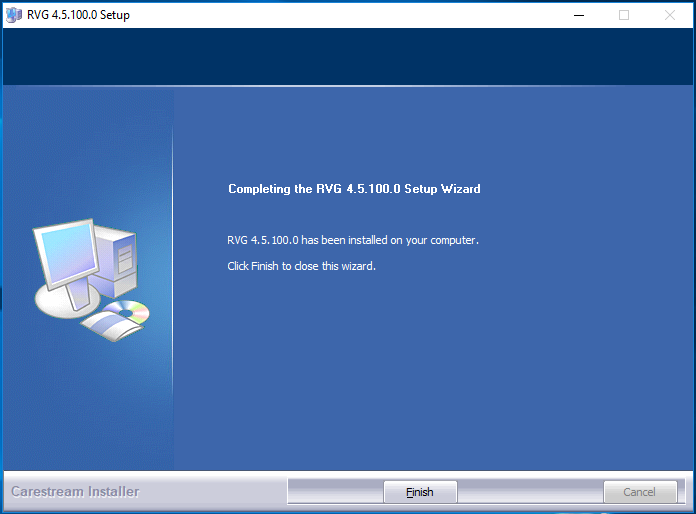
When the installation is complete, the Completing screen appears.
-
Click Finish.
-
Plug the Kodak RVG X-ray sensor into the computer.
Testing
The Kodak RVG sensor is now functional in Dentrix Ascend Imaging. To acquire a test image, do the following:
-
Select the 1 Bitewing imaging procedure.

-
Select any teeth for the test.

-
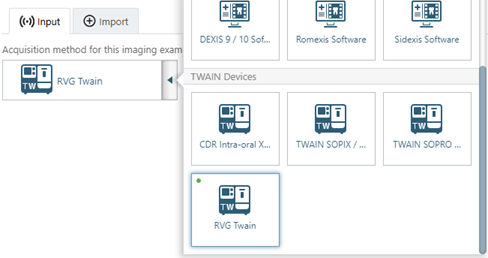
On the Available Devices menu, select RVG Twain.
-
Click Start.

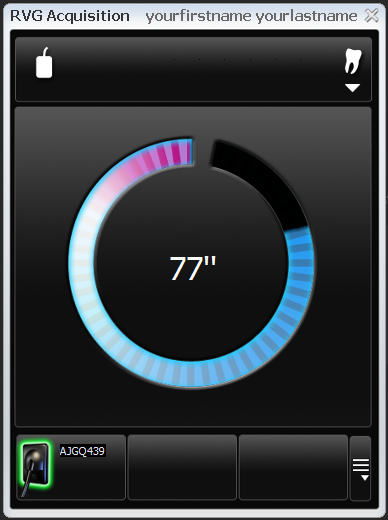
Note: If you have one or more sensors attached to your computer the RVG TWAIN Source lists the serial numbers of the sensors along the bottom of the screen. A Kodak RVG sensor's serial number is located on its cable.
-
Acquire an image using the RVG sensor.
Troubleshooting
To confirm that the Kodak RVG Sensor device driver is loaded and recognized by Windows, do the following:
-
Plug in a Kodak RVG sensor.
-
Open Device Manager.
-
Expand the Sound, video, and game controllers category.
-
Right-click RVG XXX, and then select Properties.
-
Make sure "This device is working properly" appears.
If the device does not appear in Device Manager, or if Device Manager states that "This device is not working properly," one of the following issues might be the cause:
-
The drivers are not properly installed. Try removing and reinstalling them.
-
The sensor has a bad connection or is defective.