Soredex Digora Optime Scanner Setup Guide
This guide describes the installation and setup of the Soredex Digora Optime phosphor plate scanner for use with Dentrix Ascend Imaging.
Last updated: 11/1/2025
Overview
Dentrix Ascend Imaging supports the acquisition of intraoral images from the Digora Optime phosphor plate scanner on a computer running the Windows operating system. Drivers for the Digora Optime scanner must be installed on each computer that the scanner will be connected to.
Note: Prior to the installation of the Digora Optime scanner, the acquisition agent application must be installed on each computer that will acquire images. Refer to Setting up the acquisition agent for instructions on downloading and installing the acquisition agent.
Installation
The drivers for the Digora Optime scanner must be installed prior to setting up the scanner for use with Dentrix Ascend Imaging. The scanner uses the KaVo drivers. At the time of writing this guide, the most recent Kavo drivers can be downloaded from https://kavokerr.widen.net/content/ag3ensjfz0/original/DTX_Studio_Driver_24.2.zip?u=6r91uc&download=true. They can also be found on the DEXIS website at https://dexis.com/en-eu/download-center.
Configuration
To configure the Digora Optime scanner in the acquisition agent preferences, do the following:
-
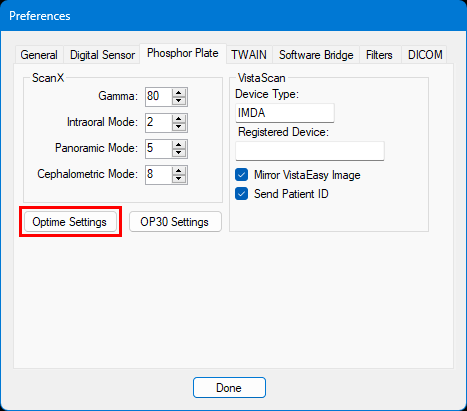
Right-click the Acquisition Agent icon in the system tray, and then select Preferences.
-
Select the Phosphor Plate tab.
-
Click Optime Settings.
-
In the DIGORA Optime Setup dialog box, select the Settings tab.
-
Under Scanner Connection, select Direct Connection or IP based, and then configure the options.
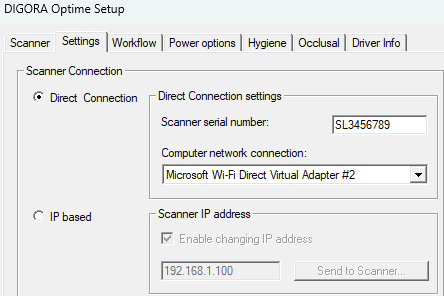
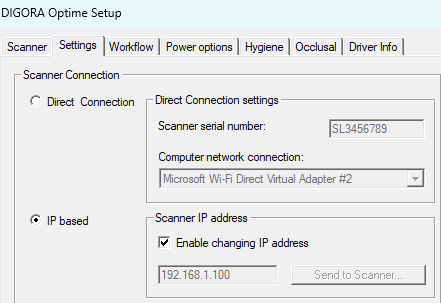
Note: Refer to your Optime User's Manual for more information.
-
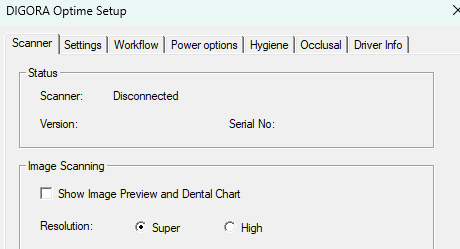
Select the Scanner tab. Under Image Scanning, select the Super option.
-
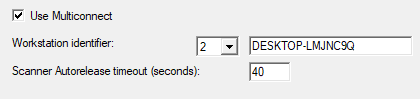
If you have multiple workstations that use the device, make sure that the Use Multiconnect checkbox is selected.
-
Click OK.
-
Click Done.
Testing
The Digora Optime scanner is now functional in Dentrix Ascend Imaging. To acquire a test image, do the following:
-
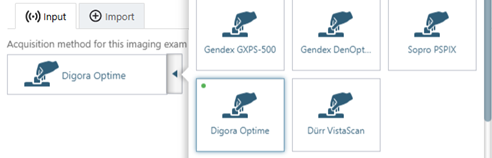
Select the 1 Bitewing imaging procedure.

-
Select any teeth for the test.

-
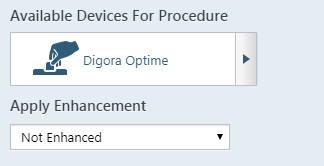
On the Available Devices menu, select Digora Optime.
-
Click Start.

Your Digora Optime scanner becomes ready to scan a plate.
Note: Before you scan a plate, make sure that Not Enhanced is selected from the Apply Enhancement list.
-
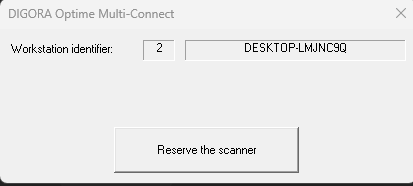
If you are using multi-connect, do the following:
-
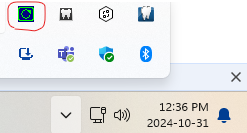
In the system tray, click the Digora Optime icon.
-
Click Reserve the scanner.
-
-
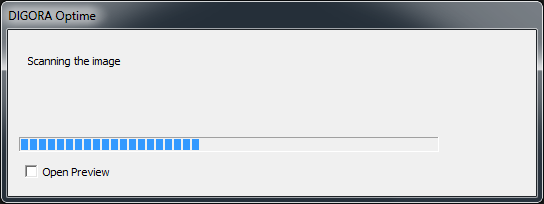
Acquire an image, and then process the plate with the Optime scanner. While the device is scanning, a window showing the progress appears.
Troubleshooting
Please refer to the Troubleshooting section in your Optime User's Manual for troubleshooting instructions.