Schick 33, Elite, and XIOS XG Sensors Setup Guide
This guide describes the installation and setup of the Schick 33, Elite, and XIOS XG intraoral sensors for use with Dentrix Ascend Imaging.
Last updated: 10/31/2025
Overview
Dentrix Ascend Imaging supports the acquisition of intraoral images from the Schick 33, Elite, and XIOS XG intraoral X-ray sensors on a computer running the Windows operation system. Drivers for the sensor must be installed on each computer that the sensor will be connected to. Calibration (correction) files must be installed on each computer that the sensor will be connected to.
Note: Prior to the installation of the sensor, the acquisition agent application must be installed on each computer that will acquire images. Refer to Setting up the acquisition agent for instructions on downloading and installing the acquisition agent.
Installing Schick 33/Elite Drivers
To install the Schick 33/Elite drivers, do the following:
-
Obtain the Schick Elite Driver with 33 support from the Dentsply Sirona support website at http://dsgo.to/schick.

-
Extract the CDRElite5_16.zip file, and then run the Setup as an administrator (right-click, and select Run as administrator).
Note: If User Account Control prompts you to confirm that you want to proceed, click Yes.
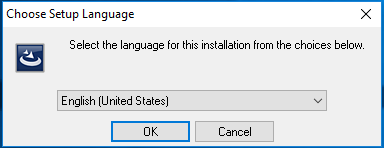
The Choose Setup Language dialog box appears.
-
Select the desired language, and then click OK.
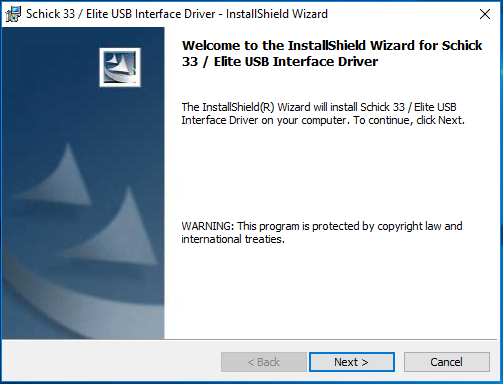
The Schick 33/Elite USB Interface Driver- InstallShield Wizard starts.
-
Click Next.
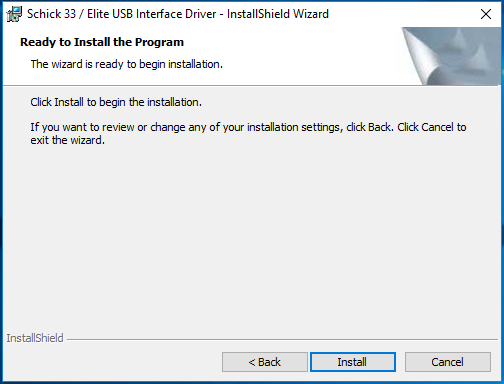
The Ready to Install the Program screen appears.
-
Click Install.
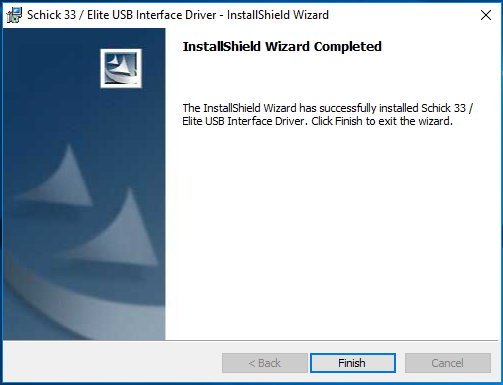
When the installation is complete, the Completed screen appears.
-
Click Finish.
-
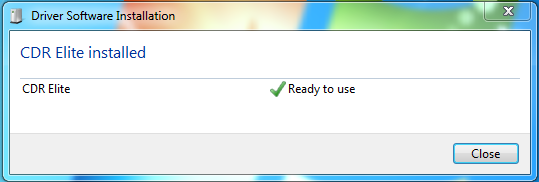
Plug in the Elite or 33 sensor. Windows will automatically detect the drivers.
Installing Schick 33/Elite Correction Files
The correction files are stored in the sensor and will be installed automatically the first time you attempt to arm the sensor. To install the correction files, do the following:
-
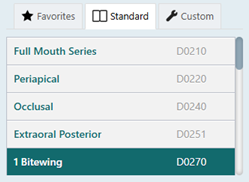
Select the 1 Bitewing imaging procedure.
-
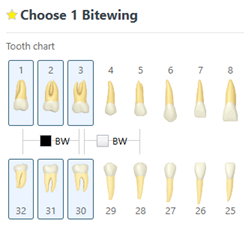
Select any teeth for the test.
-
On the Available Devices menu, select one of the following options:
-
Schick 33 / XIOS XG - If you are using a Schick 33 or XIOS XG sensor.

-
Schick CDR/ Elite - If you are using a Schick CDR or Elite sensor.

-
-
Click Start.

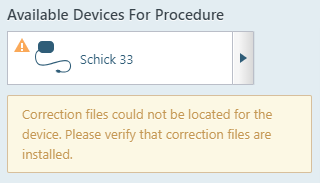
An error message appears, indicating that the correction files could not be found. This occurs because it takes a few seconds for the files to be installed from the sensor.

-
Once the correction files are installed, cancel the acquisition.
-
Configure and test the sensor as needed. For information about configuring sensor settings, refer to the "Schick 33 Configuration," "Schick 33 Binning Mode," and "Schick 33 Enhancements" sections below. For information about testing the sensor, refer to the "Testing" section below.
Schick 33 Configuration
The Schick 33 sensor can have various possible configurations. To access the settings for the sensor, do the following:
-
Click the acquisition agent icon in the system tray, and then select Preferences.

-
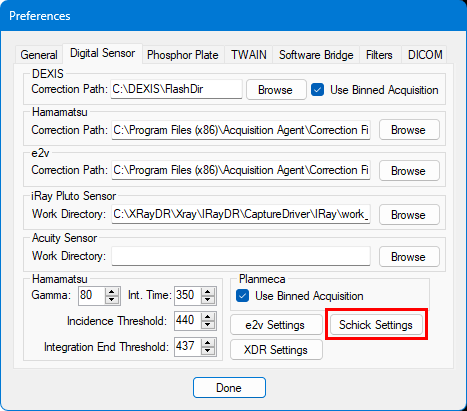
In the Preferences dialog box, select the Digital Sensor tab, and then click Schick Settings.
-
If the drivers for the sensor are installed, the Xray Acquisition Control Properties dialog box appears.

-
Click Cancel and then Done.
Schick 33 Binning Mode
Note: It is recommended that you configure the Schick 33 sensor to use Standard Resolution for acquiring images. This will reduce image load times with smaller file sizes as compared to high-resolution images.
To enable or disable binning, do the following:
-
Click the acquisition agent icon in the system tray, and then select Preferences.

-
In the Preferences dialog box, select the Digital Sensor tab, and then click Schick Settings.

-
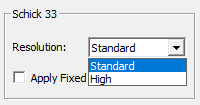
If the drivers for the sensor are installed, the Xray Acquisition Control Properties dialog box appears. Select the Elite/Schick 33 Image tab.

-
Select Standard from the Resolution list.
-
Click Apply and then OK.
-
Click Done.
Schick 33 Enhancements
The sensor settings should be set up to match the settings of the old imaging software. Do the following:
-
Click the acquisition agent icon in the system tray, and then select Preferences. In the Preferences dialog box, select the Filters tab, and then set the Schick Filter settings to match the previous imaging software.

-
Click Done.
Manual Configuration of Schick 33 Binning
It is recommended that a standard resolution is used with a Schick 33 sensor to reduce load times for the user. To configure your Schick 33 Sensor to use a standard resolution, do the following:
-
In File Explorer, navigate to C:\Program Files (x86)\Schick Technologies\Shared Files.
-
Right-click CDRSettings.exe, and then select Run as Administrator.
-
If User Account Control prompts you to confirm that you want to proceed, click Yes.
The CDR Setting Editor window opens.
-
Select the SynergyUSB folder.

-
Do one of the following:
-
If the Setting MAXIMUS_BINNED_MODE exists, verify that the Value is set to 2.
-
If the Setting MAXIMUS_BINNED_MODE does not exist, do the following to add it:
-
Click Edit > Insert Setting.
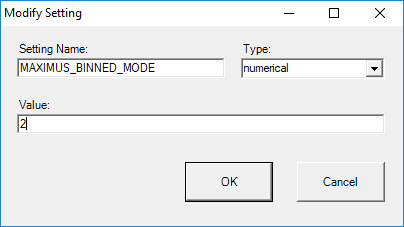
The Modify Setting dialog box appears.
-
Set up the following options:
-
Setting Name - MAXIMUS_BINNED_MODE.
-
Type - numerical.
-
Value - 2.
Note: 2 enables binning mode; 1 disables binning mode.
-
-
Click OK.
-
-
-
Close the CDR Setting Editor window.
-
Unplug the Schick Sensor, and then plug it back in.
Testing
The Schick sensor is now functional in Dentrix Ascend Imaging. To acquire a test image, do the following:
-
Select the 1 Bitewing imaging procedure.

-
Select any teeth for the test.

-
On the Available Devices menu, select one of the following options:
-
Schick 33 / XIOS XG - If you are using a Schick 33 or XIOS XG sensor.

-
Schick CDR/ Elite - If you are using a Schick CDR or Elite sensor.

-
-
Click Start.

-
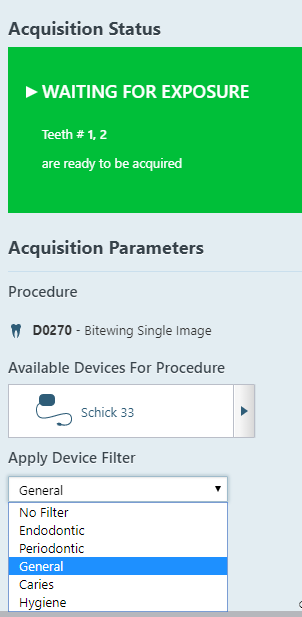
Select a filter from the Apply Device Filter list.
Notes:
-
Each Sirona and Schick device uses its own filter options to enhance the image. These enhancements are combinations of display and sharpening filters that create images that are more tuned to a specific task, such as Periodontic (which is optimized for tissue and uses less sharpening) or Endodontic (which is optimized for canals and uses more sharpening). The list of enhancements dynamically updates for the connected sensor. Make sure that only one sensor is connected at a time.
-
The enhancement filter should typically not be used in combination with Schick device filters. This is because the various Schick device filters already include sharpening for the image, and it is not recommended to turn on Dentrix Ascend Imaging's enhancement filters as it may over-sharpen the image. So, Not Enhanced should be selected in the Apply Enhancement list.

-
You can change these filter any time prior to or during the acquisition of images.
-
-
Acquire an image using your sensor.
Troubleshooting
Device Manager
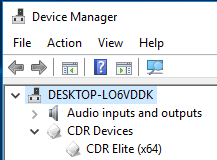
Verify that your Schick Elite/33 device has been properly installed in Device Manager. Your device will appear as a Schick Device.
Device Not Found Error
If the sensor is fully connected to the computer, and a "device was not found..." error appears, restart the computer, and then try again. This issue can occur because another imaging software locked the sensor before you started an acquisition in Dentrix Ascend Imaging.
If the issue still occurs after rebooting the computer, open the Schick settings in the acquisition agent preferences, and make sure that Use CDR Autodetect is selected, and then try again.
If the issue still occurs after you do the previous steps, reach out to Schick’s support team for further assistance.
Schick 33 Maximus Processing Error
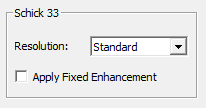
If the Apply Fixed Enhancement option is selected in the Schick settings of the acquisition agent preferences, and if the device filter is set to anything but No Filter during acquisition, the error occurs. To change the Schick settings, do the following:
-
Open the acquisition agent preferences (click the icon in the system tray, and then select Preferences). Select the Digital Sensor tab. Then, click Schick Settings.

-
Select the Elite/Schick 33 Image tab.

Clear the Apply Fixed Enhancement checkbox.
-
Click Apply and then OK.
-
Click Done.