Reviewing demographic information changes from patient forms
With Dentrix Ascend Forms, when a patient completes an online patient form that includes demographic information, the patient's record in Dentrix Ascend is updated. You can review the changes, reject specific changes as needed, and then save the patient record.
Currently, the following demographics on a form can update a patient's record:
-
Preferred name.
-
Address.
-
Email address.
-
Mobile phone:
-
If a mobile phone number does not exist for the patient, the one entered on the form is added to the beginning of the patient's list of phone numbers.
-
If a mobile phone number does exist for the patient, and it matches the mobile phone number on the form, it is moved to the beginning of the patient's list of phone numbers (if it is not already the first).
-
If a mobile phone number does exist for the patient, but it does not match the mobile phone number on the form, the one entered on the form is added to the beginning of the patient's list of phone numbers.
Note: Duplicate phone numbers are allowed in Dentrix Ascend only if they are assigned different types (such as Home and Mobile). You can have multiple phone numbers of the same type if they are different numbers.
-
To review a patient's information
-
If the correct patient is not already selected, use the Patient Search box to access the patient's record.

-
Do one of the following:
-
On the Patient Information ribbon, click (or tap) the Edit Patient Information button
 .
.Note: If the ribbon is not visible, click (or tap) the arrow button below the Patient Search box.

-
On the Patient menu, under General, select Patient Information.
The patient's Patient Information page opens.

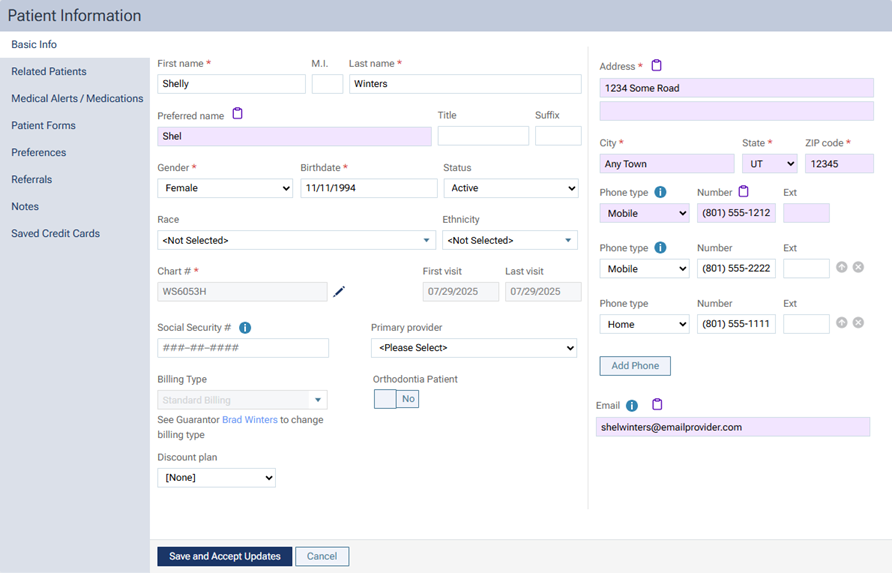
In the Basic Info section of the patient's Patient Information page, when the patient's record has changes that need to be reviewed and accepted, the following appear:
-
For each updated demographic:
-
The corresponding option is highlighted in purple.
-
The corresponding option has a purple Form Update icon
 .
.
-
-
The Save and Accept Updates button replaces the Save button.
Notes:
-
If 270 days have elapsed since the updates were made, the updates can no longer be reviewed, and the purple highlights and icons no longer appear.
-
If a second set of updates occurs before the first set of updates is reviewed and accepted, the first updates can no longer be reviewed.
-
-
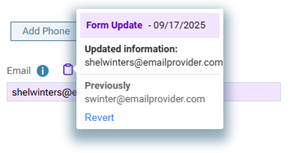
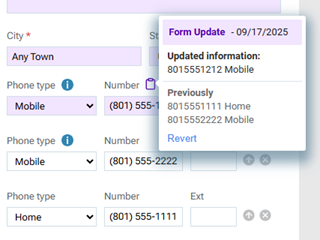
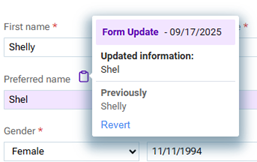
For each option with an update, click the Form Update icon
to view a pop-up box with the New information and the Previously entered information. To revert a value back to the previous value, click the Revert link on the pop-up box (the reverting is not saved automatically).Notes:
-
Reverting the address affects the street (both lines), city, state, and ZIP Code.

-
Reverting the mobile phone number removes it (only if it was added) and restores the previous order of phone numbers (if any exist).
-
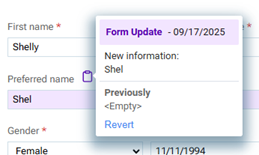
For an option with no previous information, the pop-up box displays only the New information. Under Previously, "<Empty>" appears. Reverting the option removes the new value.
-
-
When you have finished reviewing and reverting values as needed, click Save and Accept Updates. The patient's record, as it is currently displayed, is saved. The updates can no longer be reviewed.
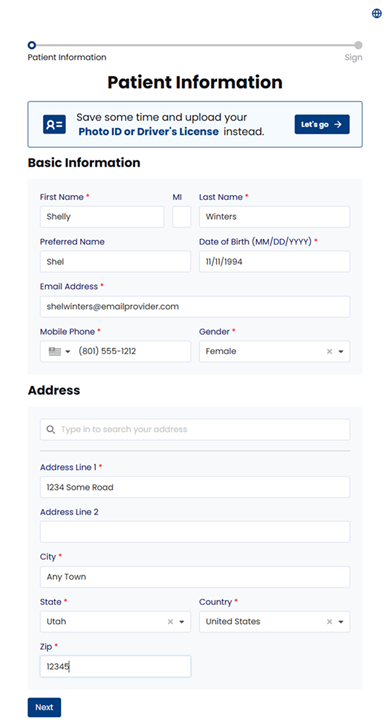
Sample online form with demographics
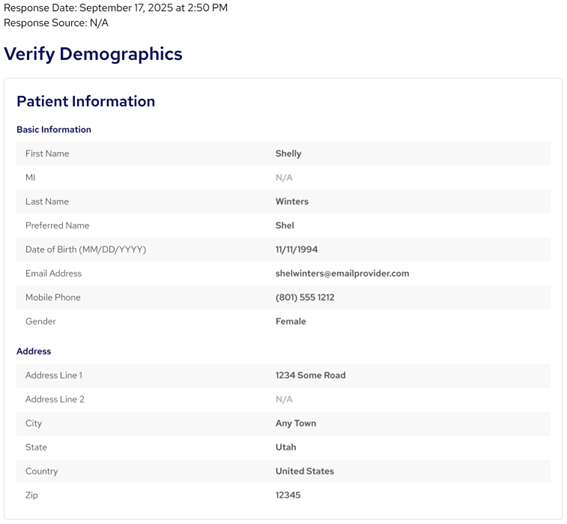
Sample PDF in patient's Document Manager
Sample pop-ups with previous and new values
-
Preferred name
-
Address
-
Mobile phone
-
Email address