Payment Plan Report
The Payment Plan Report lists active payment plans. The report also allows you to process payments for payment plans that are due for processing through Dentrix Ascend Pay, to view payments that were declined (you can then fix any issues and reprocess the payment) and mark the issues as fixed, and to view a history of payments for payment plans.
Notes:
-
The Payment Plan Report is specific to the location that you are logged in to.
-
Accessing the Payment Plan Report requires the "Patient Reports" security right.
To use the report
-
If you are not already viewing the correct location, select it on the Location menu.
-
On the Home menu, under Reports, select Payment Plan.
The current location's Payment Plan Report page opens.

-
Use each tab of the report as needed.
-
Payment Plan List
The Payment Plan List tab lists all active payment plans that have been created in this location but only those plans that are attached to guarantor records.
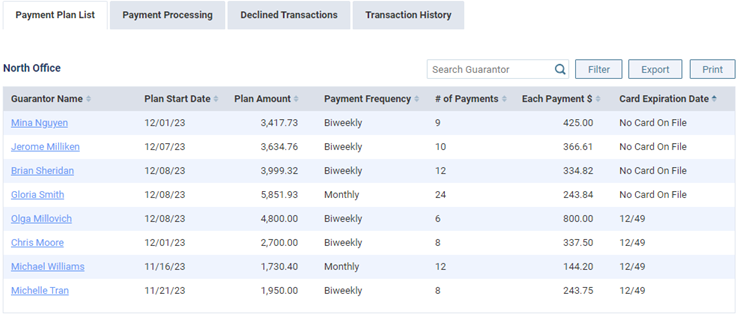
Do any of the following:
-
To search for a guarantor, type all or part of a name in the Search Guarantor box, and then press Enter.
-
To filter the list, do the following:
-
Click (or tap) Filter to open the menu.
-
To filter payment plans by start date, click (or tap) in the Date Range box, and then select Today, Yesterday, Last 7 Days, This Month, Last Month, Specific Date (and choose the date), or Custom Range (and choose the starting and ending dates).
-
To filter payment plans by an associated credit card on file will expire, select a Card Expiring in option: All, 30 days, 60 days, 90 days, 6 months, or No card on file.
-
To filter payment plans by the frequency of scheduled payments, select any of the Payment Frequency options: Biweekly, Monthly, and/or Quarterly.
-
Click (or tap) Apply.

-
-
Click (tap) a guarantor name to open that guarantor's ledger.
-
To export or print the information on this tab, click (or tap) Export or Print.
-
-
Payment Processing
The Payment Processing tab lists pending payments but only for payment plans that have a card on file. Also, the pending payments are grouped by due date.
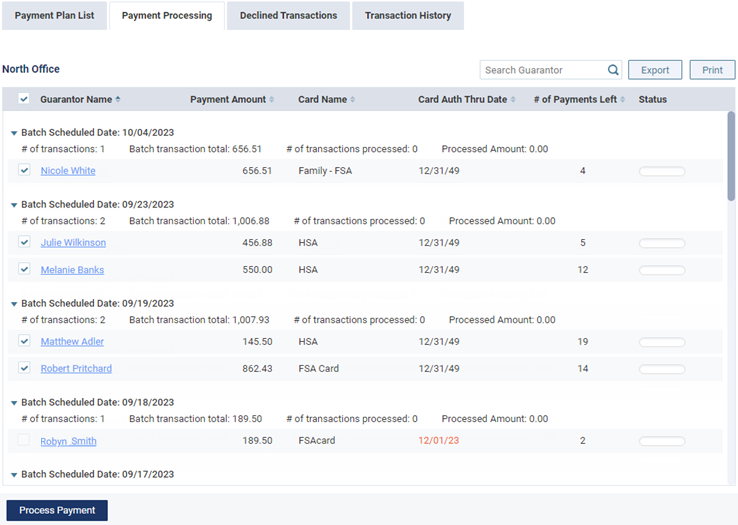
Important:The first person to open the Payment Processing tab locks it, meaning only one person can process payments at a time. There is a timer on the first person; the lock comes off when the first user is inactive on the page for more than 15 minutes. A second person could then take over, which would re-lock the tab.
Do any of the following:
-
To search for a guarantor, type all or part of a name in the Search Guarantor box, and then press Enter.
-
Click (tap) a guarantor name to open that guarantor's ledger.
-
To export or print the information on this tab, click (or tap) Export or Print. You can export or print the information before you process payments or afterwards.
-
To process payments, do the following:
-
The check box of each pending payment that is due is selected by default unless the associated credit card on file has expired (in which case, the checkbox is not available). Clear the checkboxes of any pending payments that you do not want to process at this time. To clear all checkboxes at the same time so you can select specific pending payments, clear the check box in the header next to Guarantor Name; then, select the applicable checkboxes.
-
Click (or tap) Process Payment.
Each pending payment is processed and posted to the corresponding guarantor's ledger. The progress indicator in the Status column, shows the progress of each transaction.

-
-
-
Declined Transactions
The Declined Transactions tab lists payments that were declined or failed to be processed. You can use this list as a working reference as you address declined transactions individually. The specific resolution will depend on if the problem is an expired card, an insufficient balance, or simply a processing failure on the first attempt.
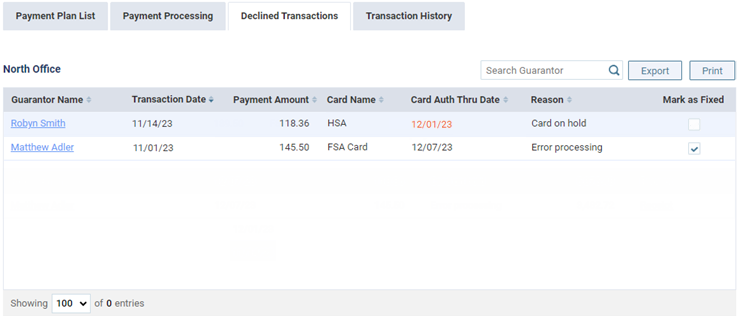
Do any of the following:
-
To search for a guarantor, type all or part of a name in the Search Guarantor box, and then press Enter.
-
Click (tap) a guarantor name to open that guarantor's ledger.
-
To export or print the information on this tab, click (or tap) Export or Print.
-
If you have corrected an issue and obtained payment for a declined payment, select the corresponding Mark as Fixed checkbox.
-
-
Transaction History
The Transaction History tab displays a history of successful, declined, and failed recurring payments. By default, the past 30 days of transactions appear in the list.
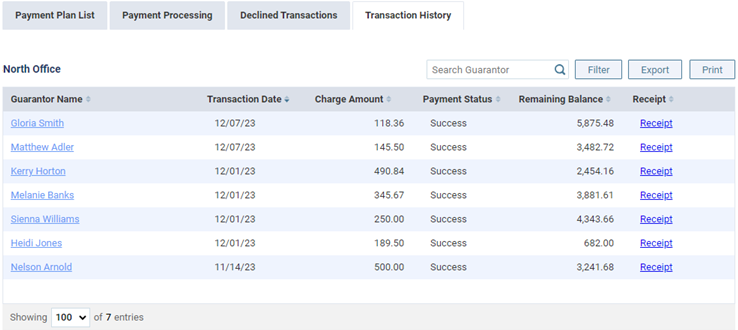
Do any of the following:
-
To search for a guarantor, type all or part of a name in the Search Guarantor box, and then press Enter.
-
To filter the list, do the following:
-
Click (or tap) Filter to open the menu.
-
To filter transactions by date, click (or tap) in the Date Range box, and then select Today, Yesterday, Last 7 Days, This Month, Last Month, Specific Date (and choose the date), or Custom Range (and choose the starting and ending dates).
-
To filter transactions by status, select any of the Payment Status options: Declined, Failed, and/or Success.
-
Click (or tap) Apply.

-
-
Click (tap) a guarantor name to open that guarantor's ledger.
-
To export or print the information on this tab, click (or tap) Export or Print.
-
To view the receipt for a successful transaction, click (or tap) the corresponding Receipt link.
-
-