Manually matching a claim on an ERA
If a claim on an ERA that Dentrix Ascend receives through the clearinghouse is not matched to a claim in Dentrix Ascend, you can manually match the claim so you can post a payment to it.
To manually match a claim on an ERA
-
If you are not already viewing the correct location, select it on the Location menu.
-
On the Home menu, under Insurance, select Bulk/ERA Insurance Payments.
The Bulk/ERA Insurance Payments page opens.

-
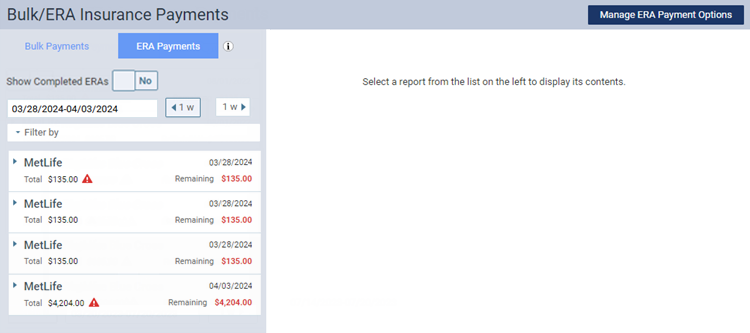
Select the ERA Payments tab on the left panel.
ERAs for claims that correspond to the current location appear.
-
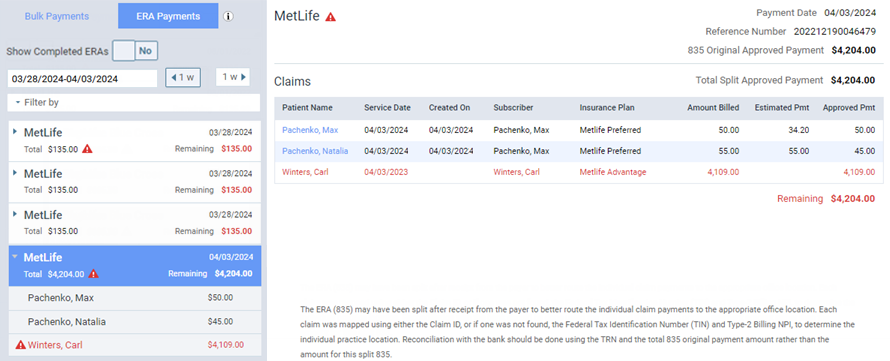
Select an ERA on the left panel.
On the left panel, the patient name and payment amount of each claim that pertains to the selected ERA appears.
-
On the left panel, select an unmatched claim (as indicated by the red warning icon
 ). On the right, the details of the claim appear.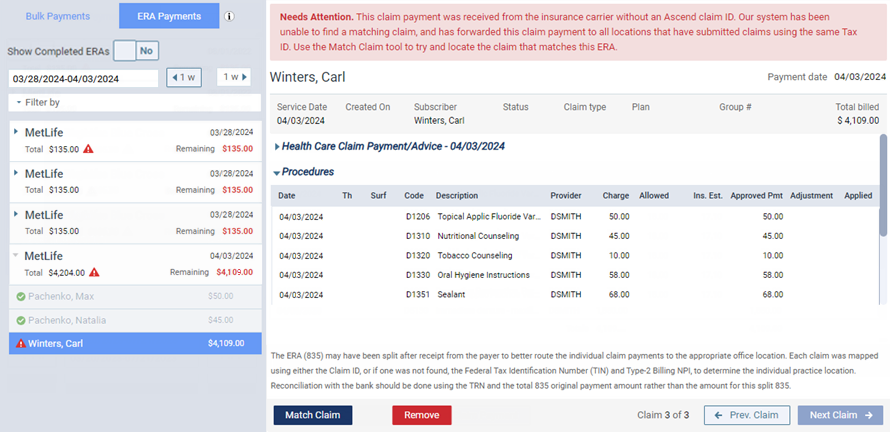
-
Click (or tap) Match Claim.
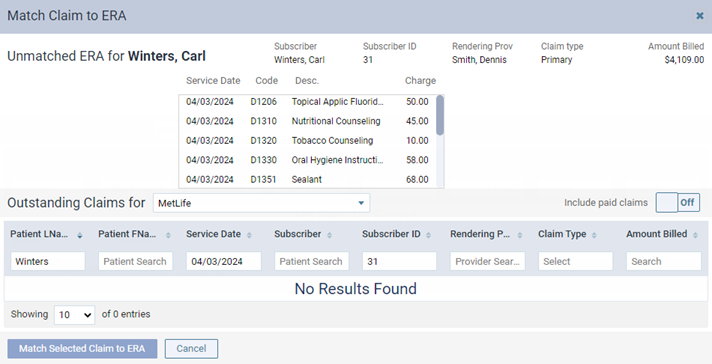
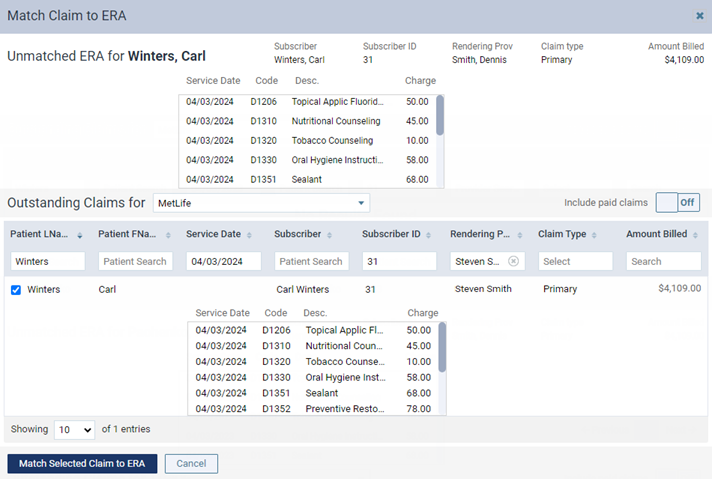
The Match Claim to ERA dialog box appears.
-
Set up the following options as needed to search for the correct claim:
-
Outstanding Claims for - By default, the carrier from the ERA is selected, but you can select a different carrier.
-
Include paid claims - By default, paid claims are excluded, but you can set the switch to On to include paid claims.
-
Patient LName - By default, the last name of the patient from the ERA is entered, but you can change or remove the name.
-
Patient FName - Enter all or part of the patient's first name.
-
Service Date - By default, the date of service from the ERA is selected, but you can change or remove the date.
-
Subscriber - Enter all or part of subscriber's name.
-
Subscriber ID - Enter all or part of a subscriber ID.
-
Rendering Provider - Select one or more providers.
-
Claim Type - Select one or more claim types (primary, secondary, and so forth).
-
Amount Billed - Enter an amount.
-
-
Do one of the following:
-
If you cannot find the correct claim, you might need to remove the claim from the ERA.
-
If you find the correct claim, select its checkbox, and then click (or tap) Match Selected Claim to ERA. Then, on the confirmation message that appears, click (or tap) Ok.
-